How to build a CI/CD pipeline for Serverless apps with AWS CodePipeline and CodeBuild
In a couple of our previous posts we looked at how to build a CI/CD pipeline for Serverless apps on AWS with CircleCI and Travis CI. Today, we’ll look at how to do the same using AWS CodePipeline and AWS CodeBuild.
The purpose of these posts is to dive deep into real-world CI/CD setups, something which most of the tutorials out there skip. We’ll try to illustrate how to set up something similar to Seed but using CodePipeline and CodeBuild instead. It’ll also give a you chance to see how Seed makes your life easier!
In case you are not totally familiar with CodePipeline and CodeBuild; you can think of CodeBuild as a CI service while CodePipeline is a CD service. So you create a CI/CD pipeline in AWS you’ll need a combination of these two services.
To cover a real-world setup we’ll be using a:
- A monorepo Serverless app
- With multiple services
- Deployed to separate development and production AWS accounts
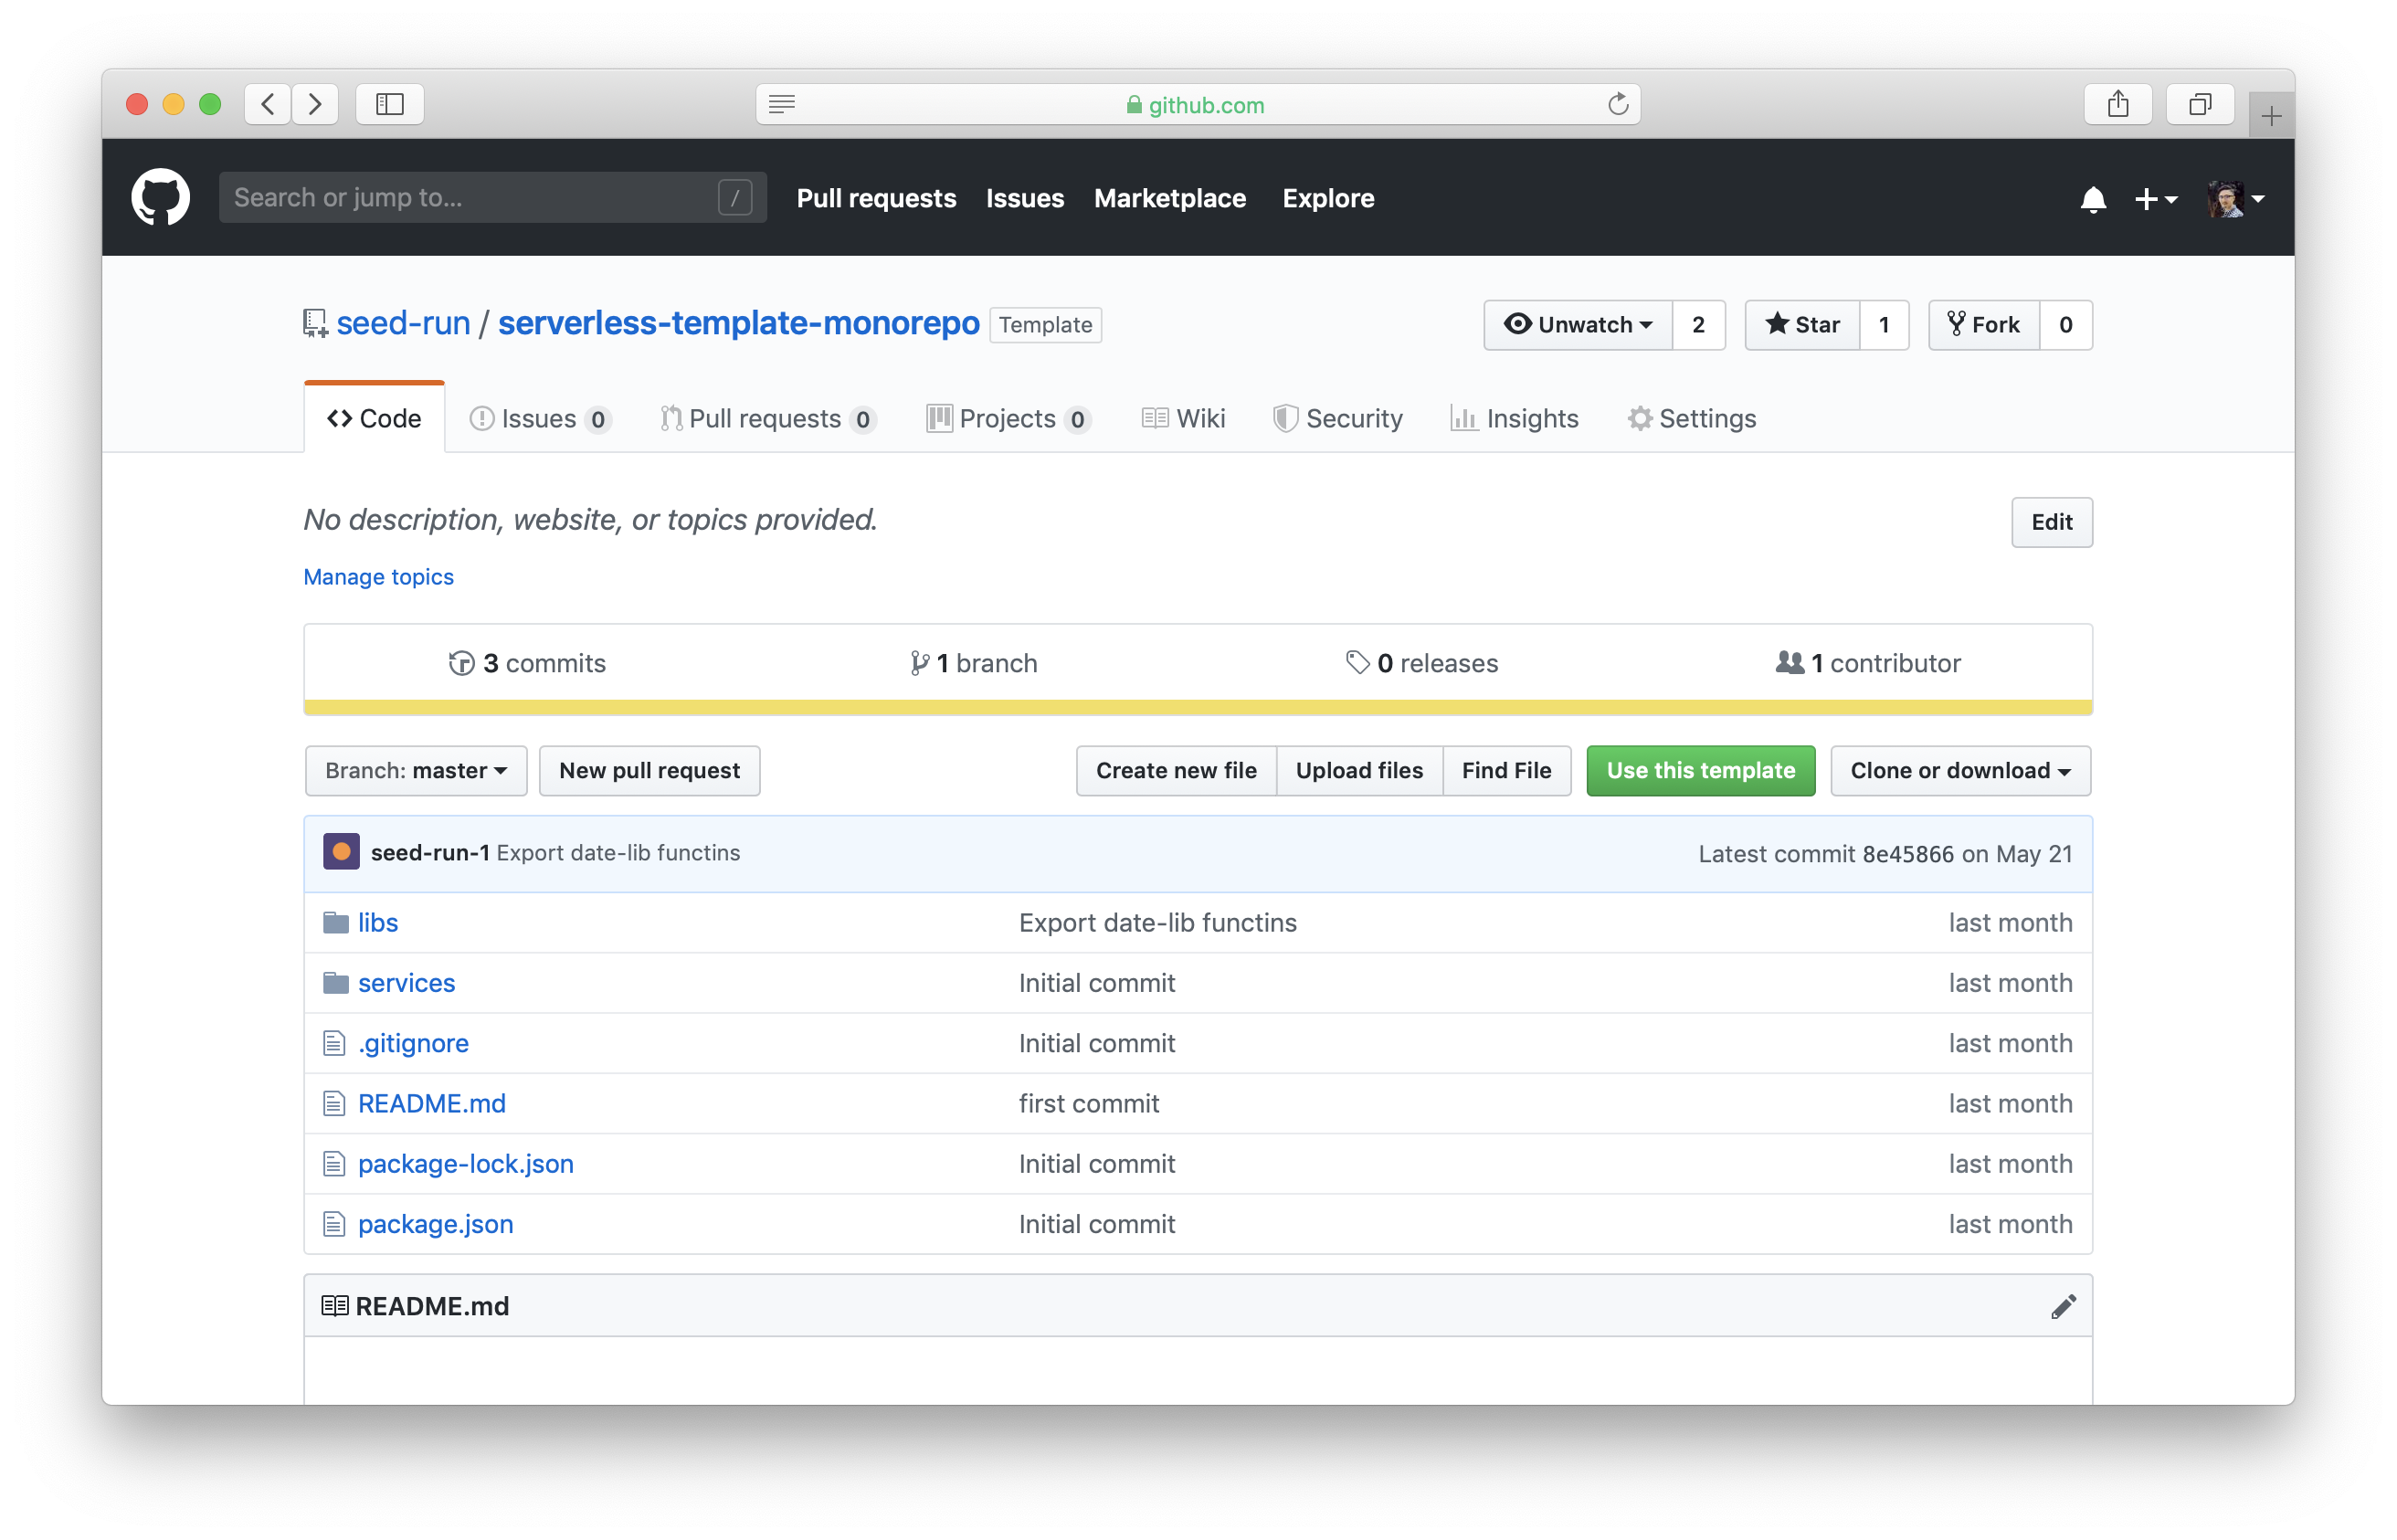
As a refresher, a monorepo Serverless app is one where multiple Serverless services are in subdirectories with their own serverless.yml file. Here is a sample repo for the app that we’ll be configuring. The directory structure might look something like this:
/
  package.json
  services/
    users-api/
      package.json
      serverless.yml
    posts-api/
      package.json
      serverless.yml
    cron-job/
      package.json
      serverless.yml
What we’ll be covering
- How to deploy your monorepo Serverless app on Git push
- How to deploy to multiple AWS accounts
- How to deploy using the pull request workflow
- How to clean up unused branches and closed pull requests
Note that, this guide is structured to work in standalone steps. If you only want to deploy to multiple AWS accounts, you can stop after step 2.
Pre-requisites
- A monorepo Serverless app in a GitHub repo. Head over to our template repo and click on Use this template to clone it to your account.
1. How to deploy your monorepo app on Git push
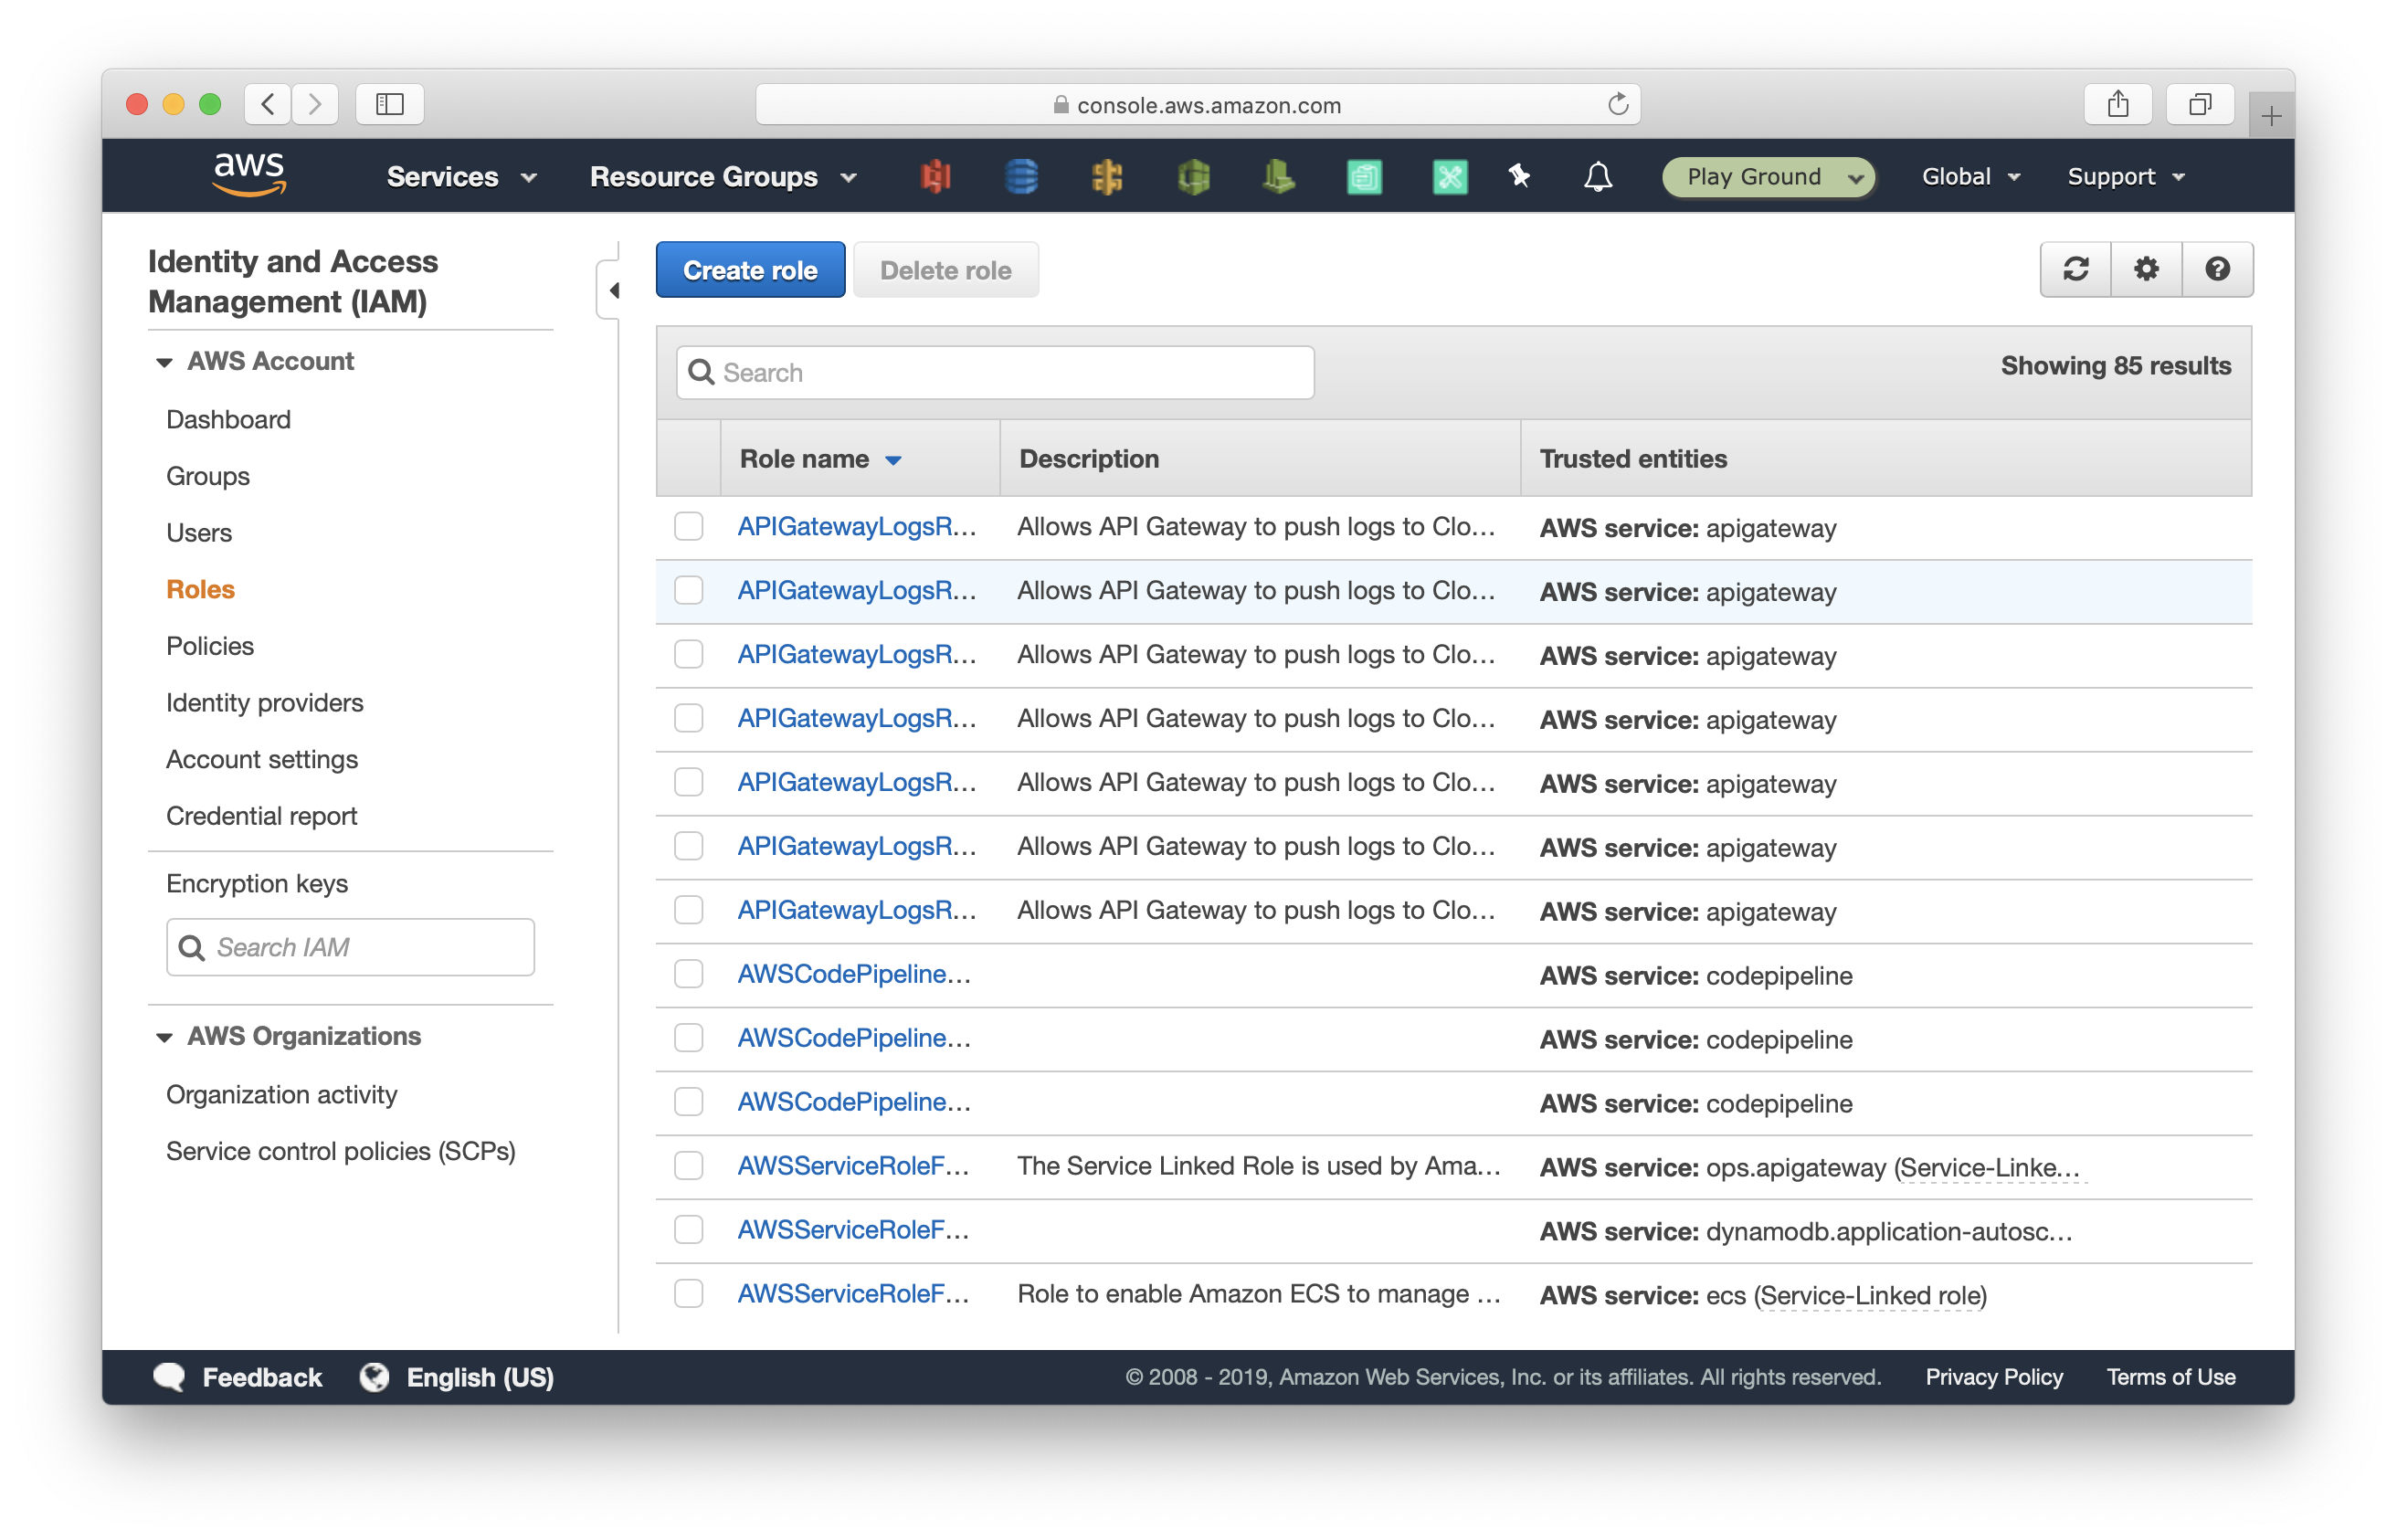
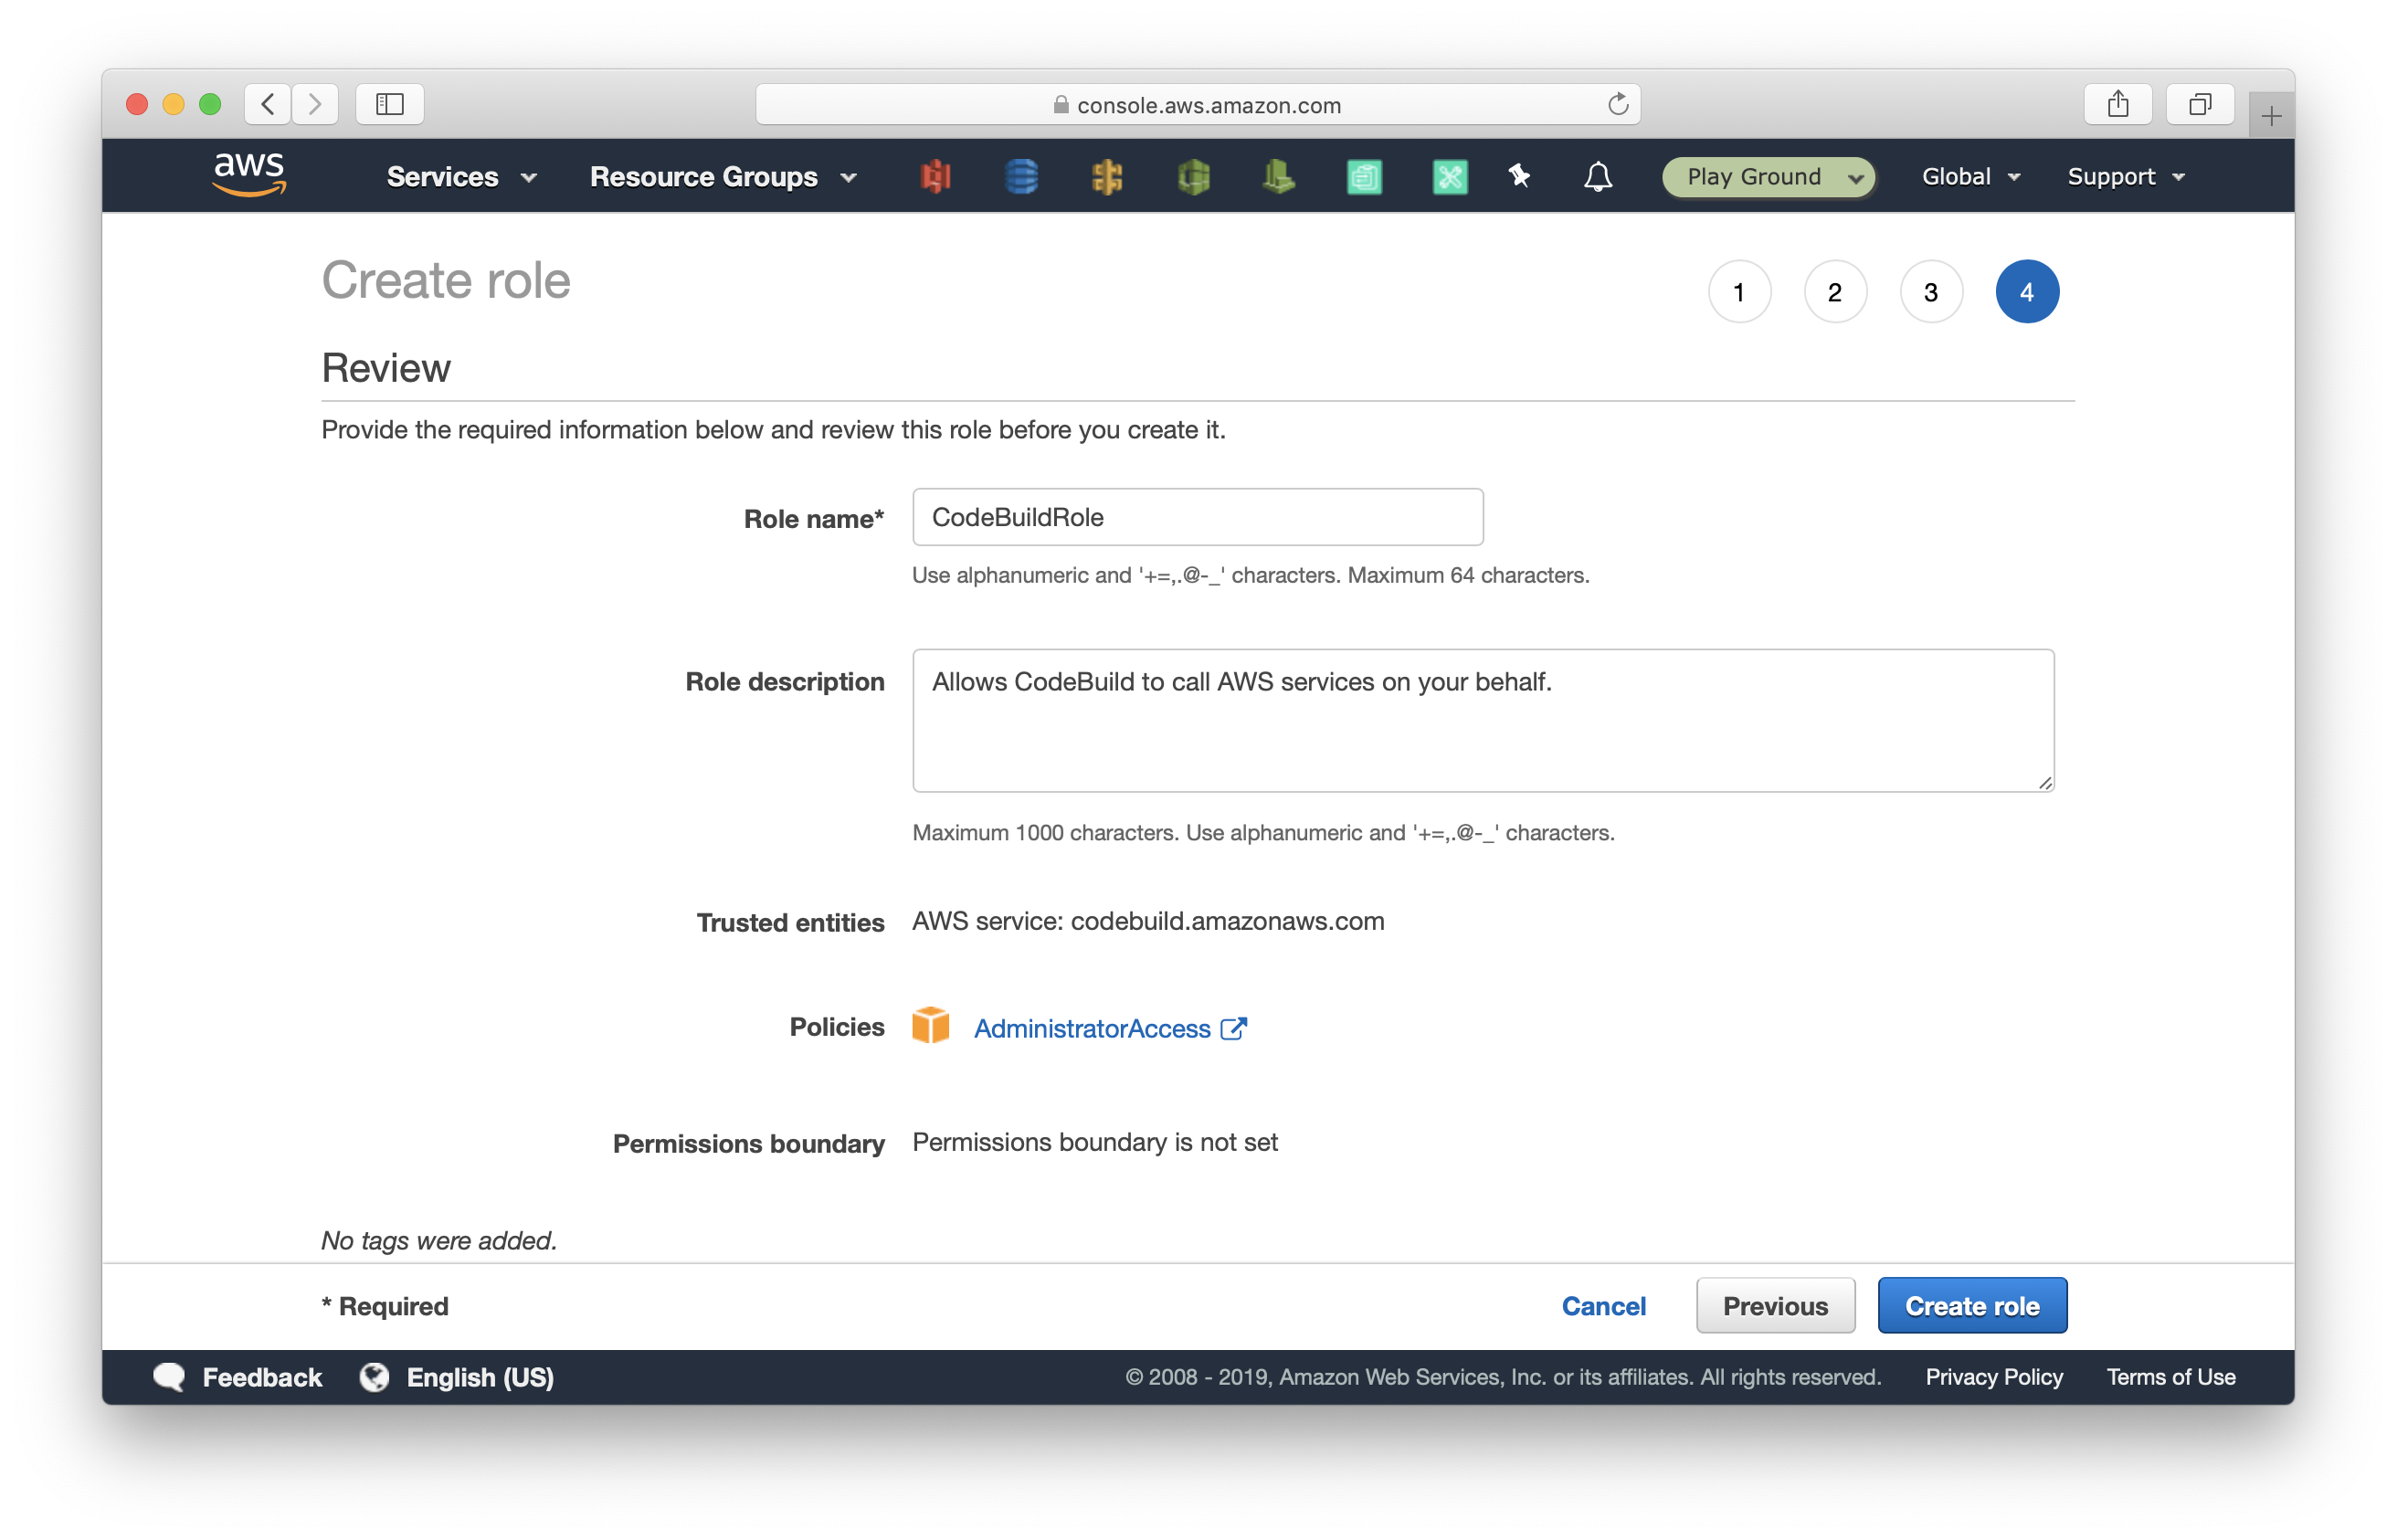
Let’s first create an IAM role which we’ll use later to deploy our Serverless app. Head over to your AWS IAM console, and select Roles on the left.
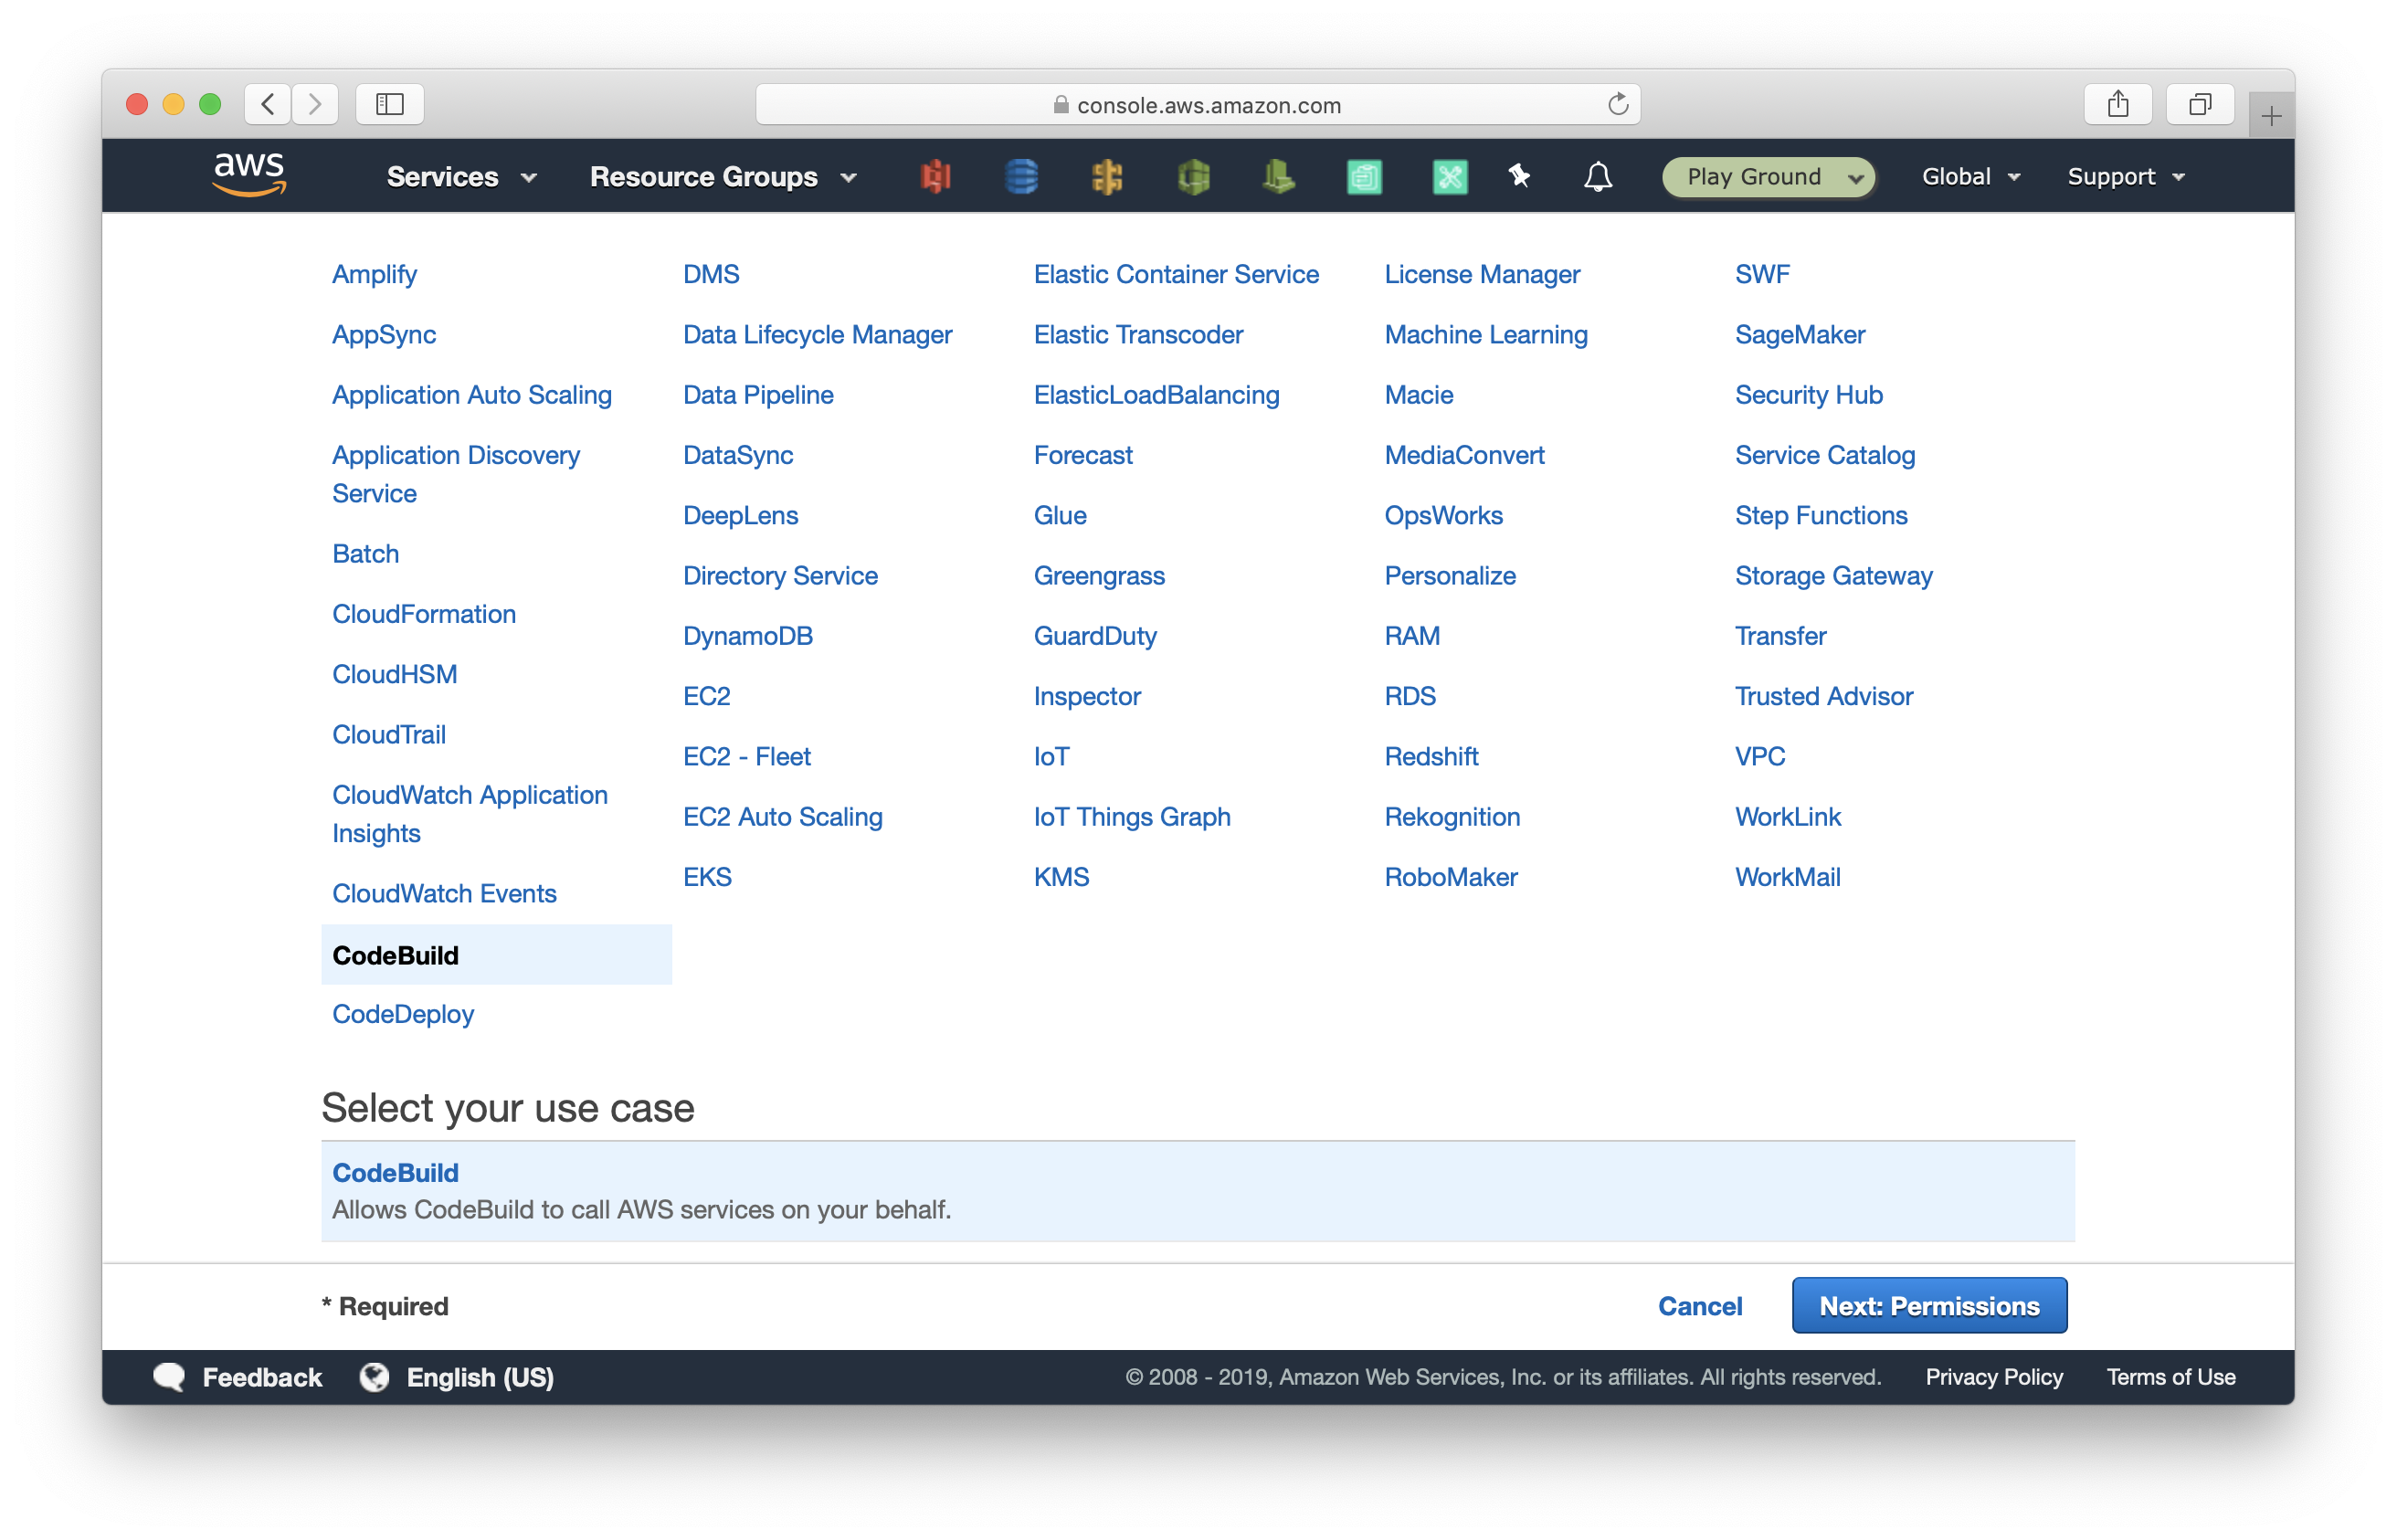
Select Create role > select CodeBuild from the list of services > then click Next: Permissions.
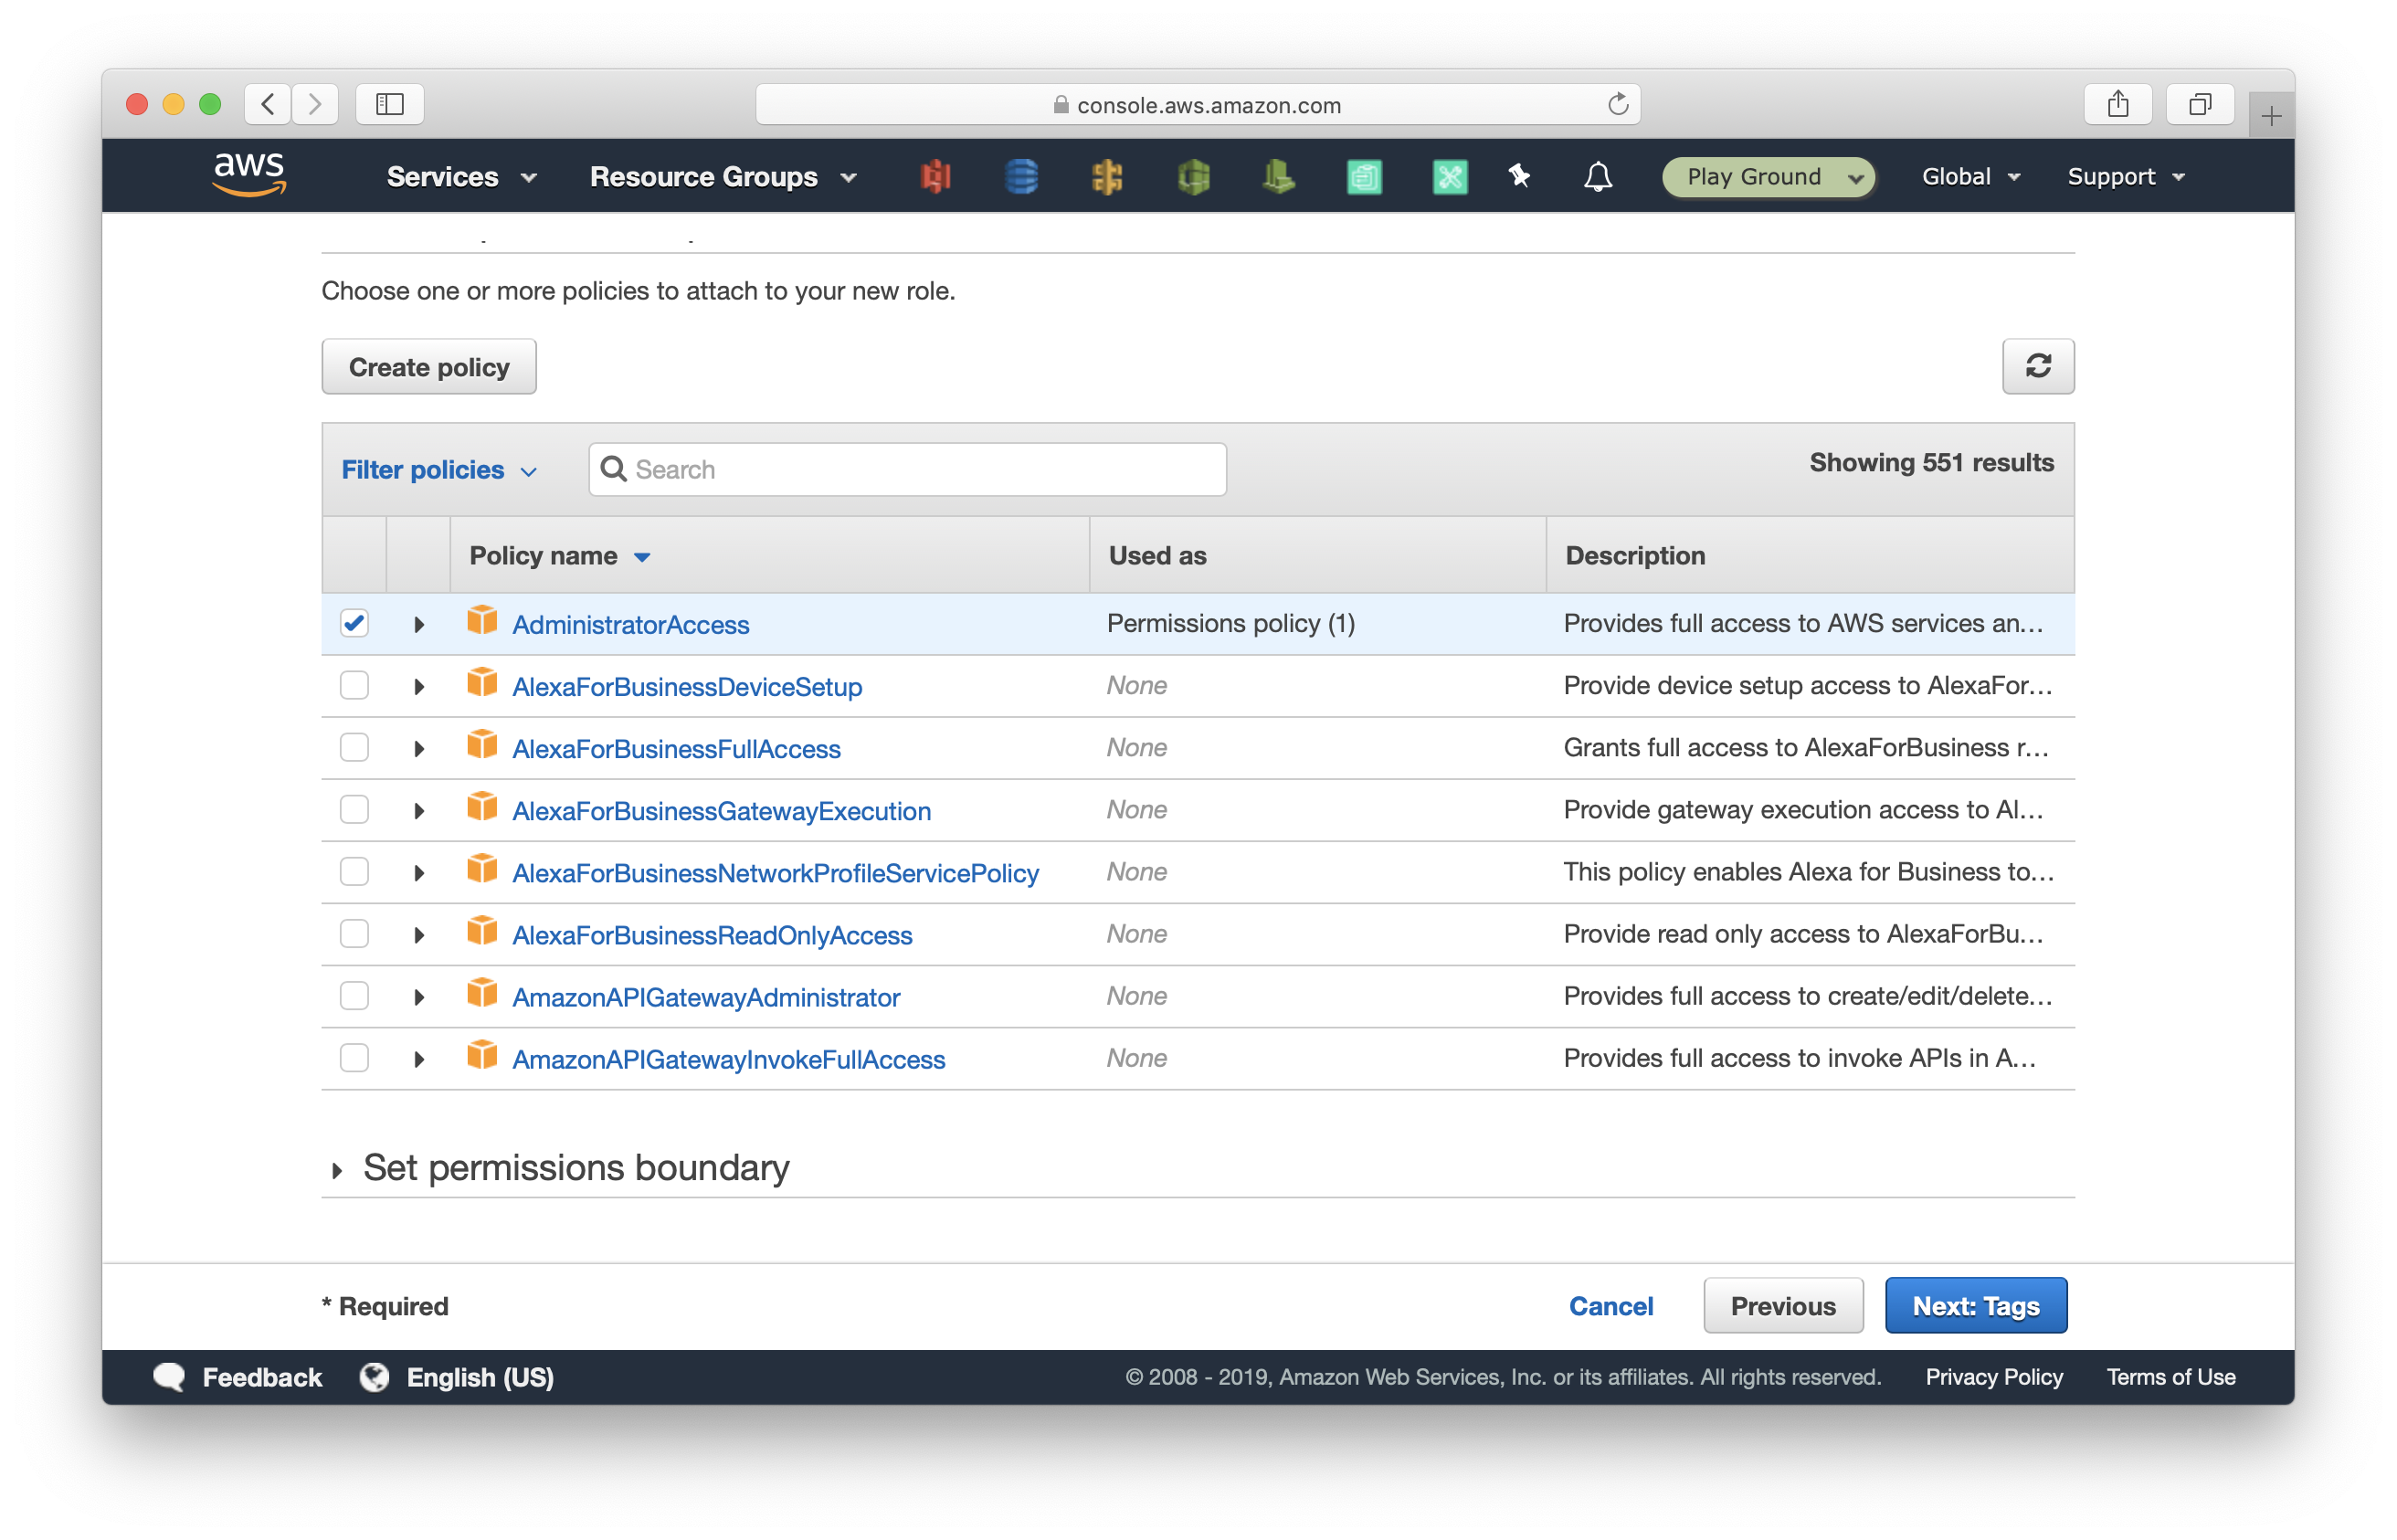
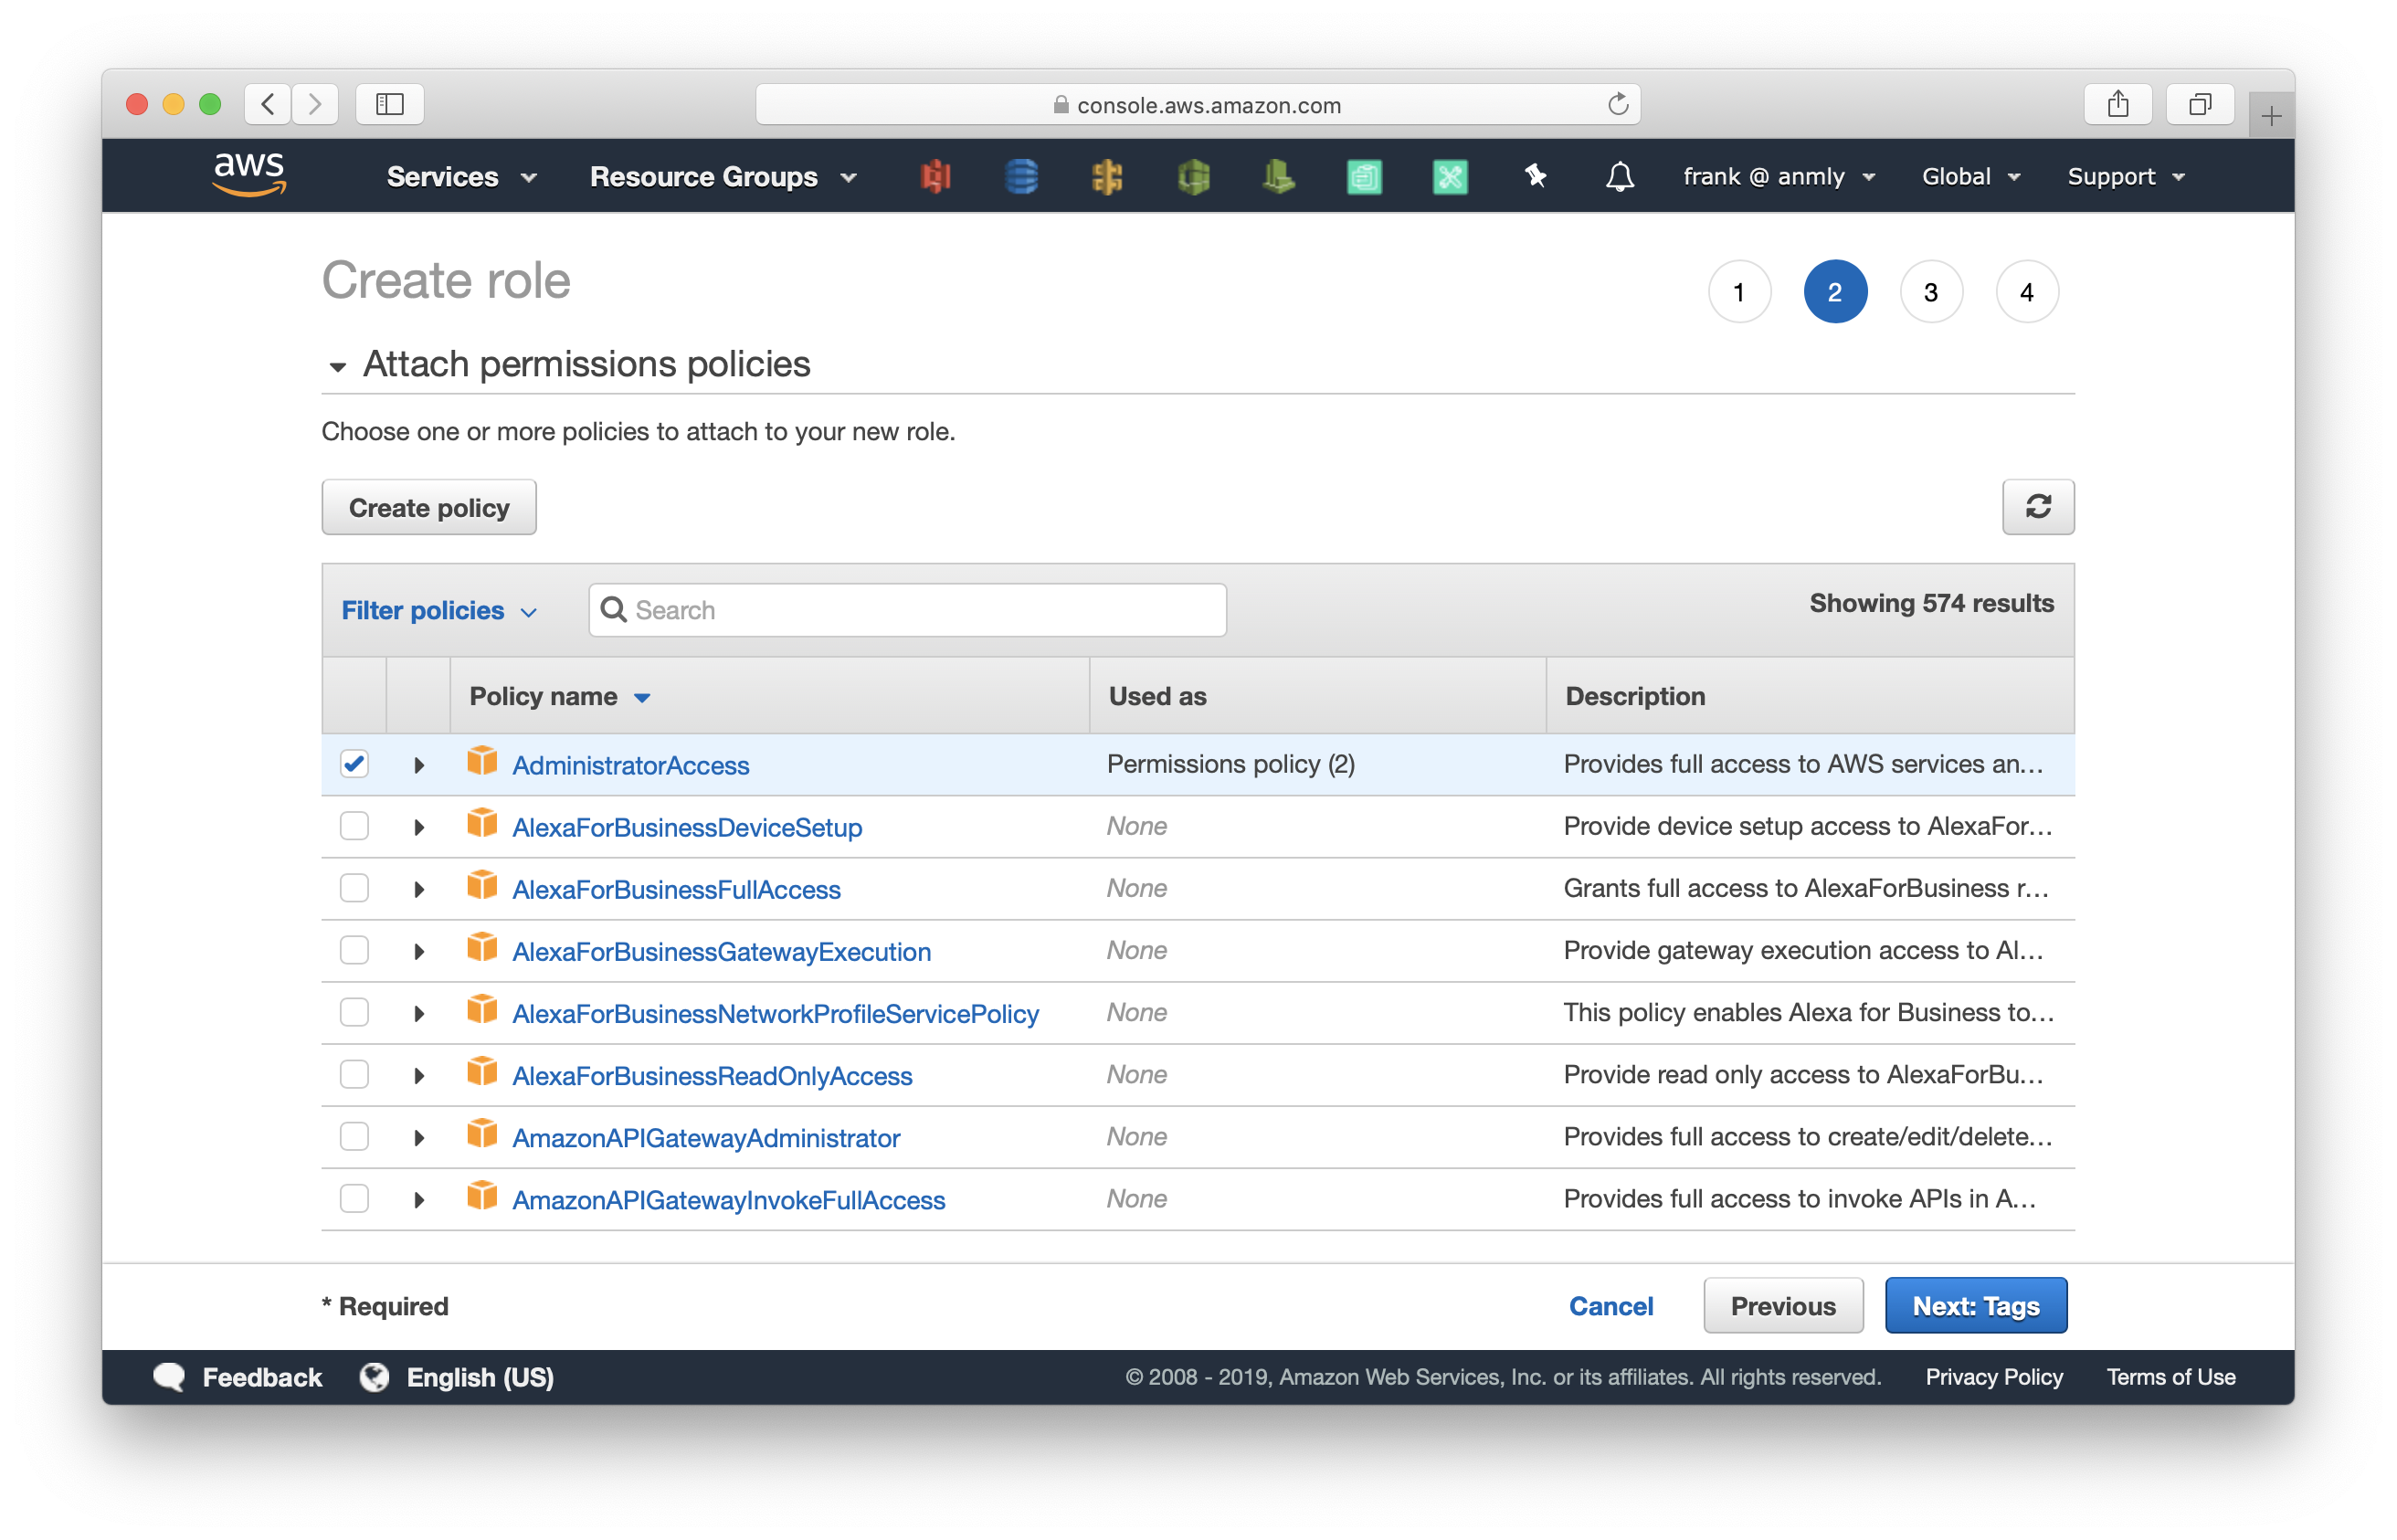
Check AdministratorAccess and click Next: Tags.
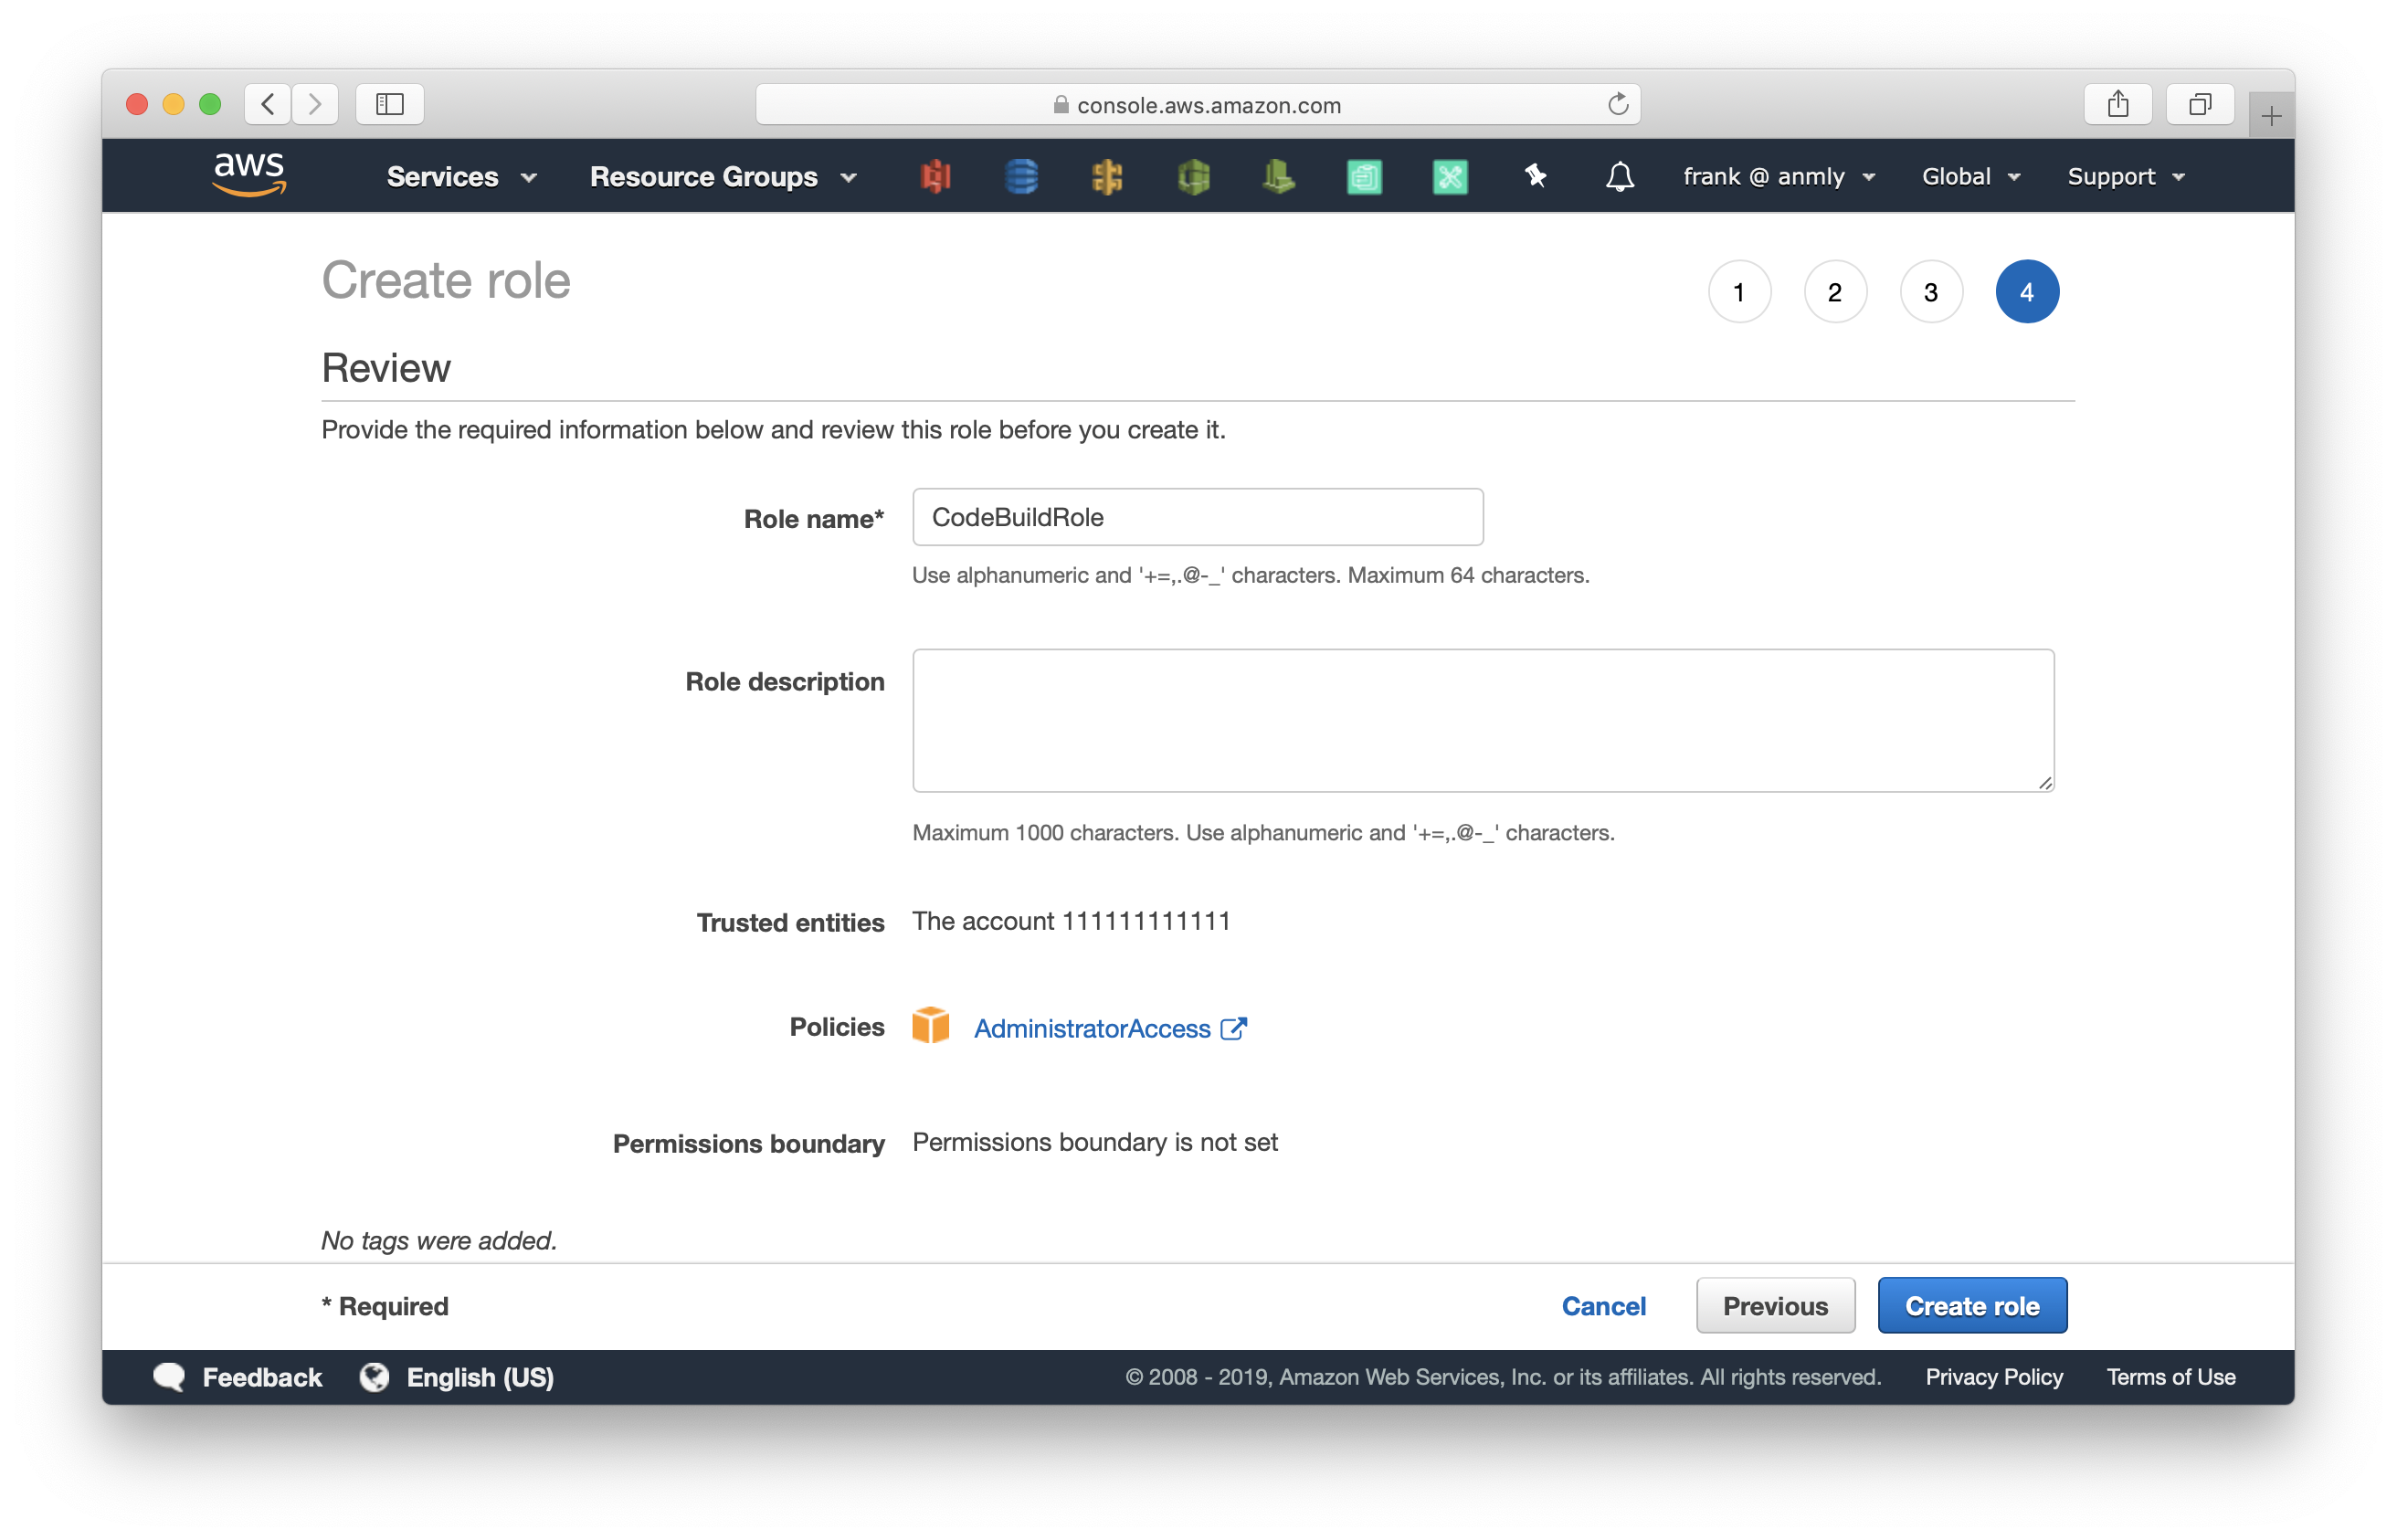
Select Next: Review > name the role CodeBuildRole > and then click Create role.
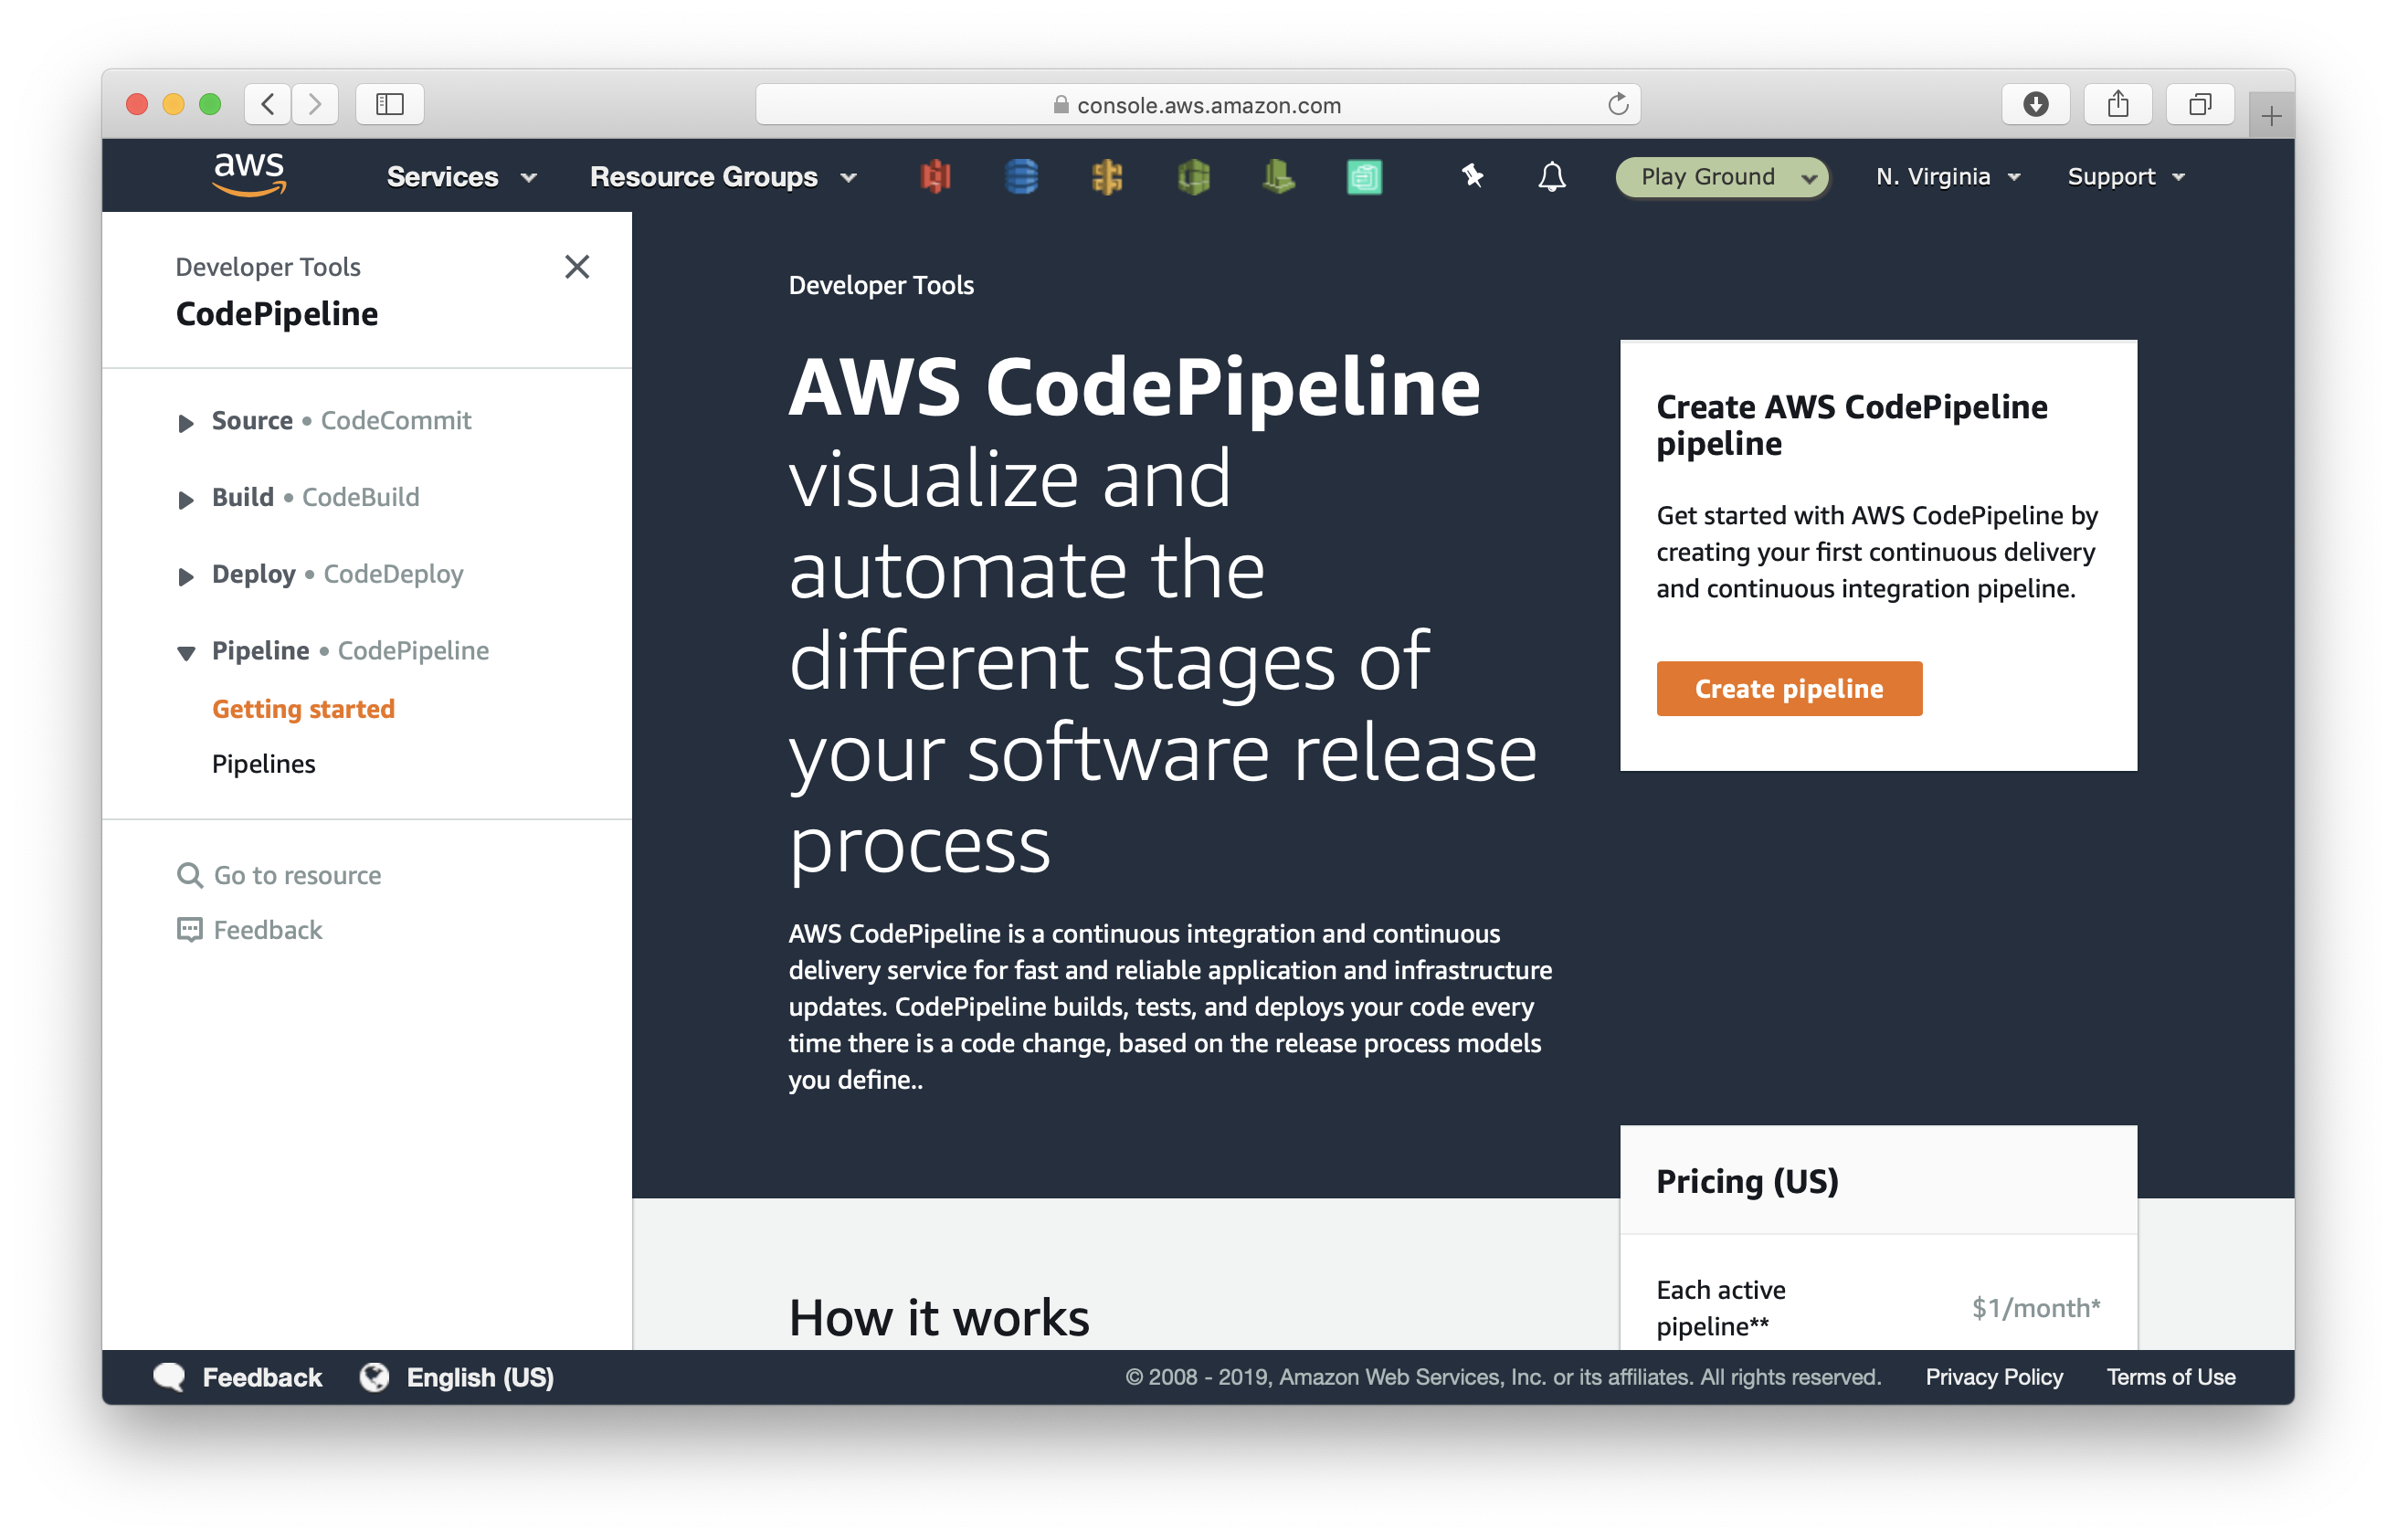
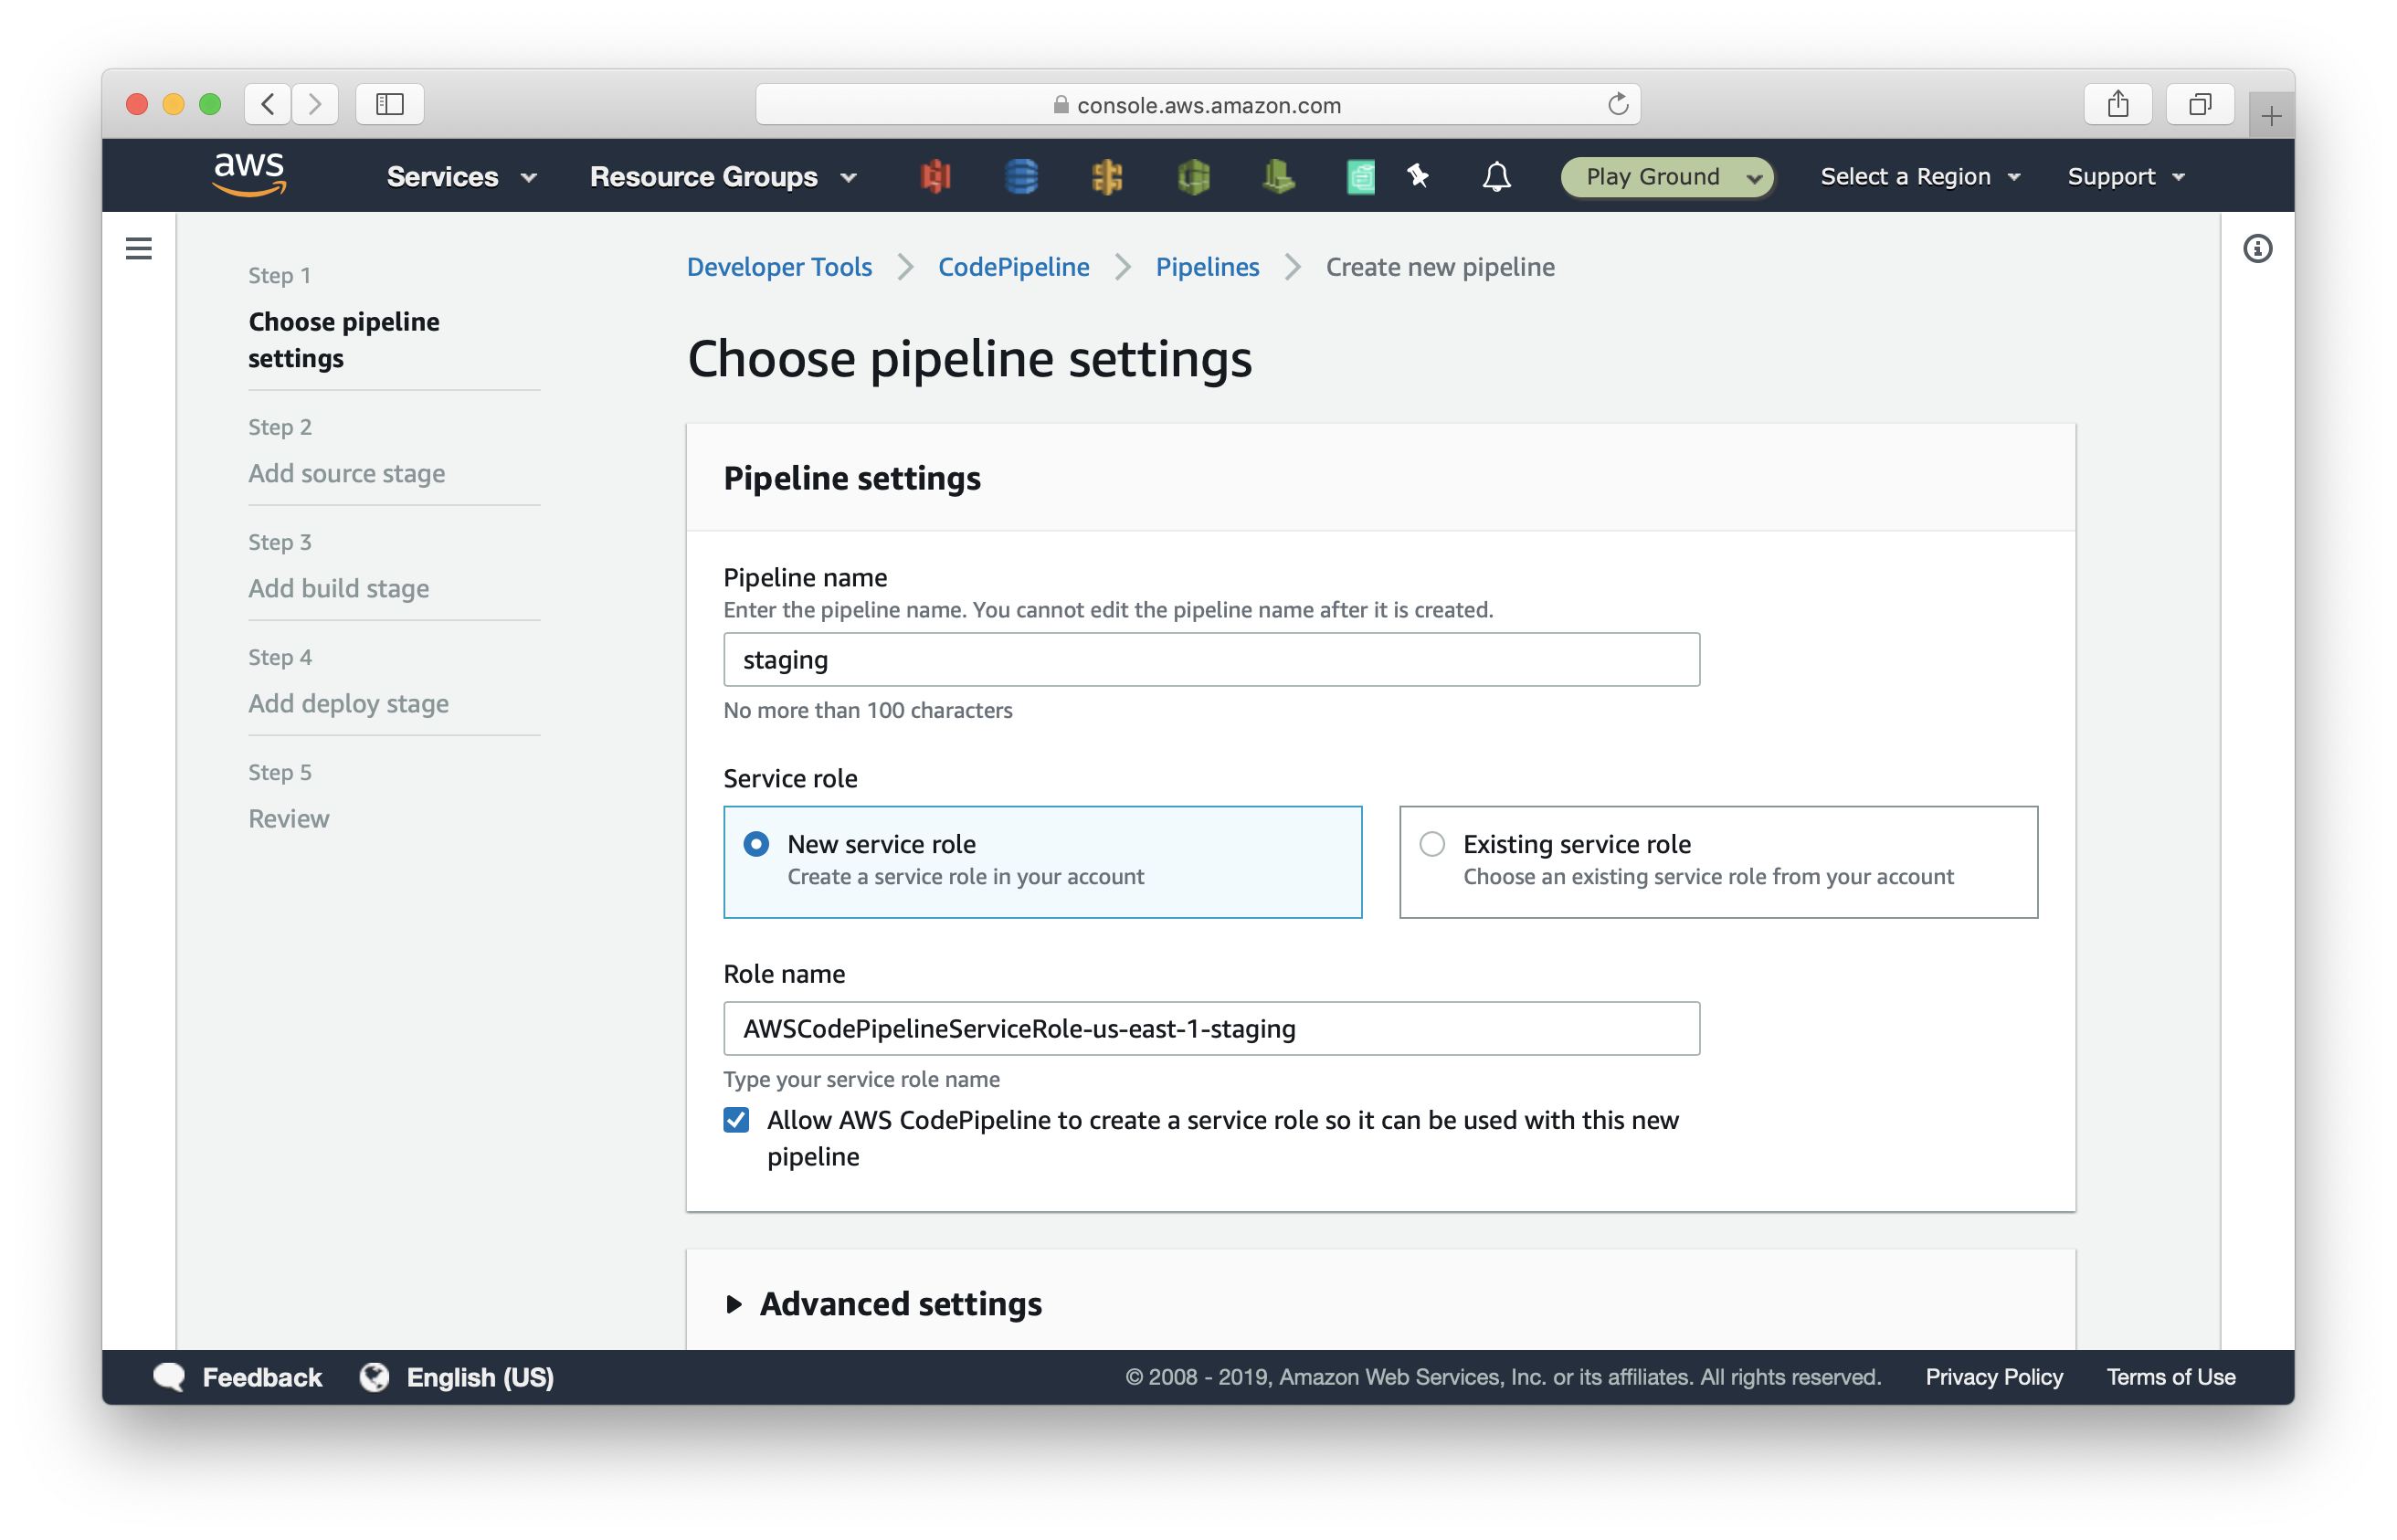
Now, let’s create our pipeline. Head over to your AWS CodePipeline console, and select Create pipeline.
Name the pipeline master since we are going to configure this pipeline to deploy on git pushes to the master branch. And click Next.
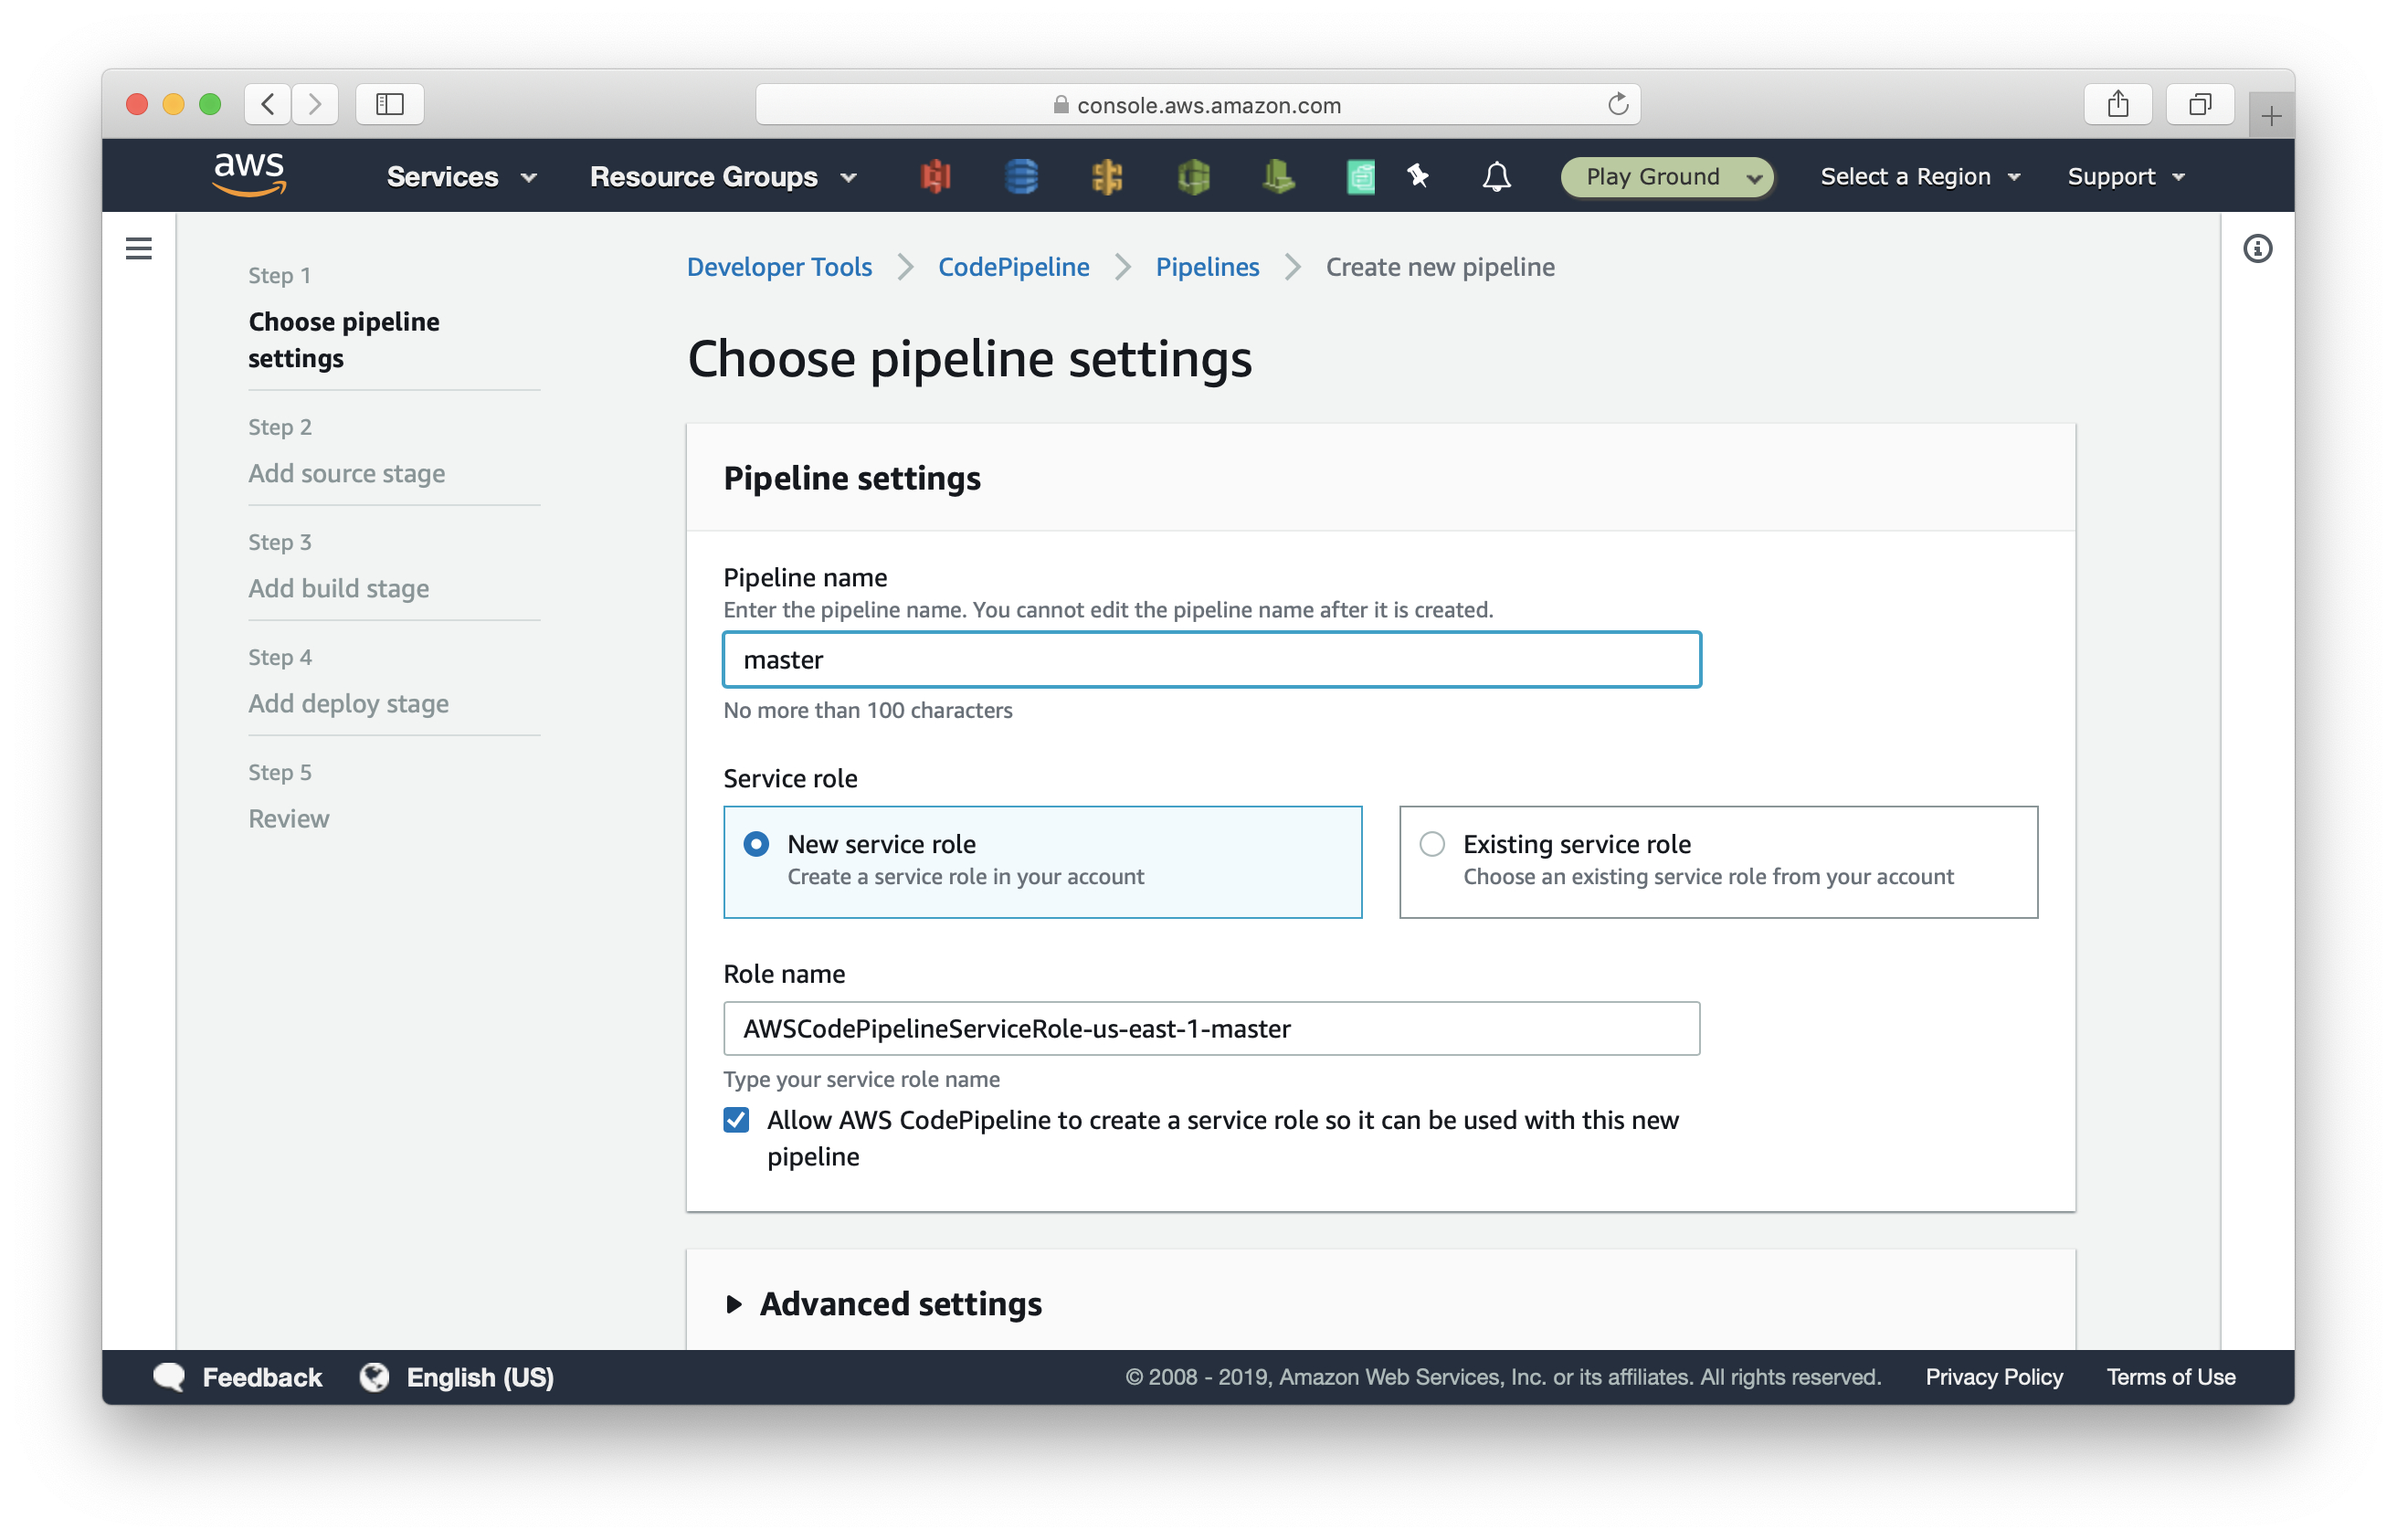
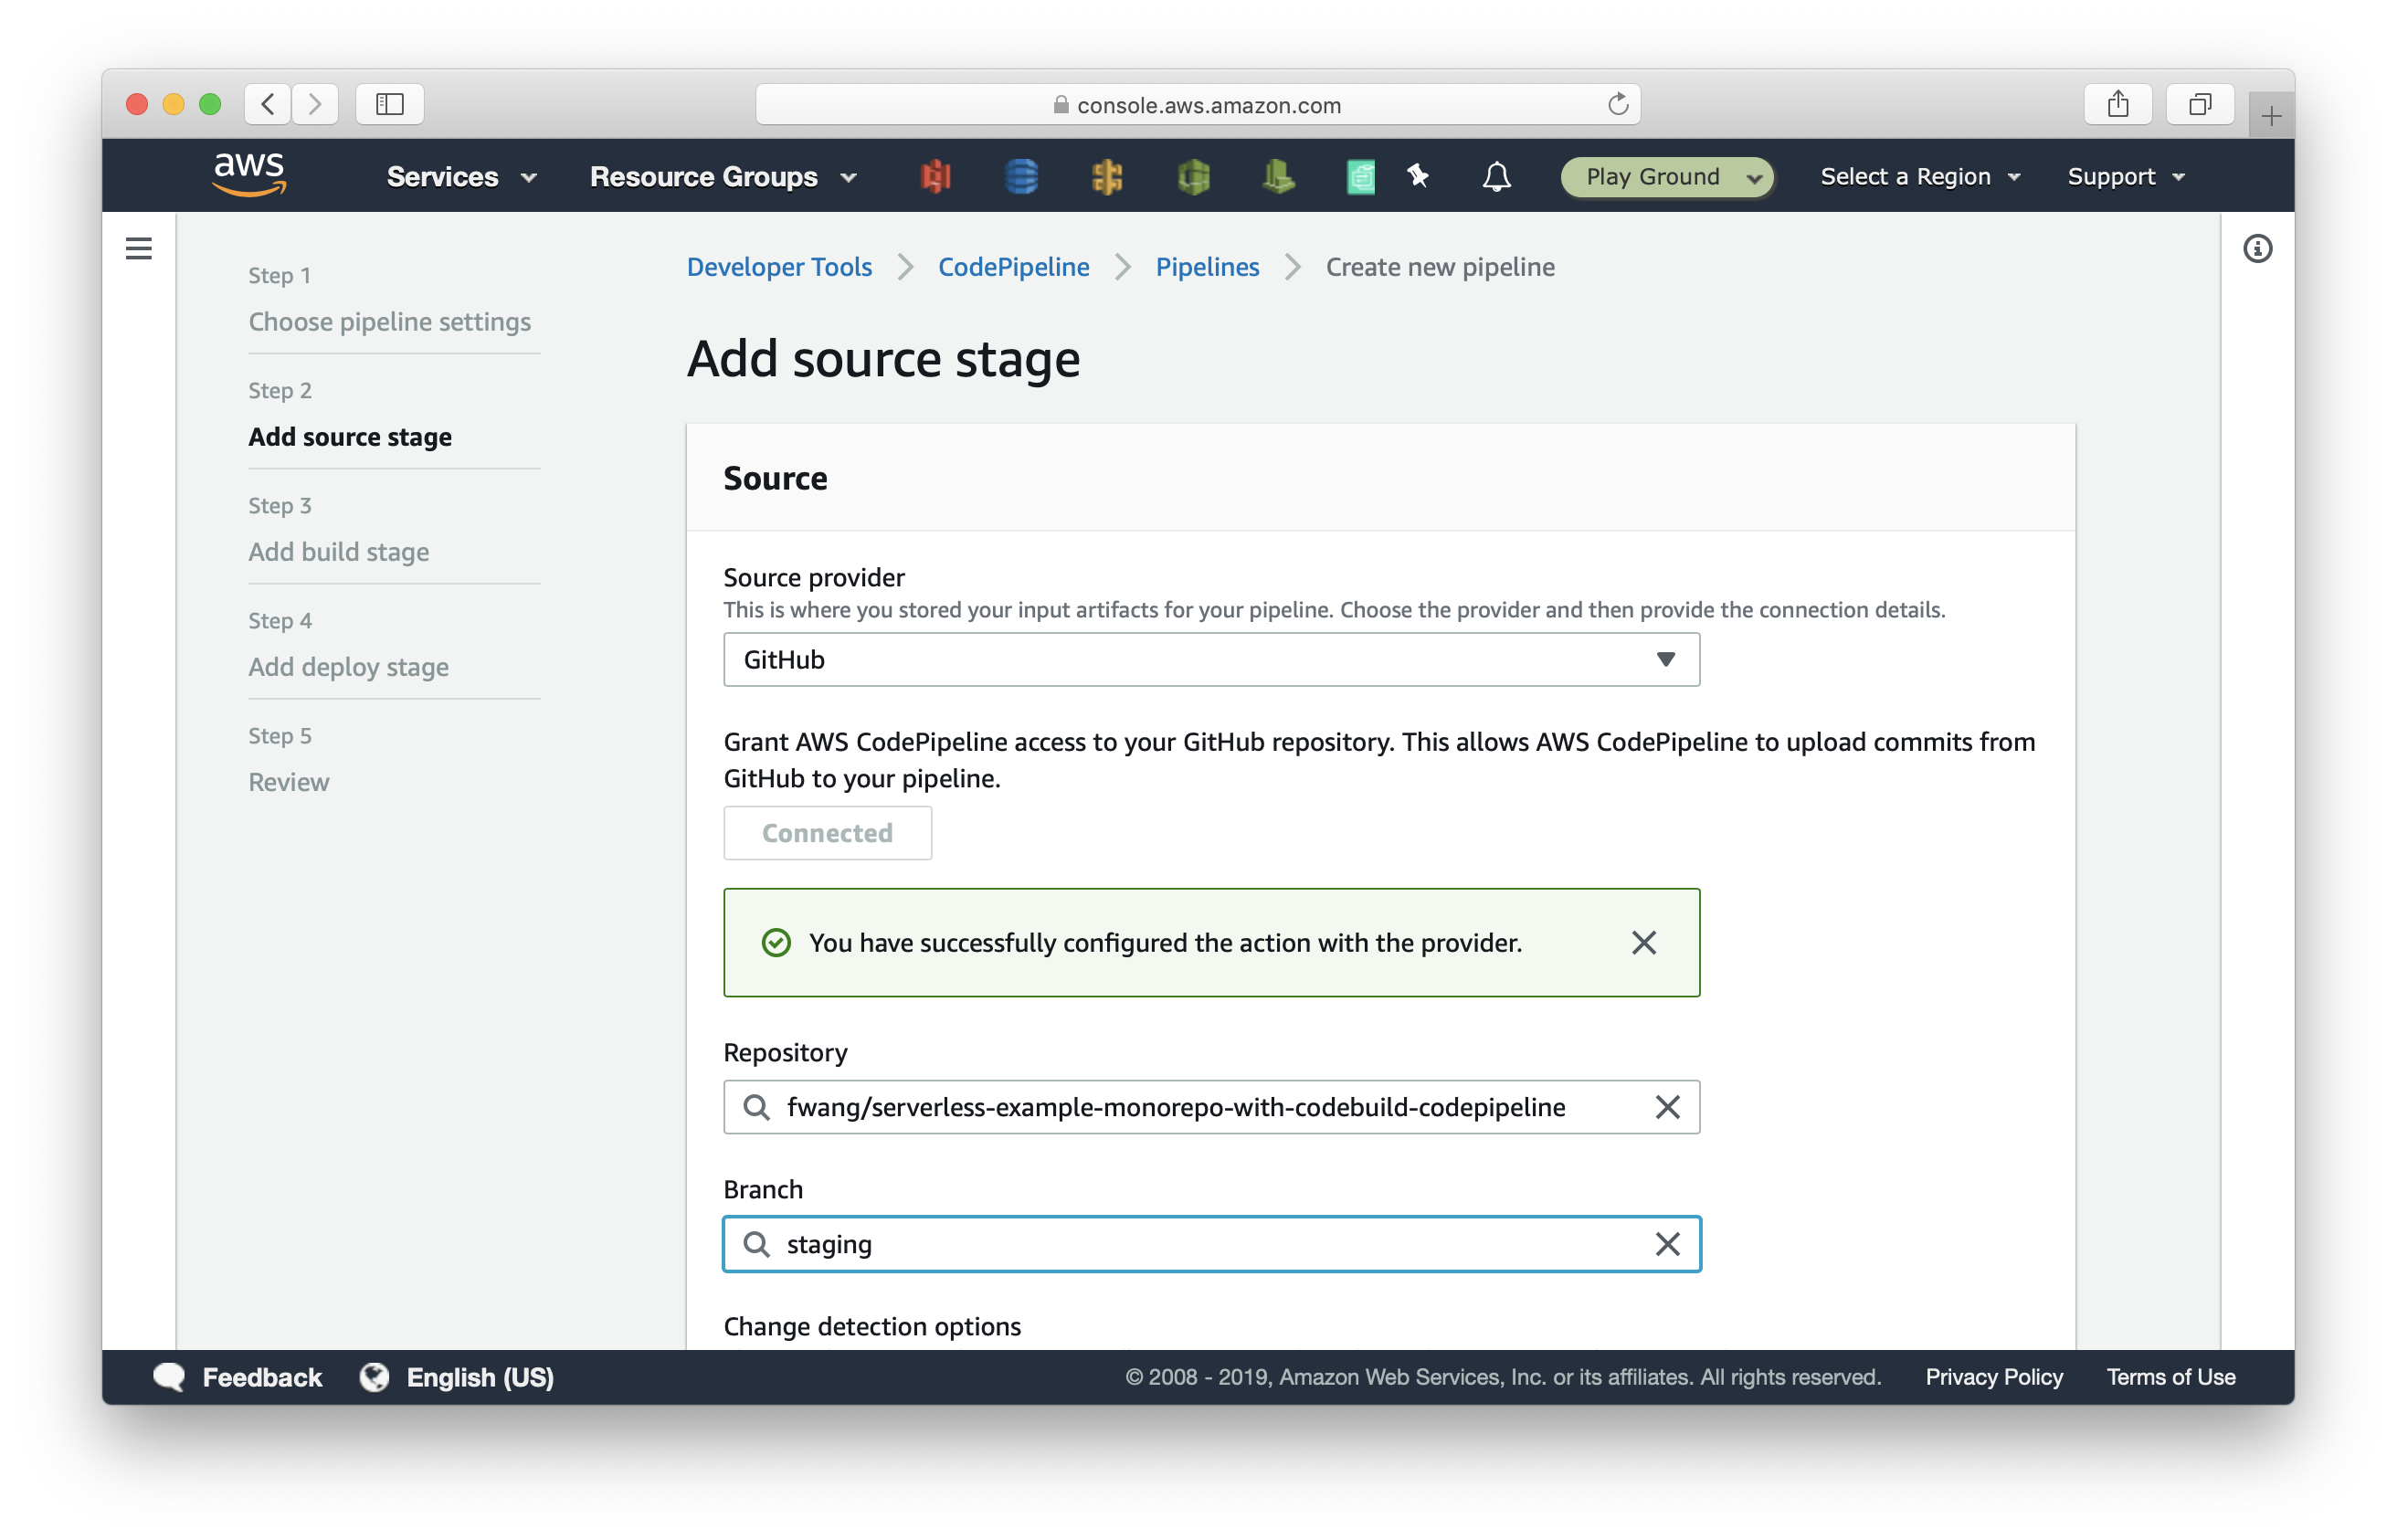
Select GitHub as the source provider. After connecting your GitHub account, select your repository and the master branch. Then click Next.

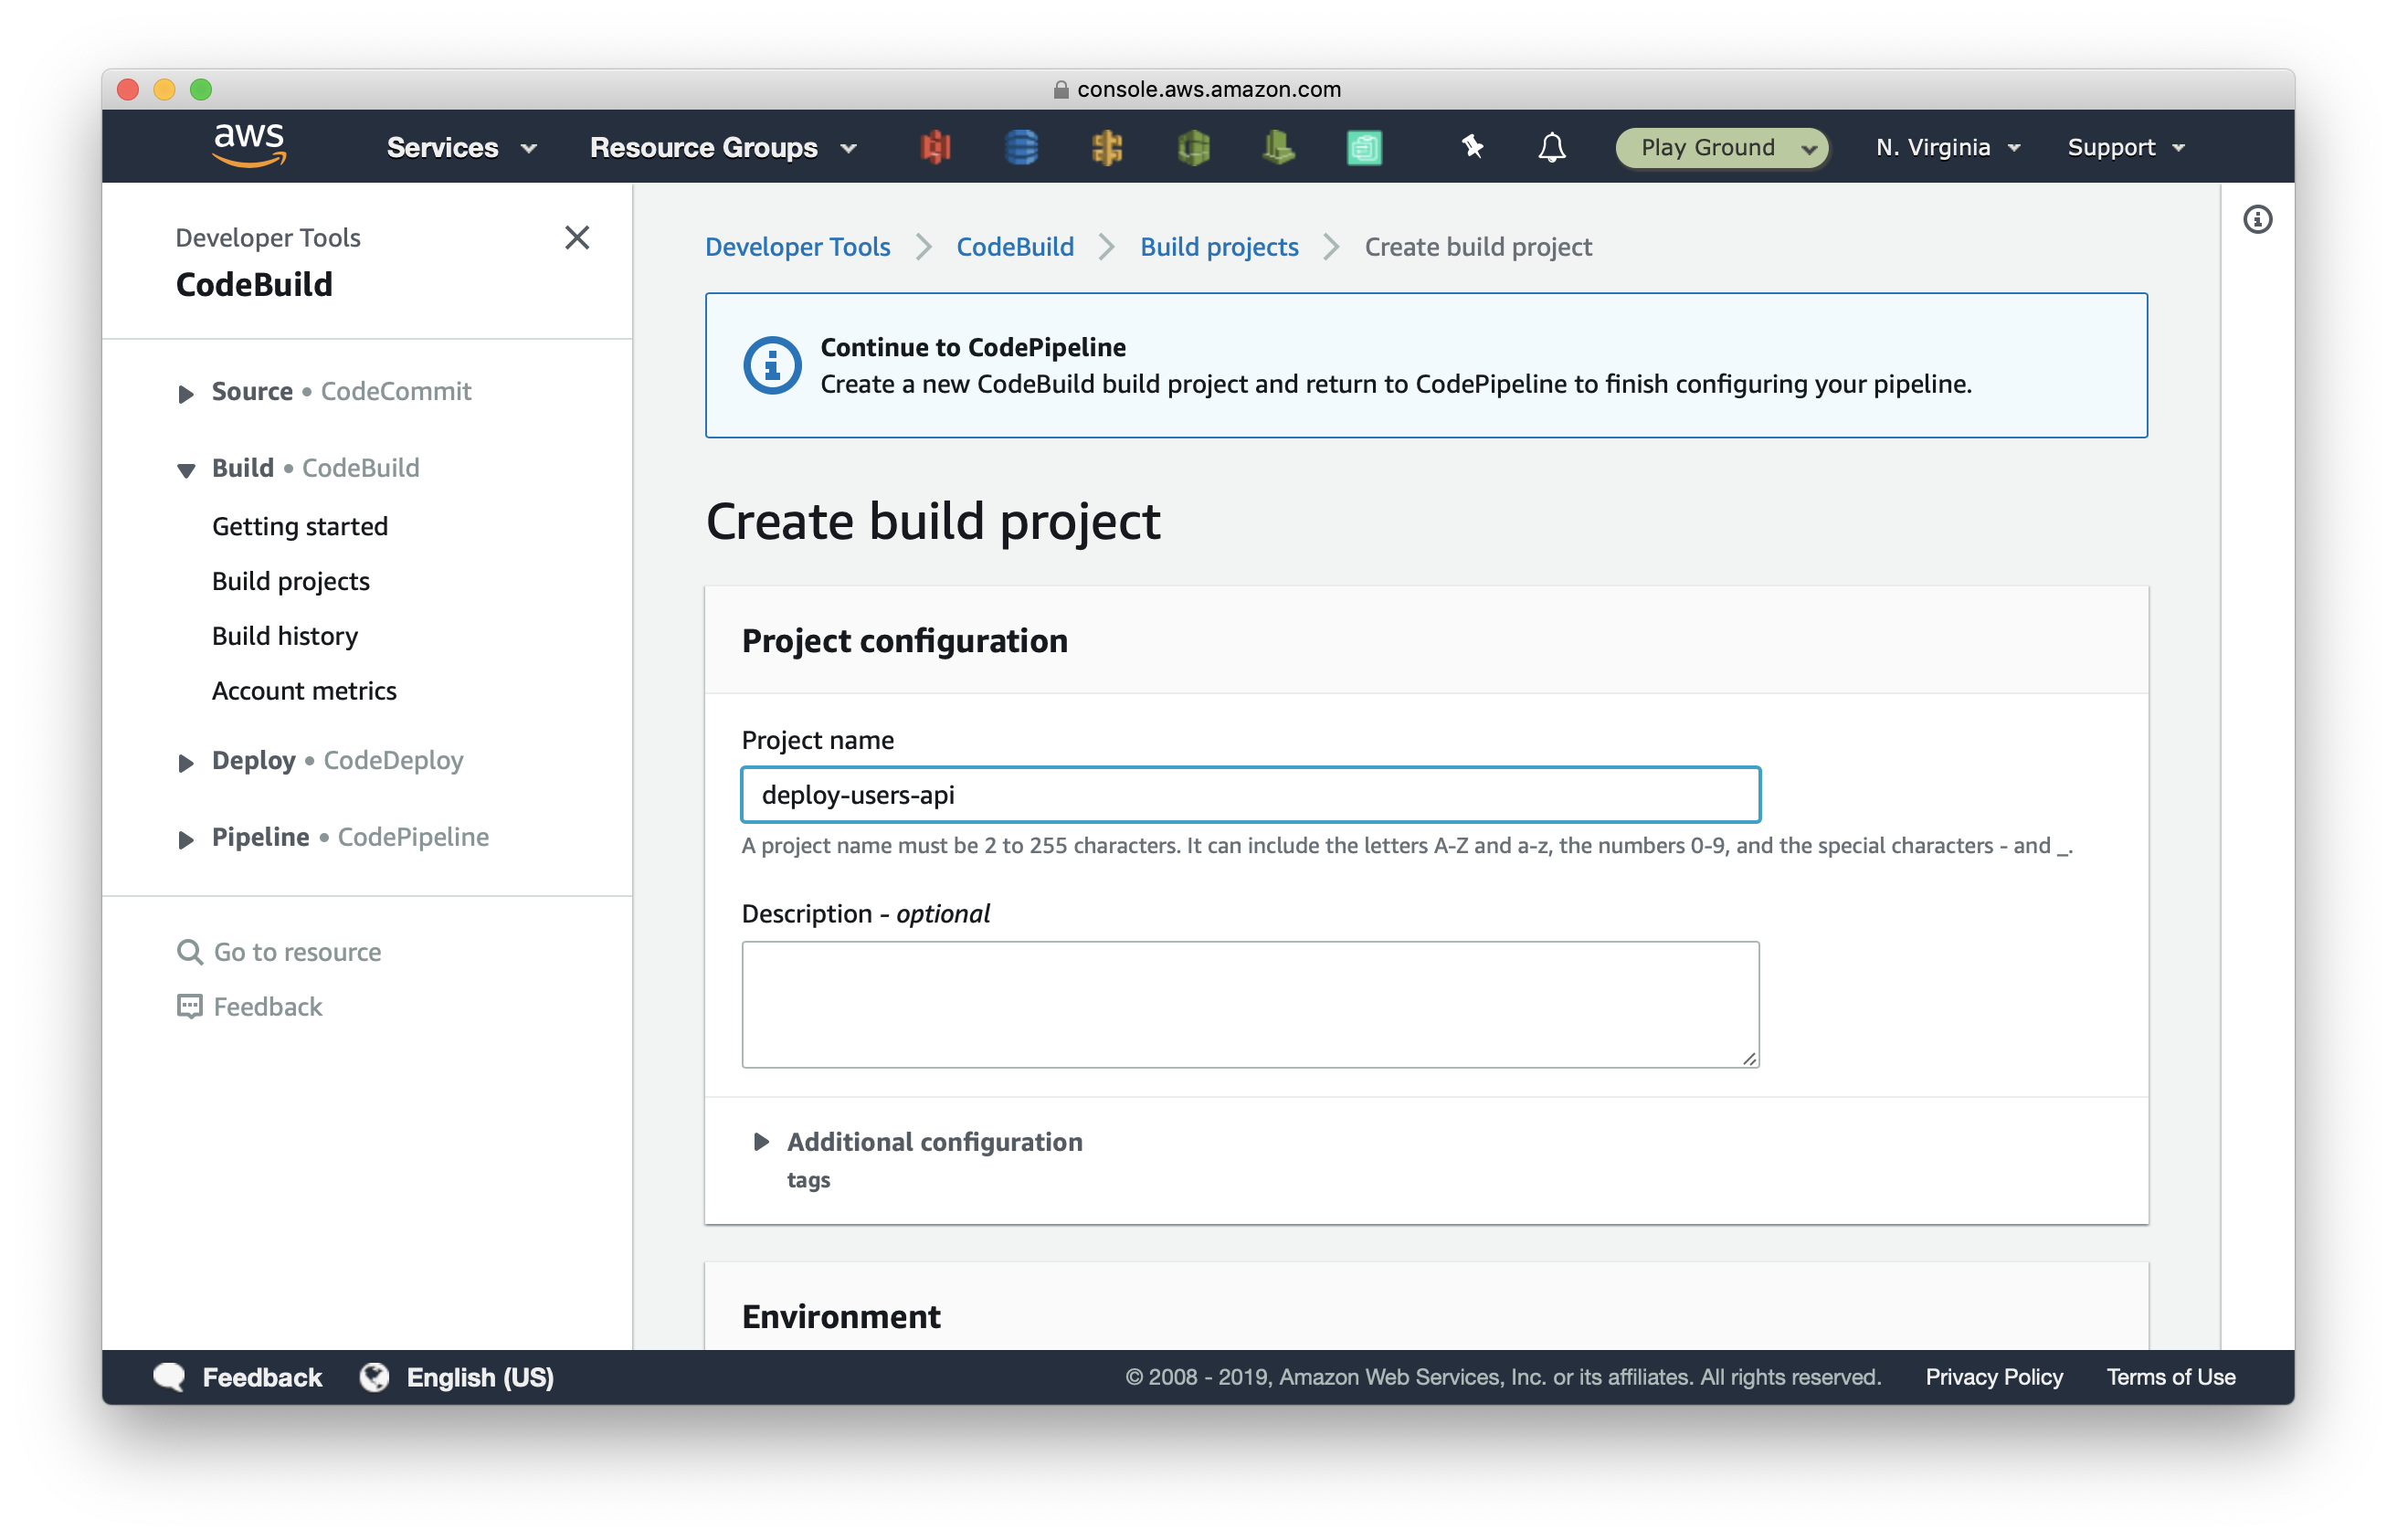
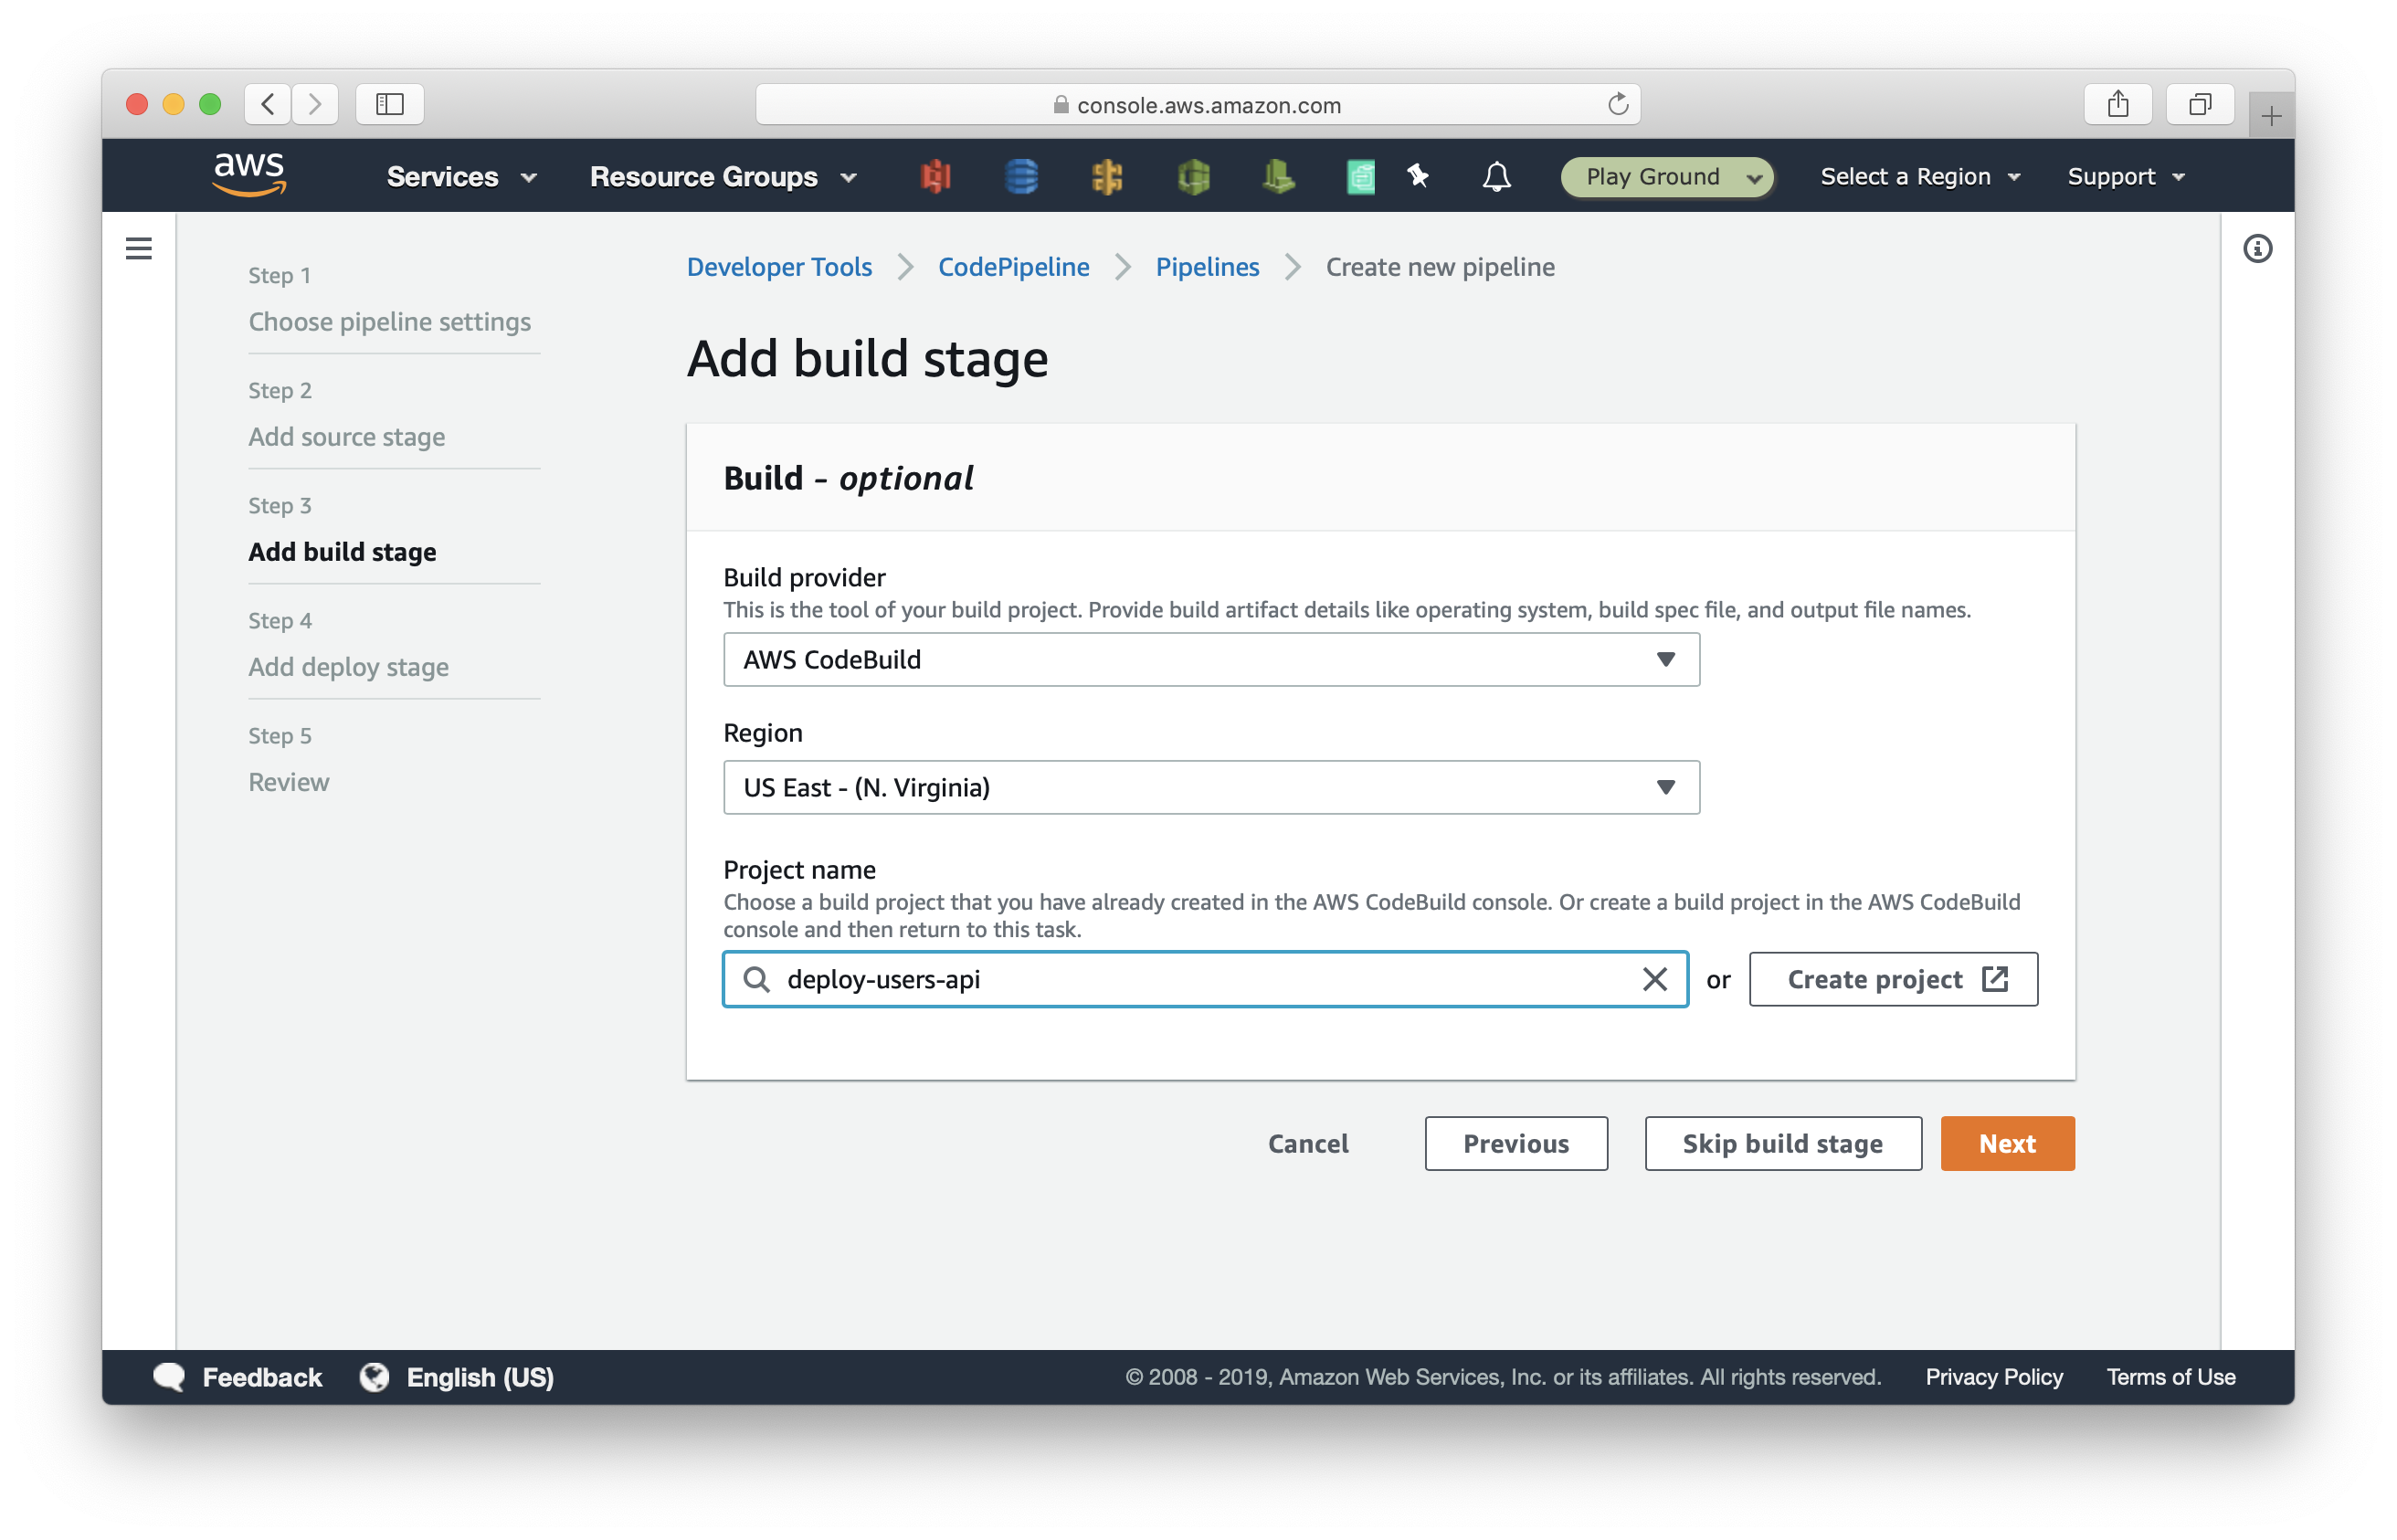
Select AWS CodeBuild as the Build provider, and select Create project.

In the new window, we are going to create a CodeBuild project to deploy our first Serverless service.
Enter deploy-users-api as the project name.
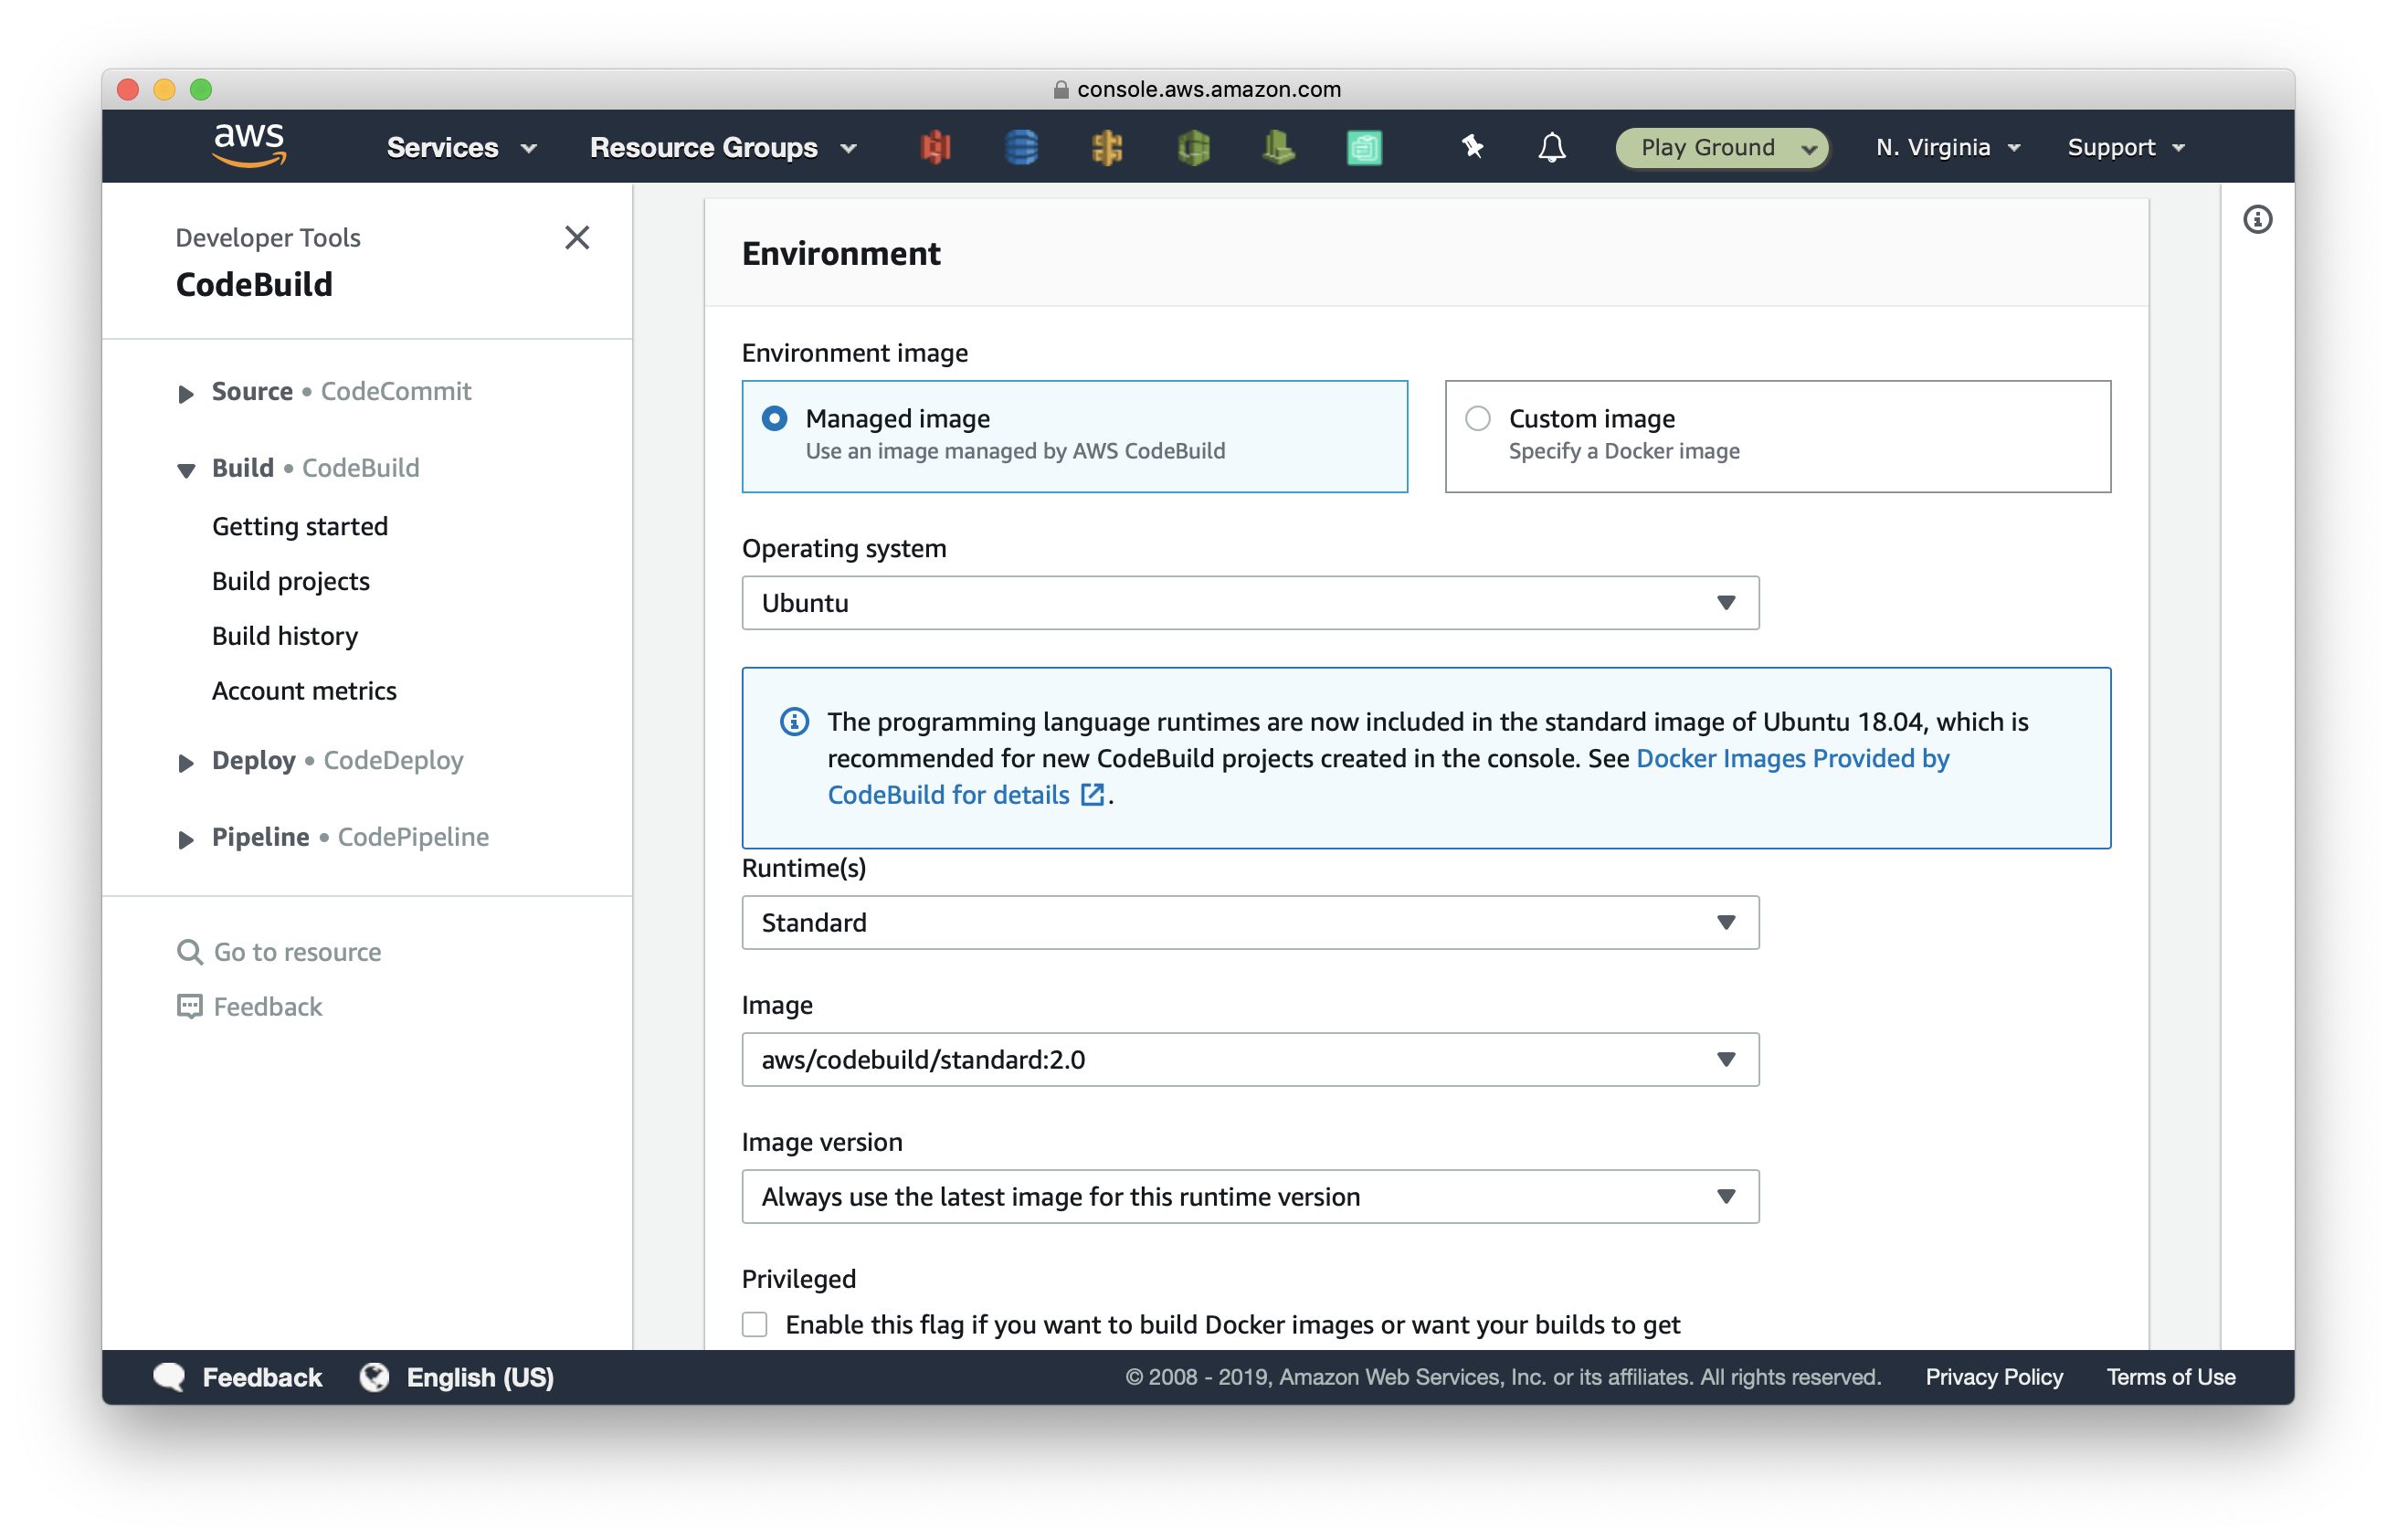
Scroll down to the Environment section > select Ubuntu operating system > Standard runtime > and aws/codebuild/standard:2.0 image.
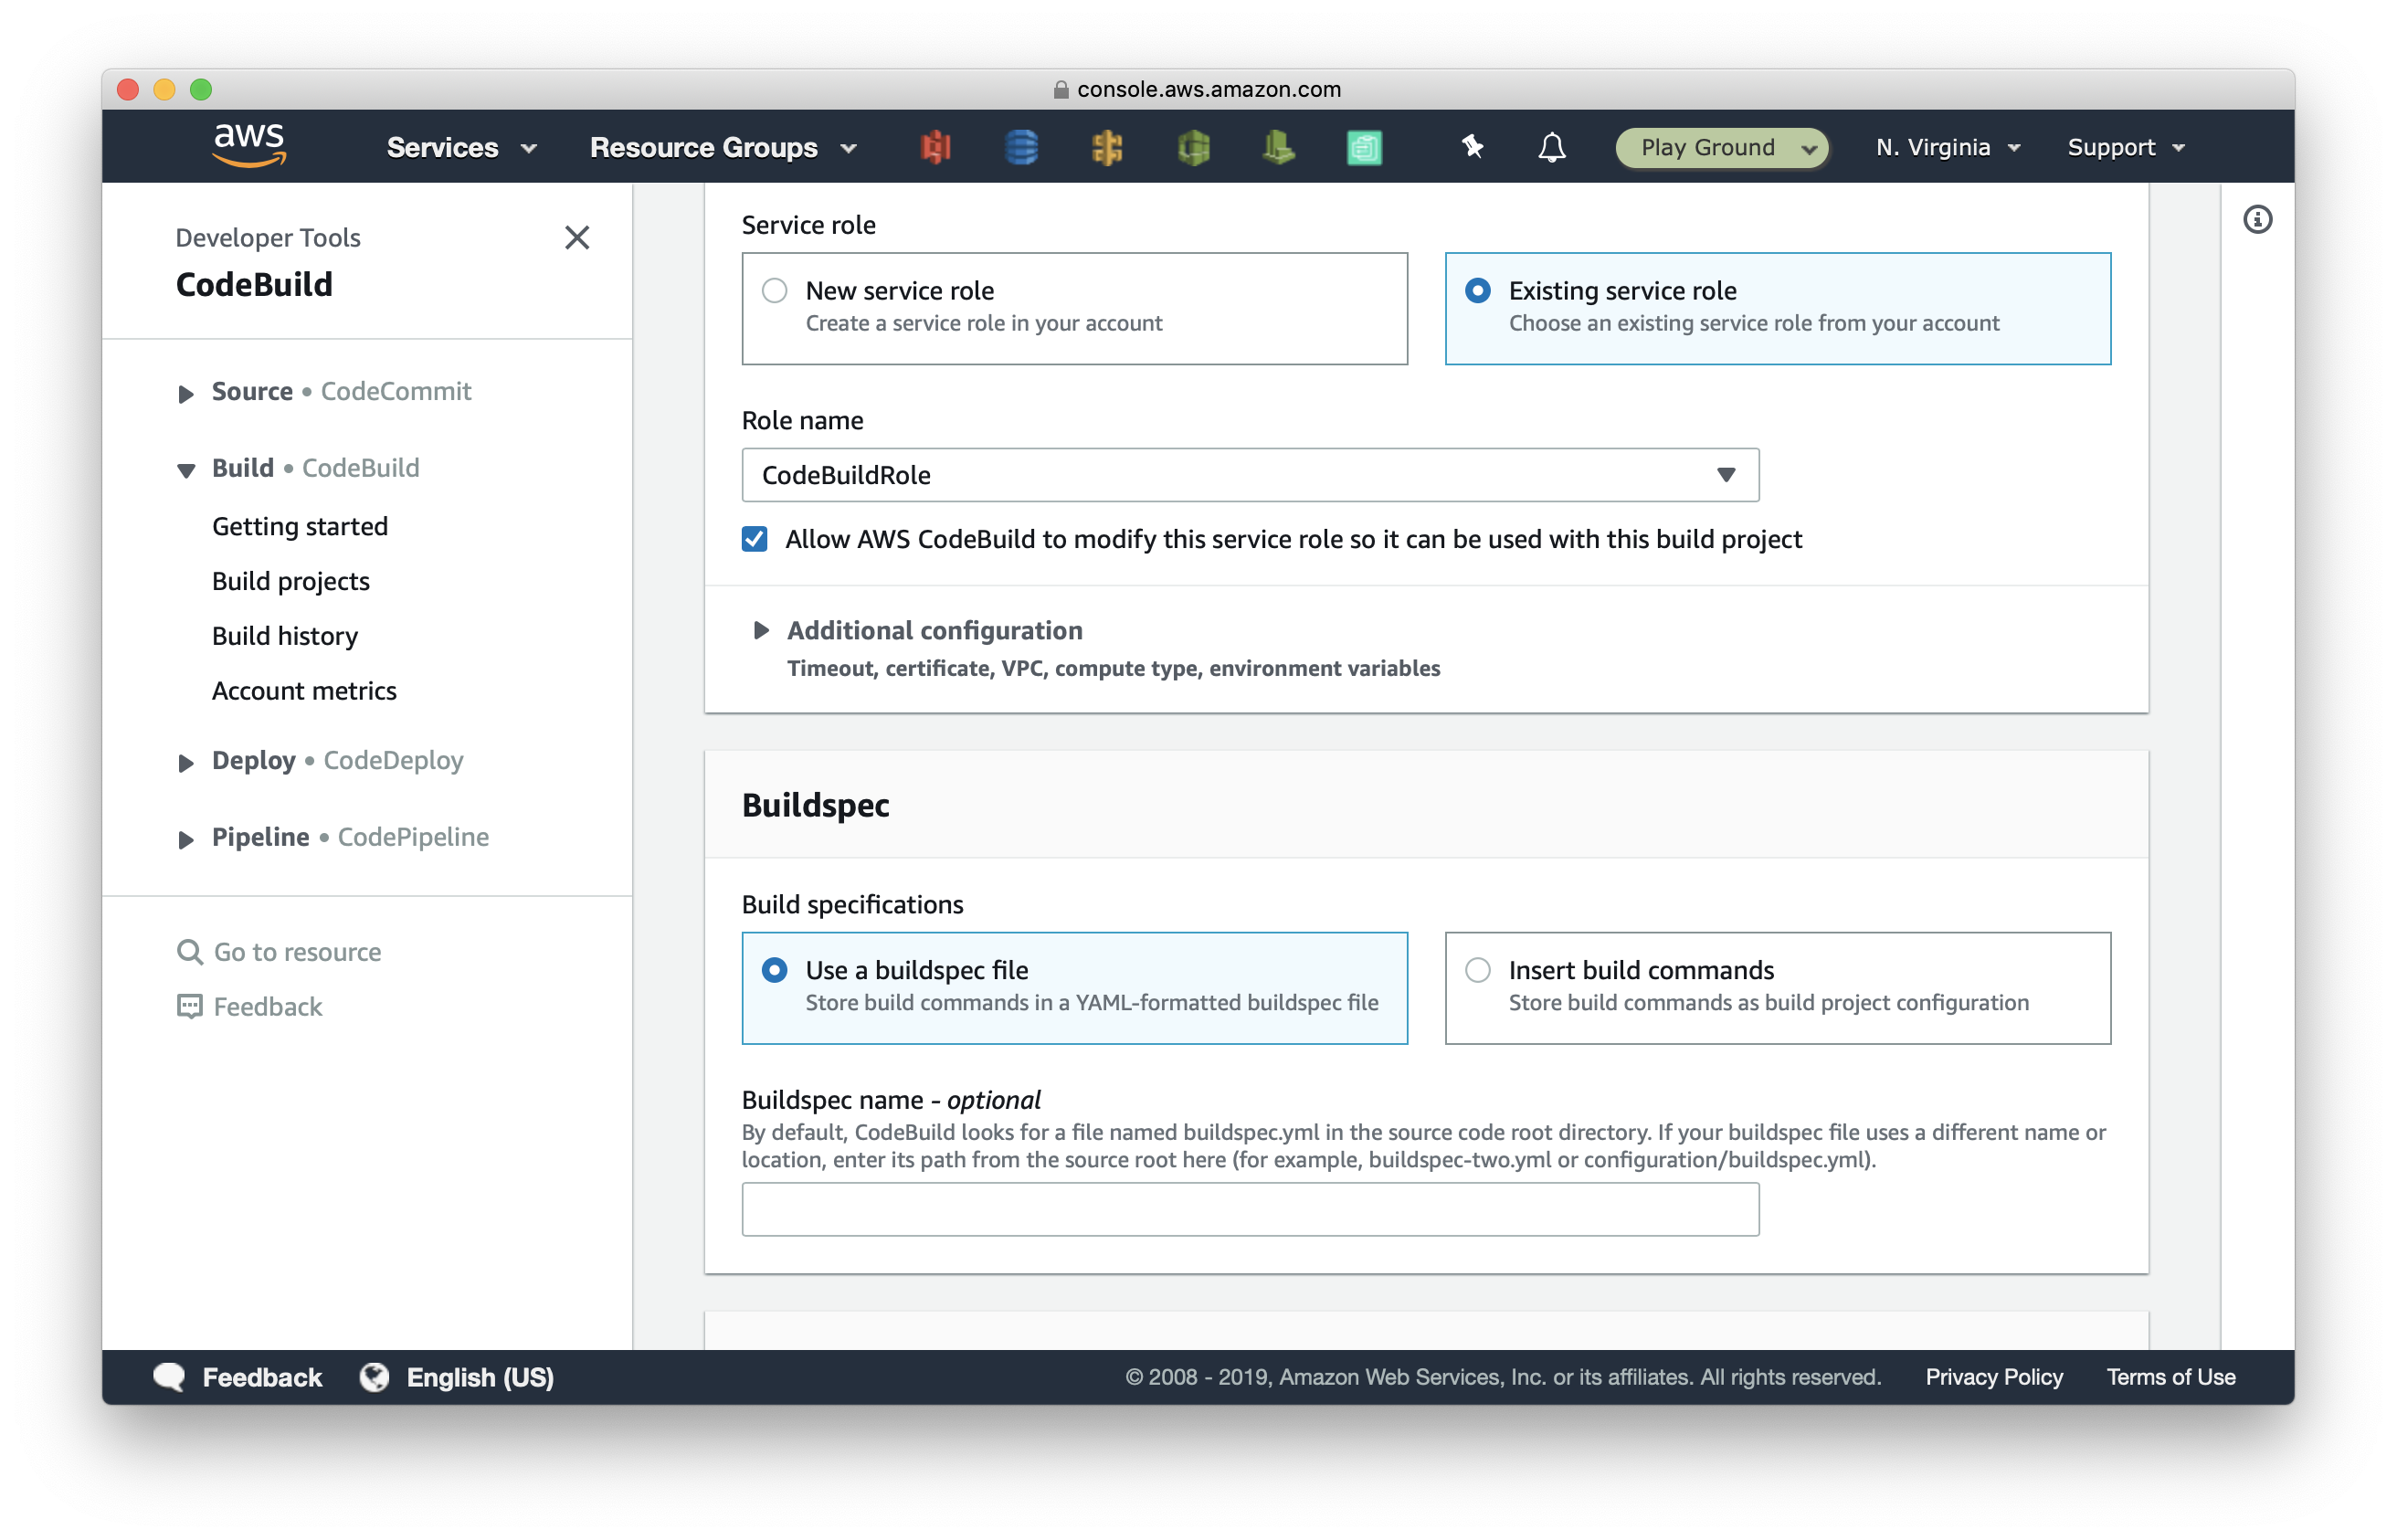
Scroll down and select Existing service role and pick the CodeBuildRole we created.
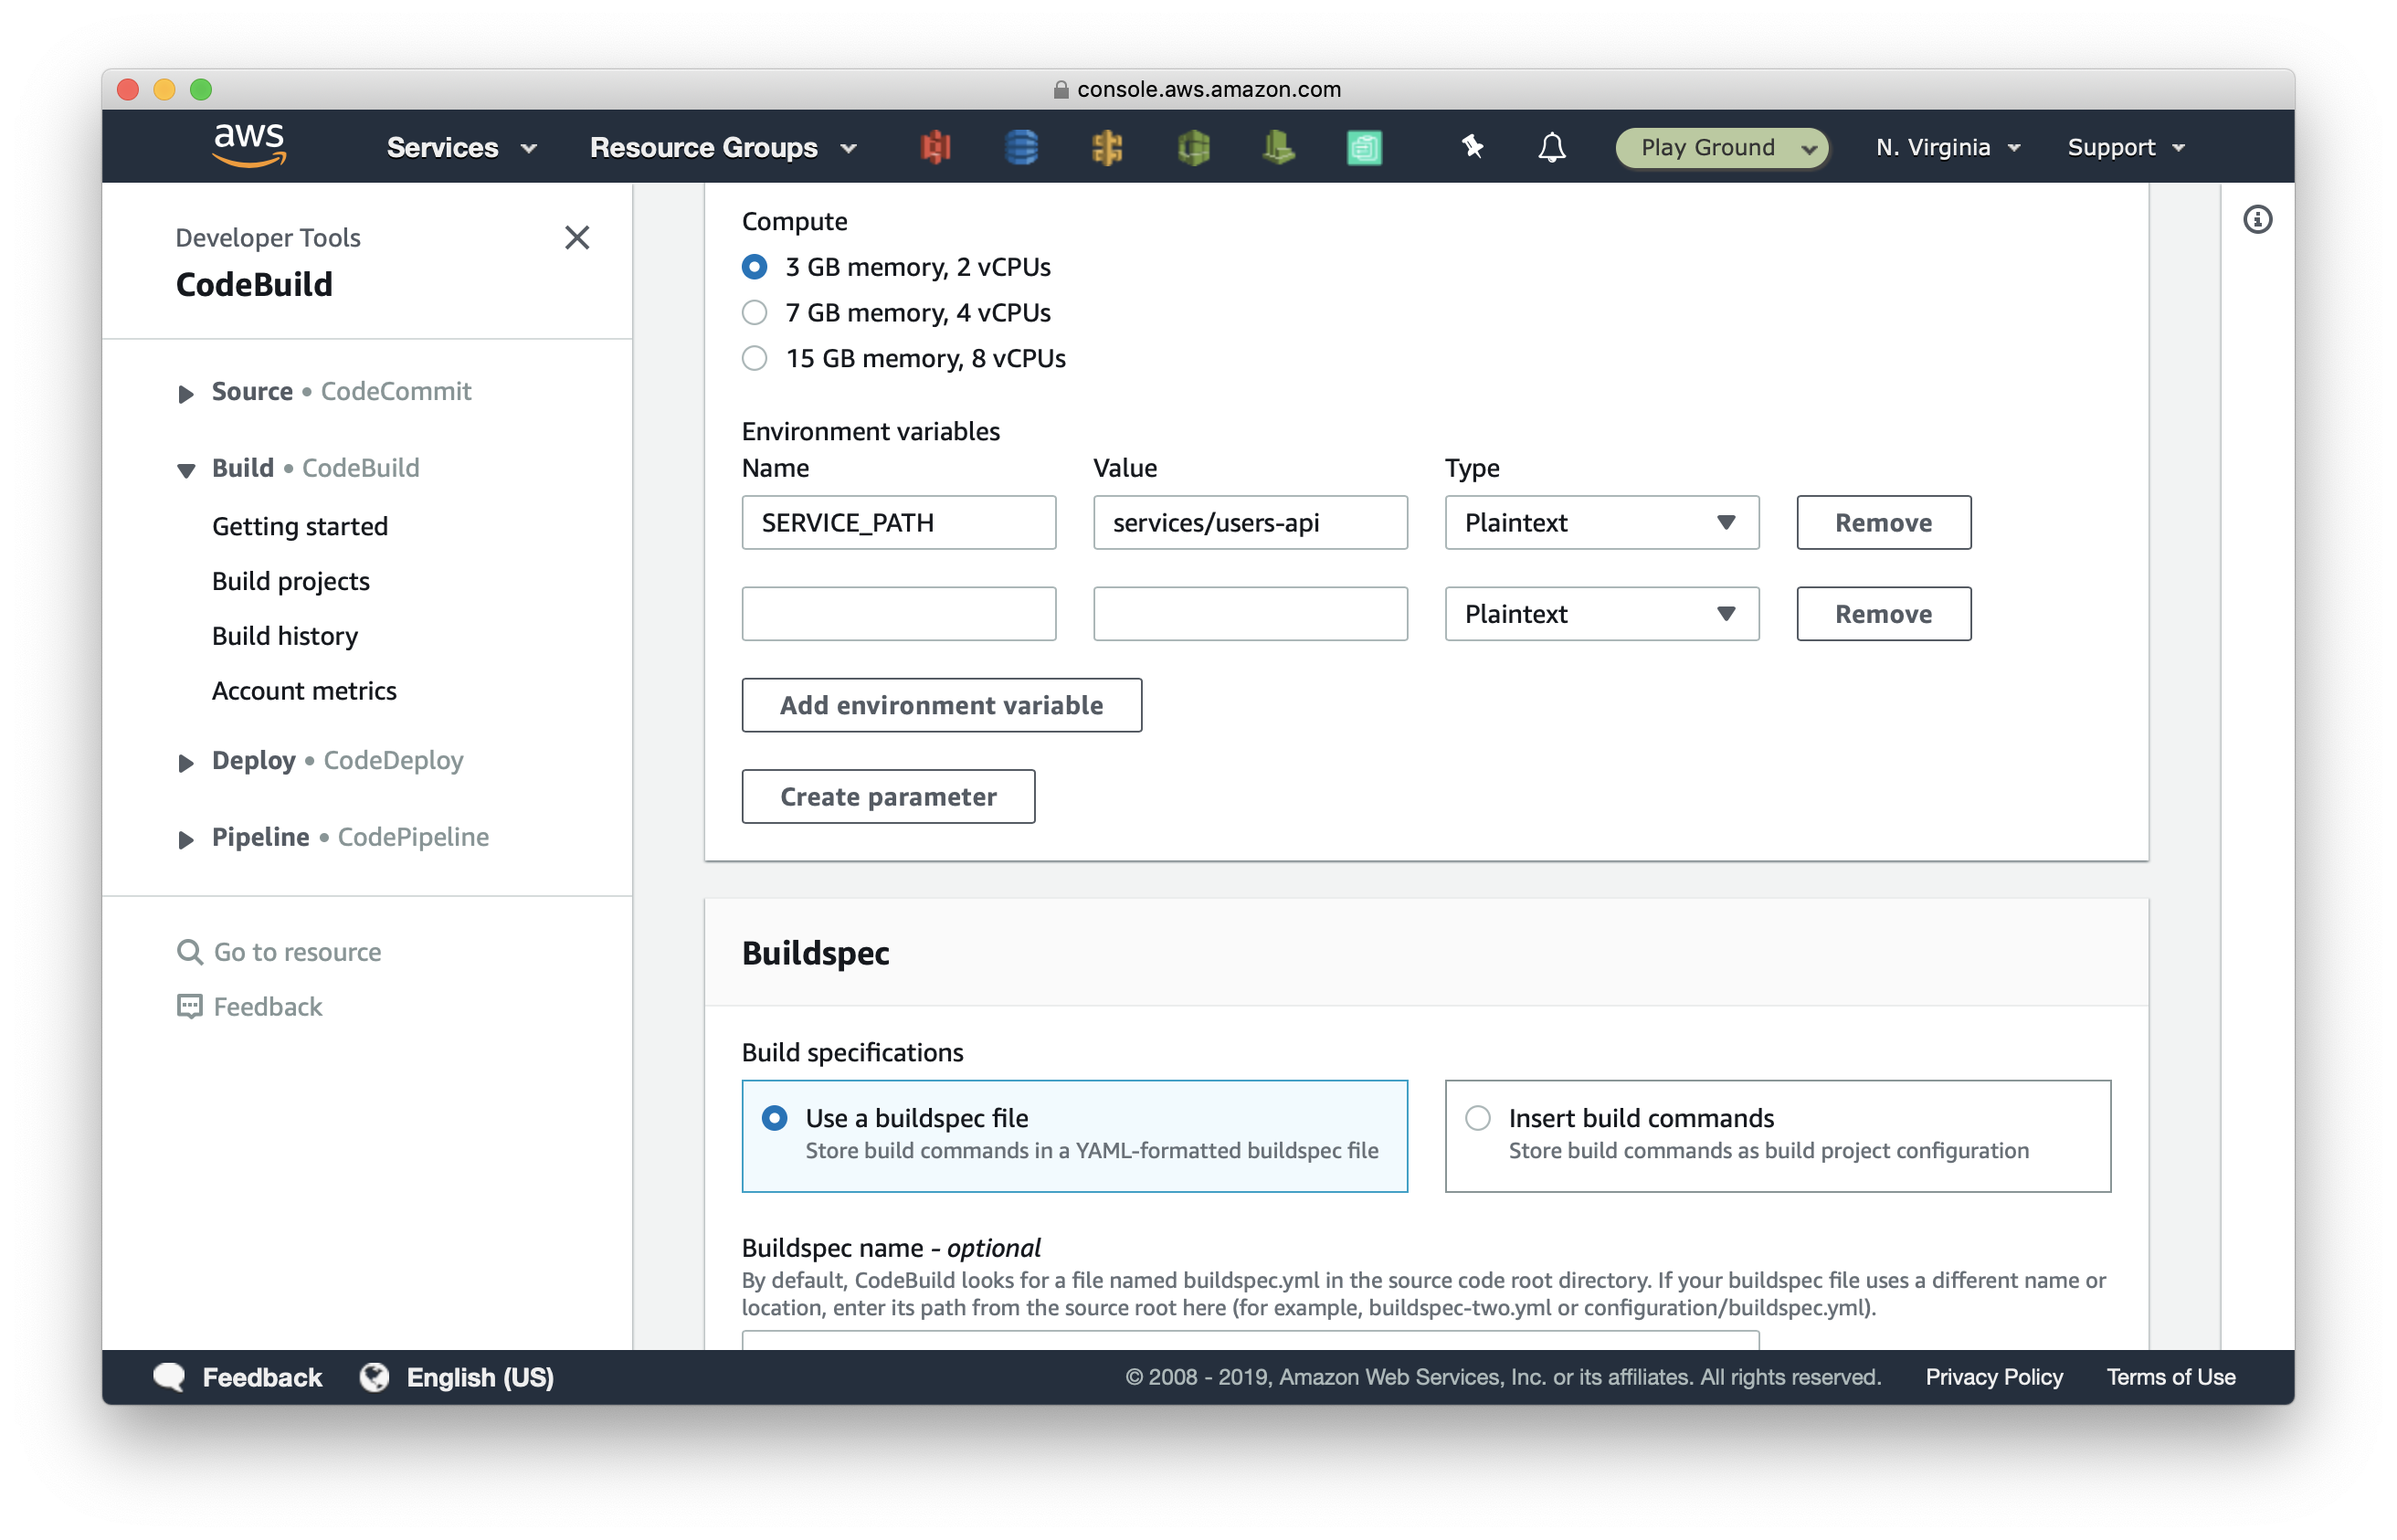
Expand Additional configuration. Add an environment variable with:
- Name: SERVICE_PATH
- Value: services/users-api
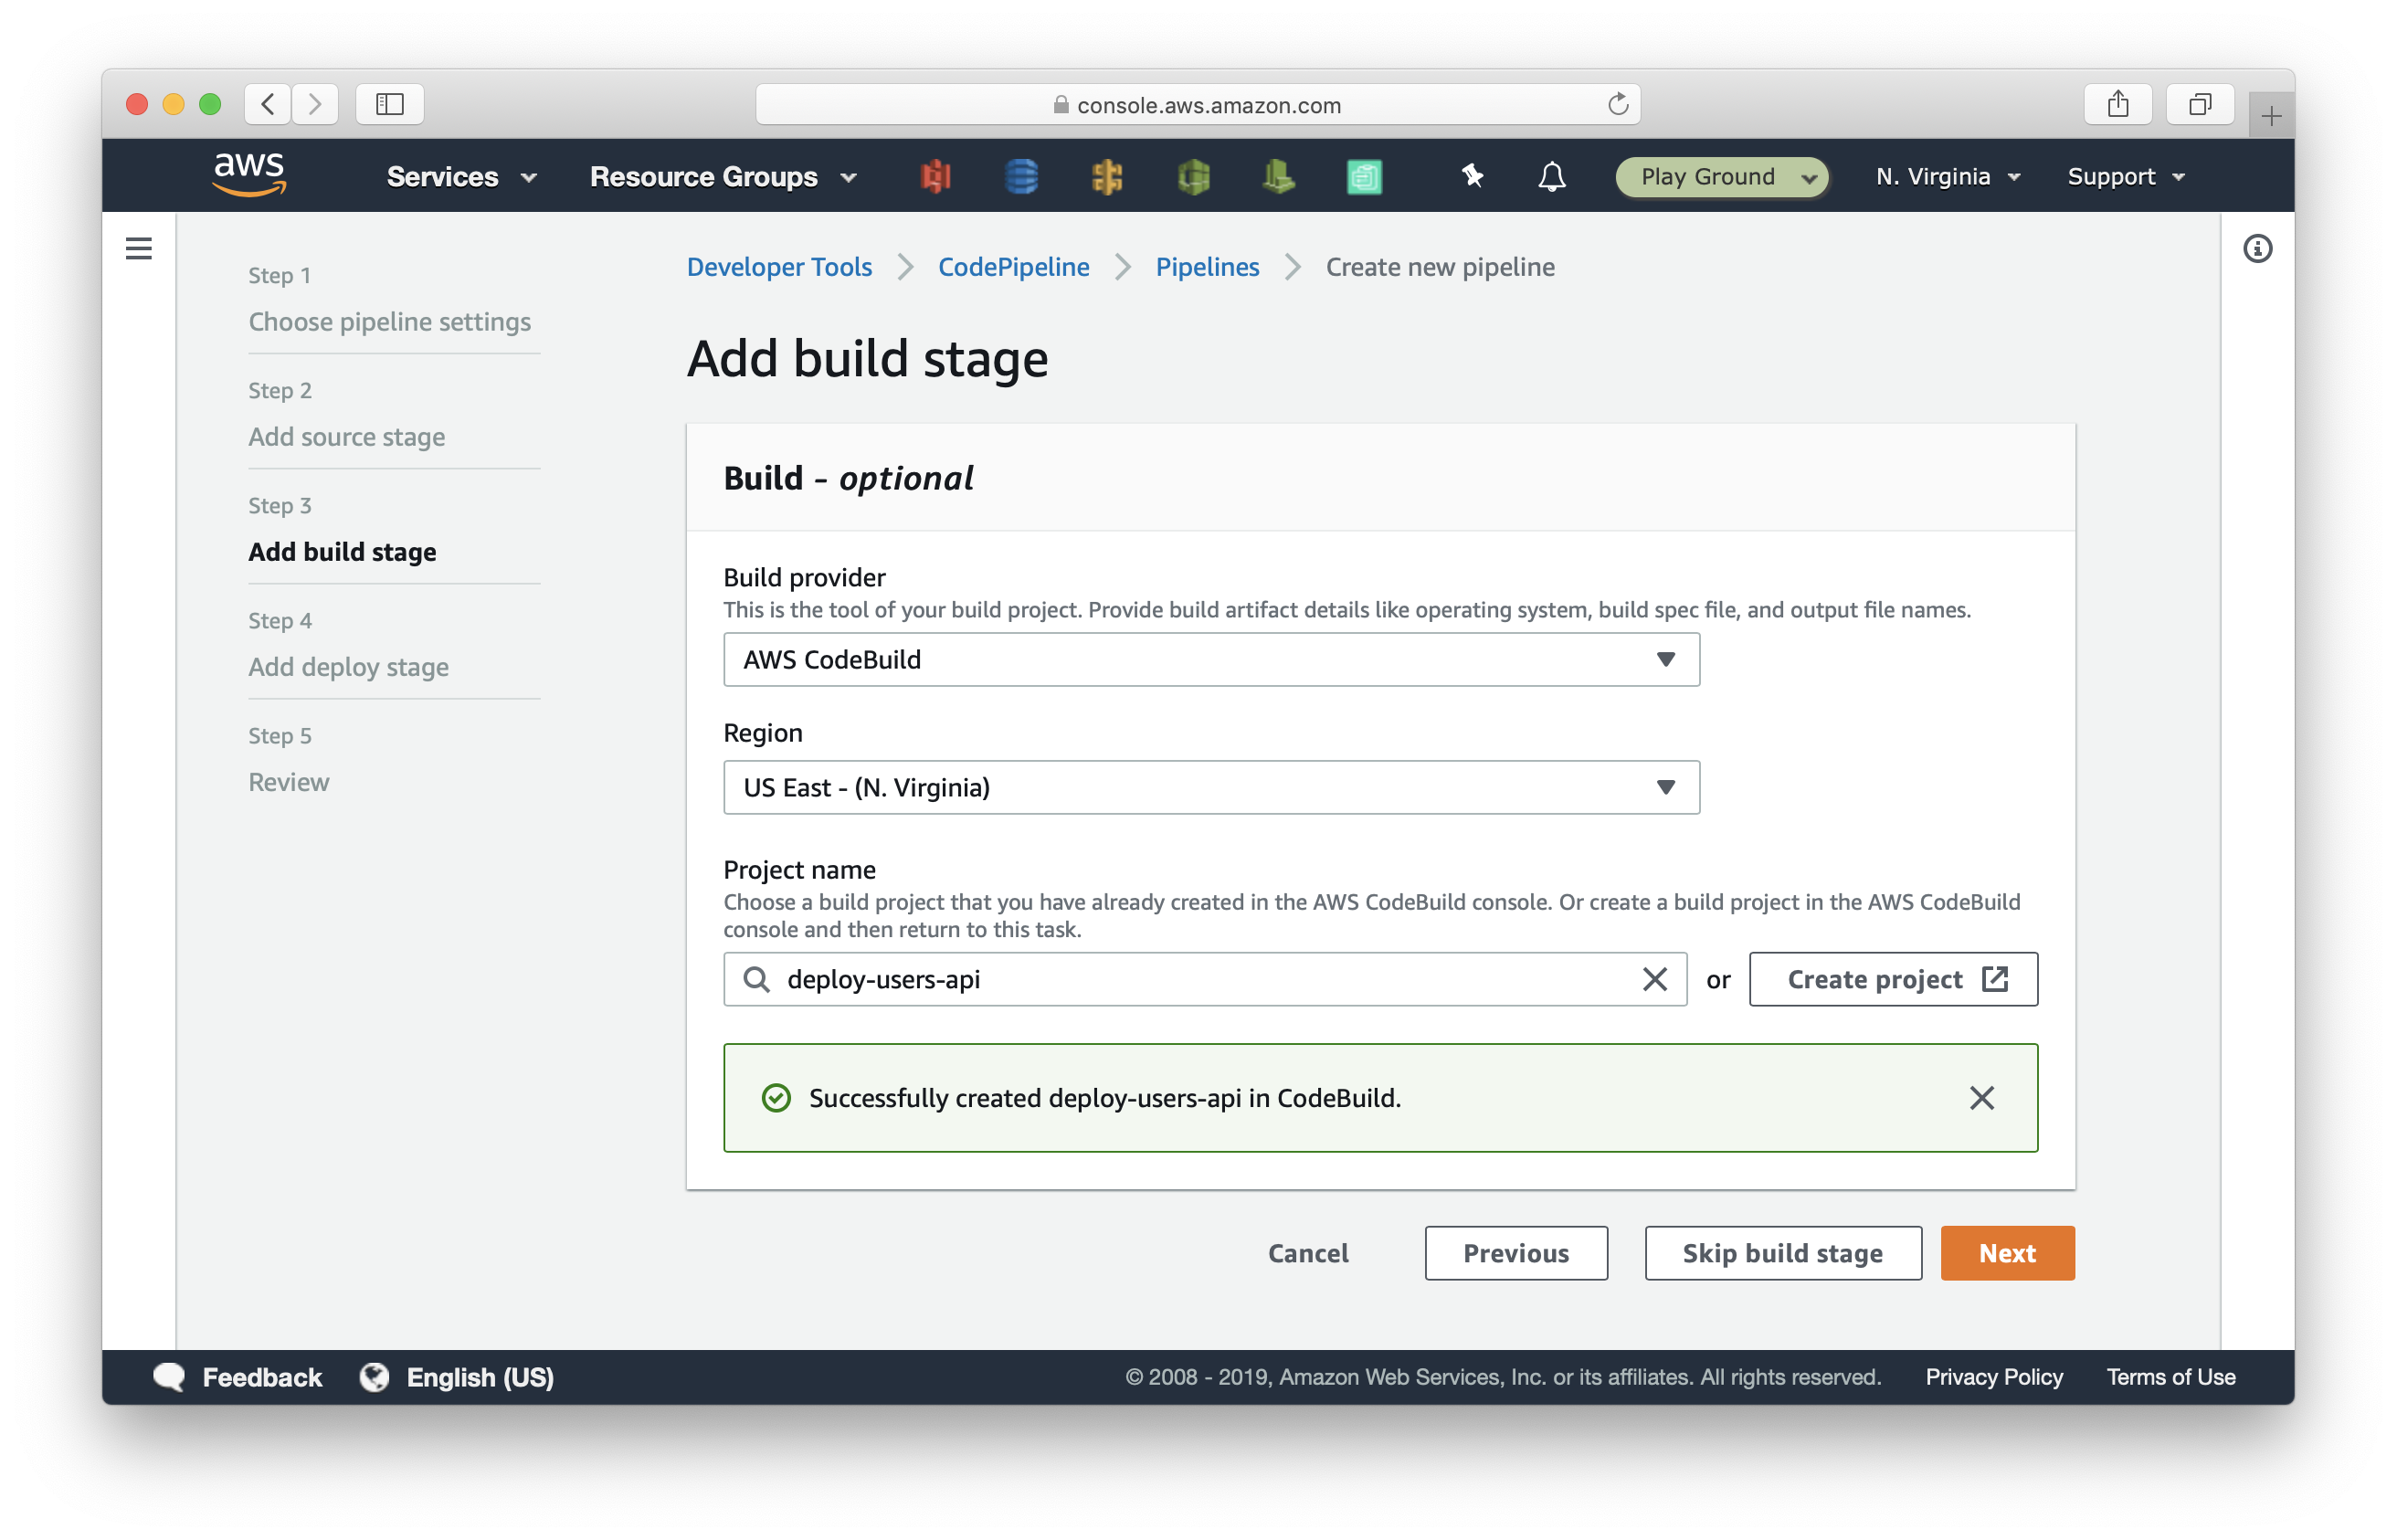
Scroll to the bottom and select Continue to CodePipeline to finish creating the CodeBuild project and continue with creating our pipeline.
The Project name field should be autofilled with the CodeBuild project we just created. Click Next.
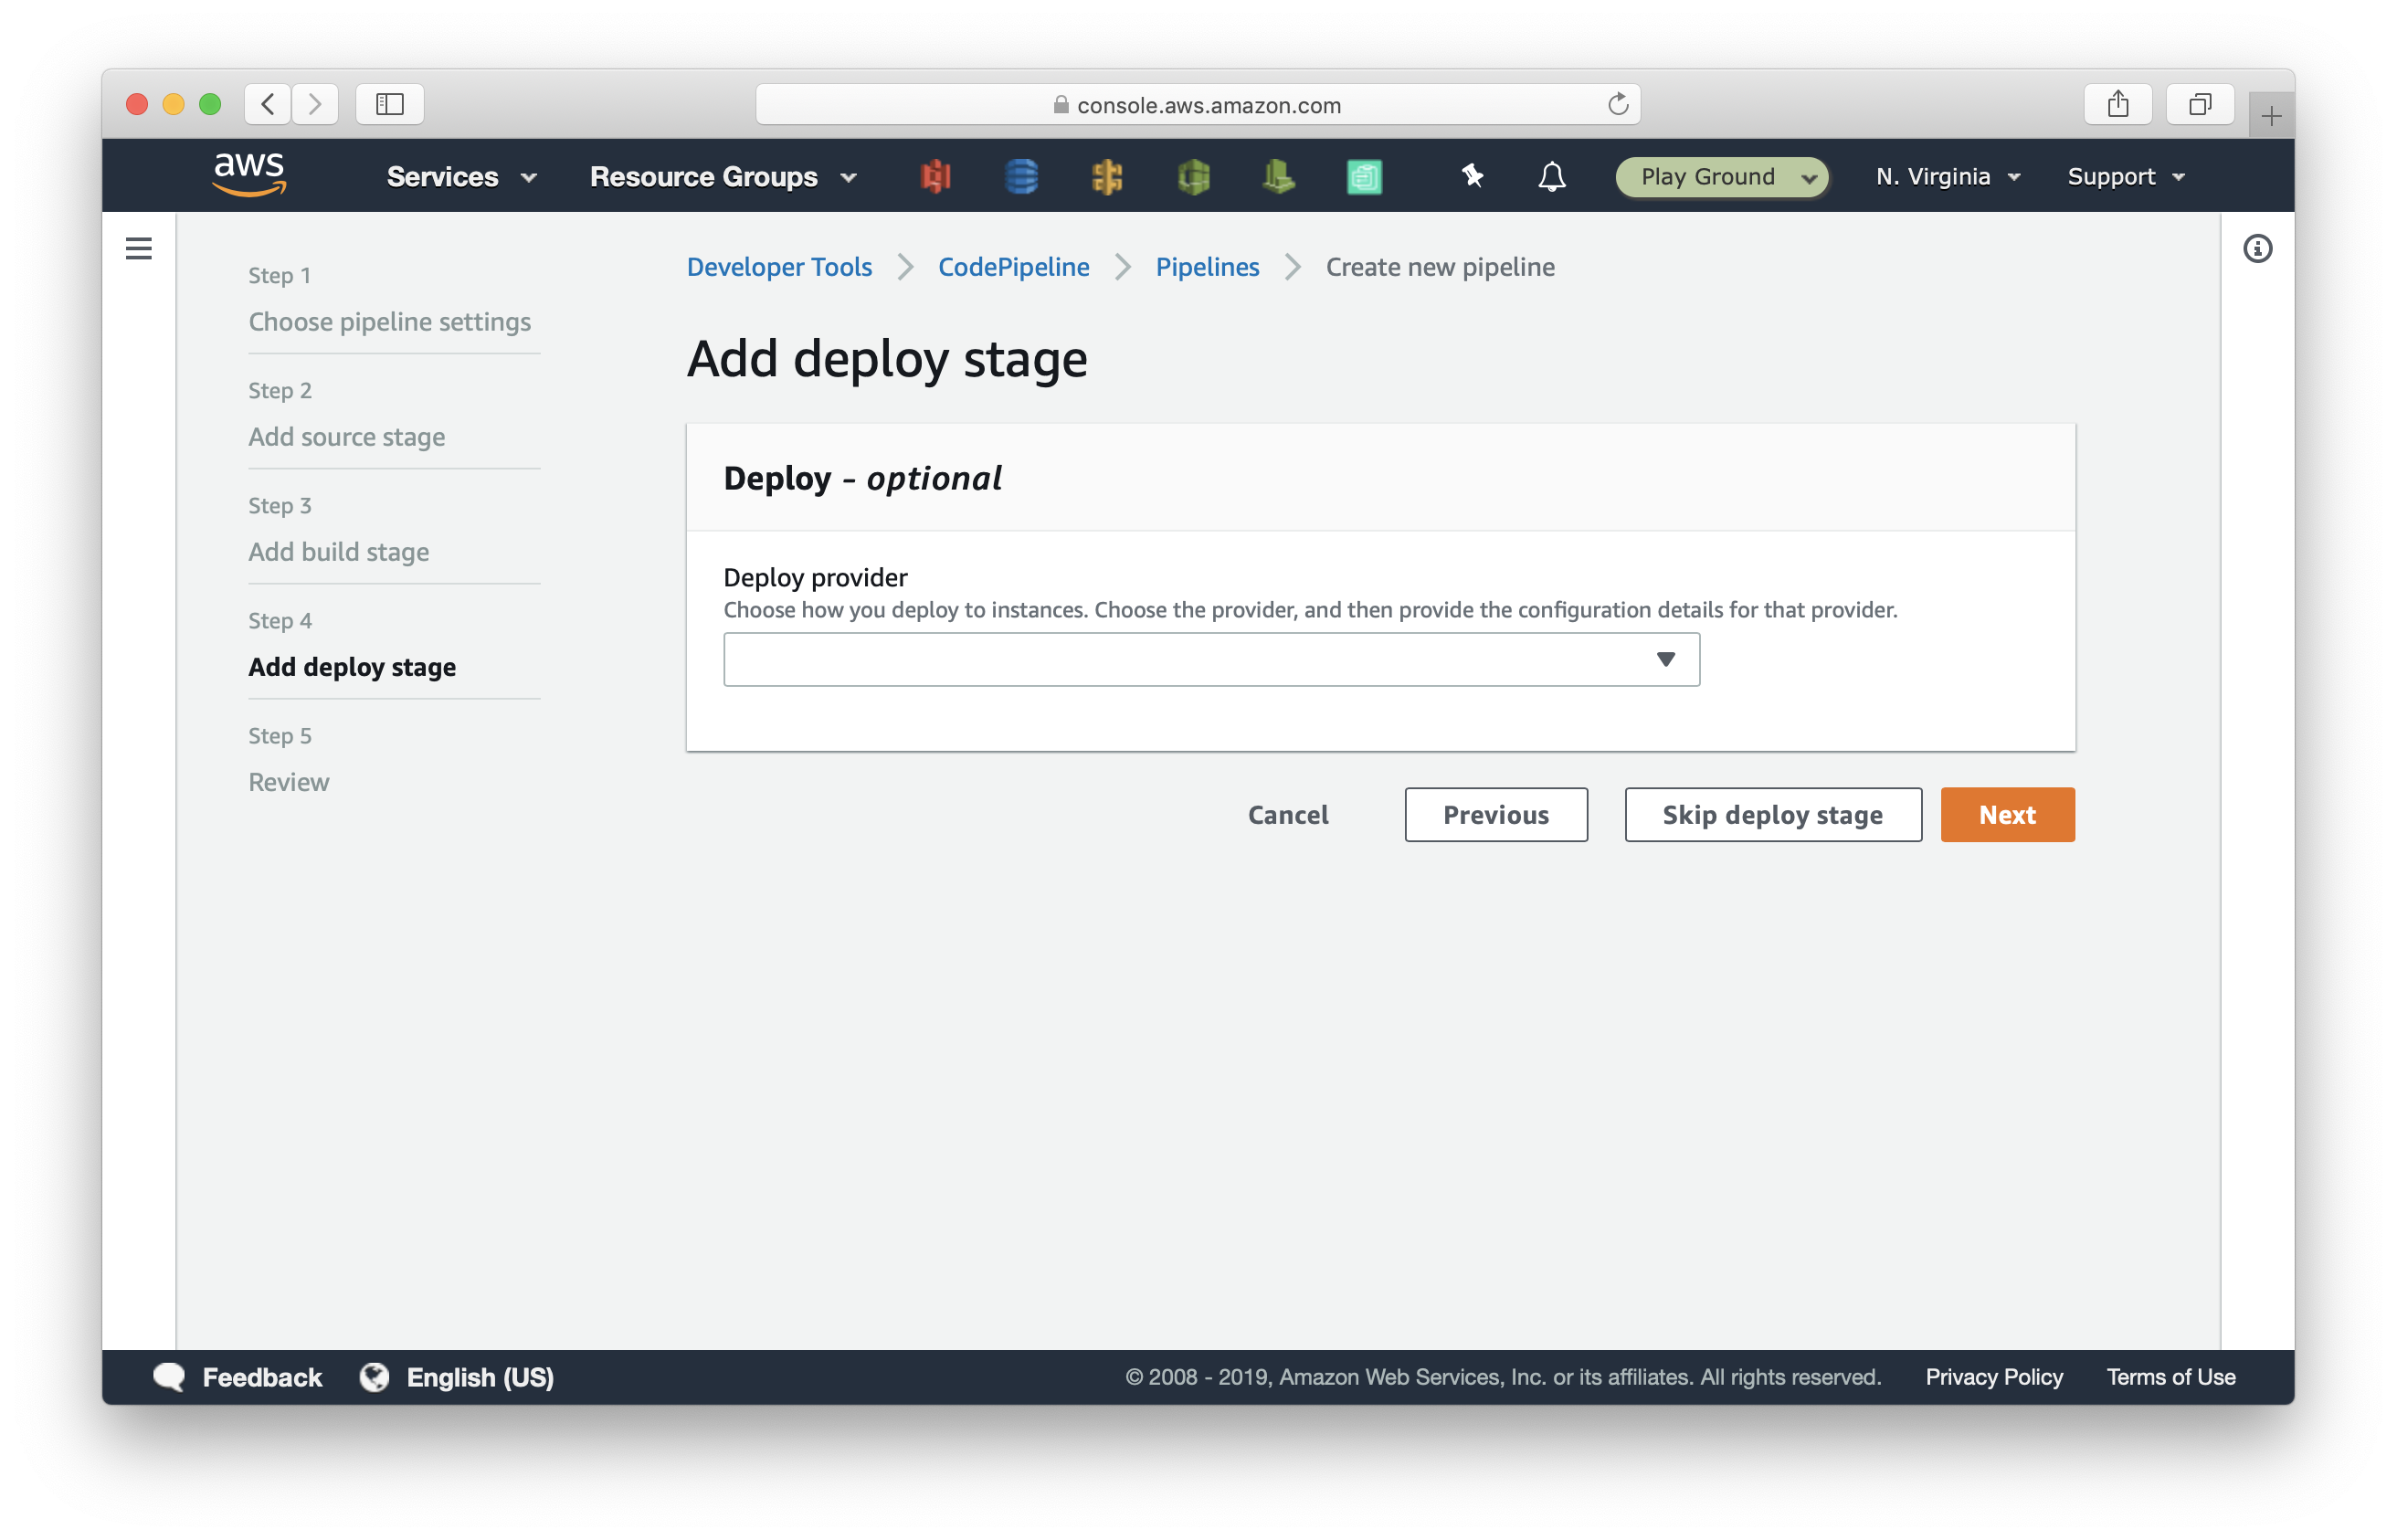
Select Skip deploy stage, and confirm Skip.
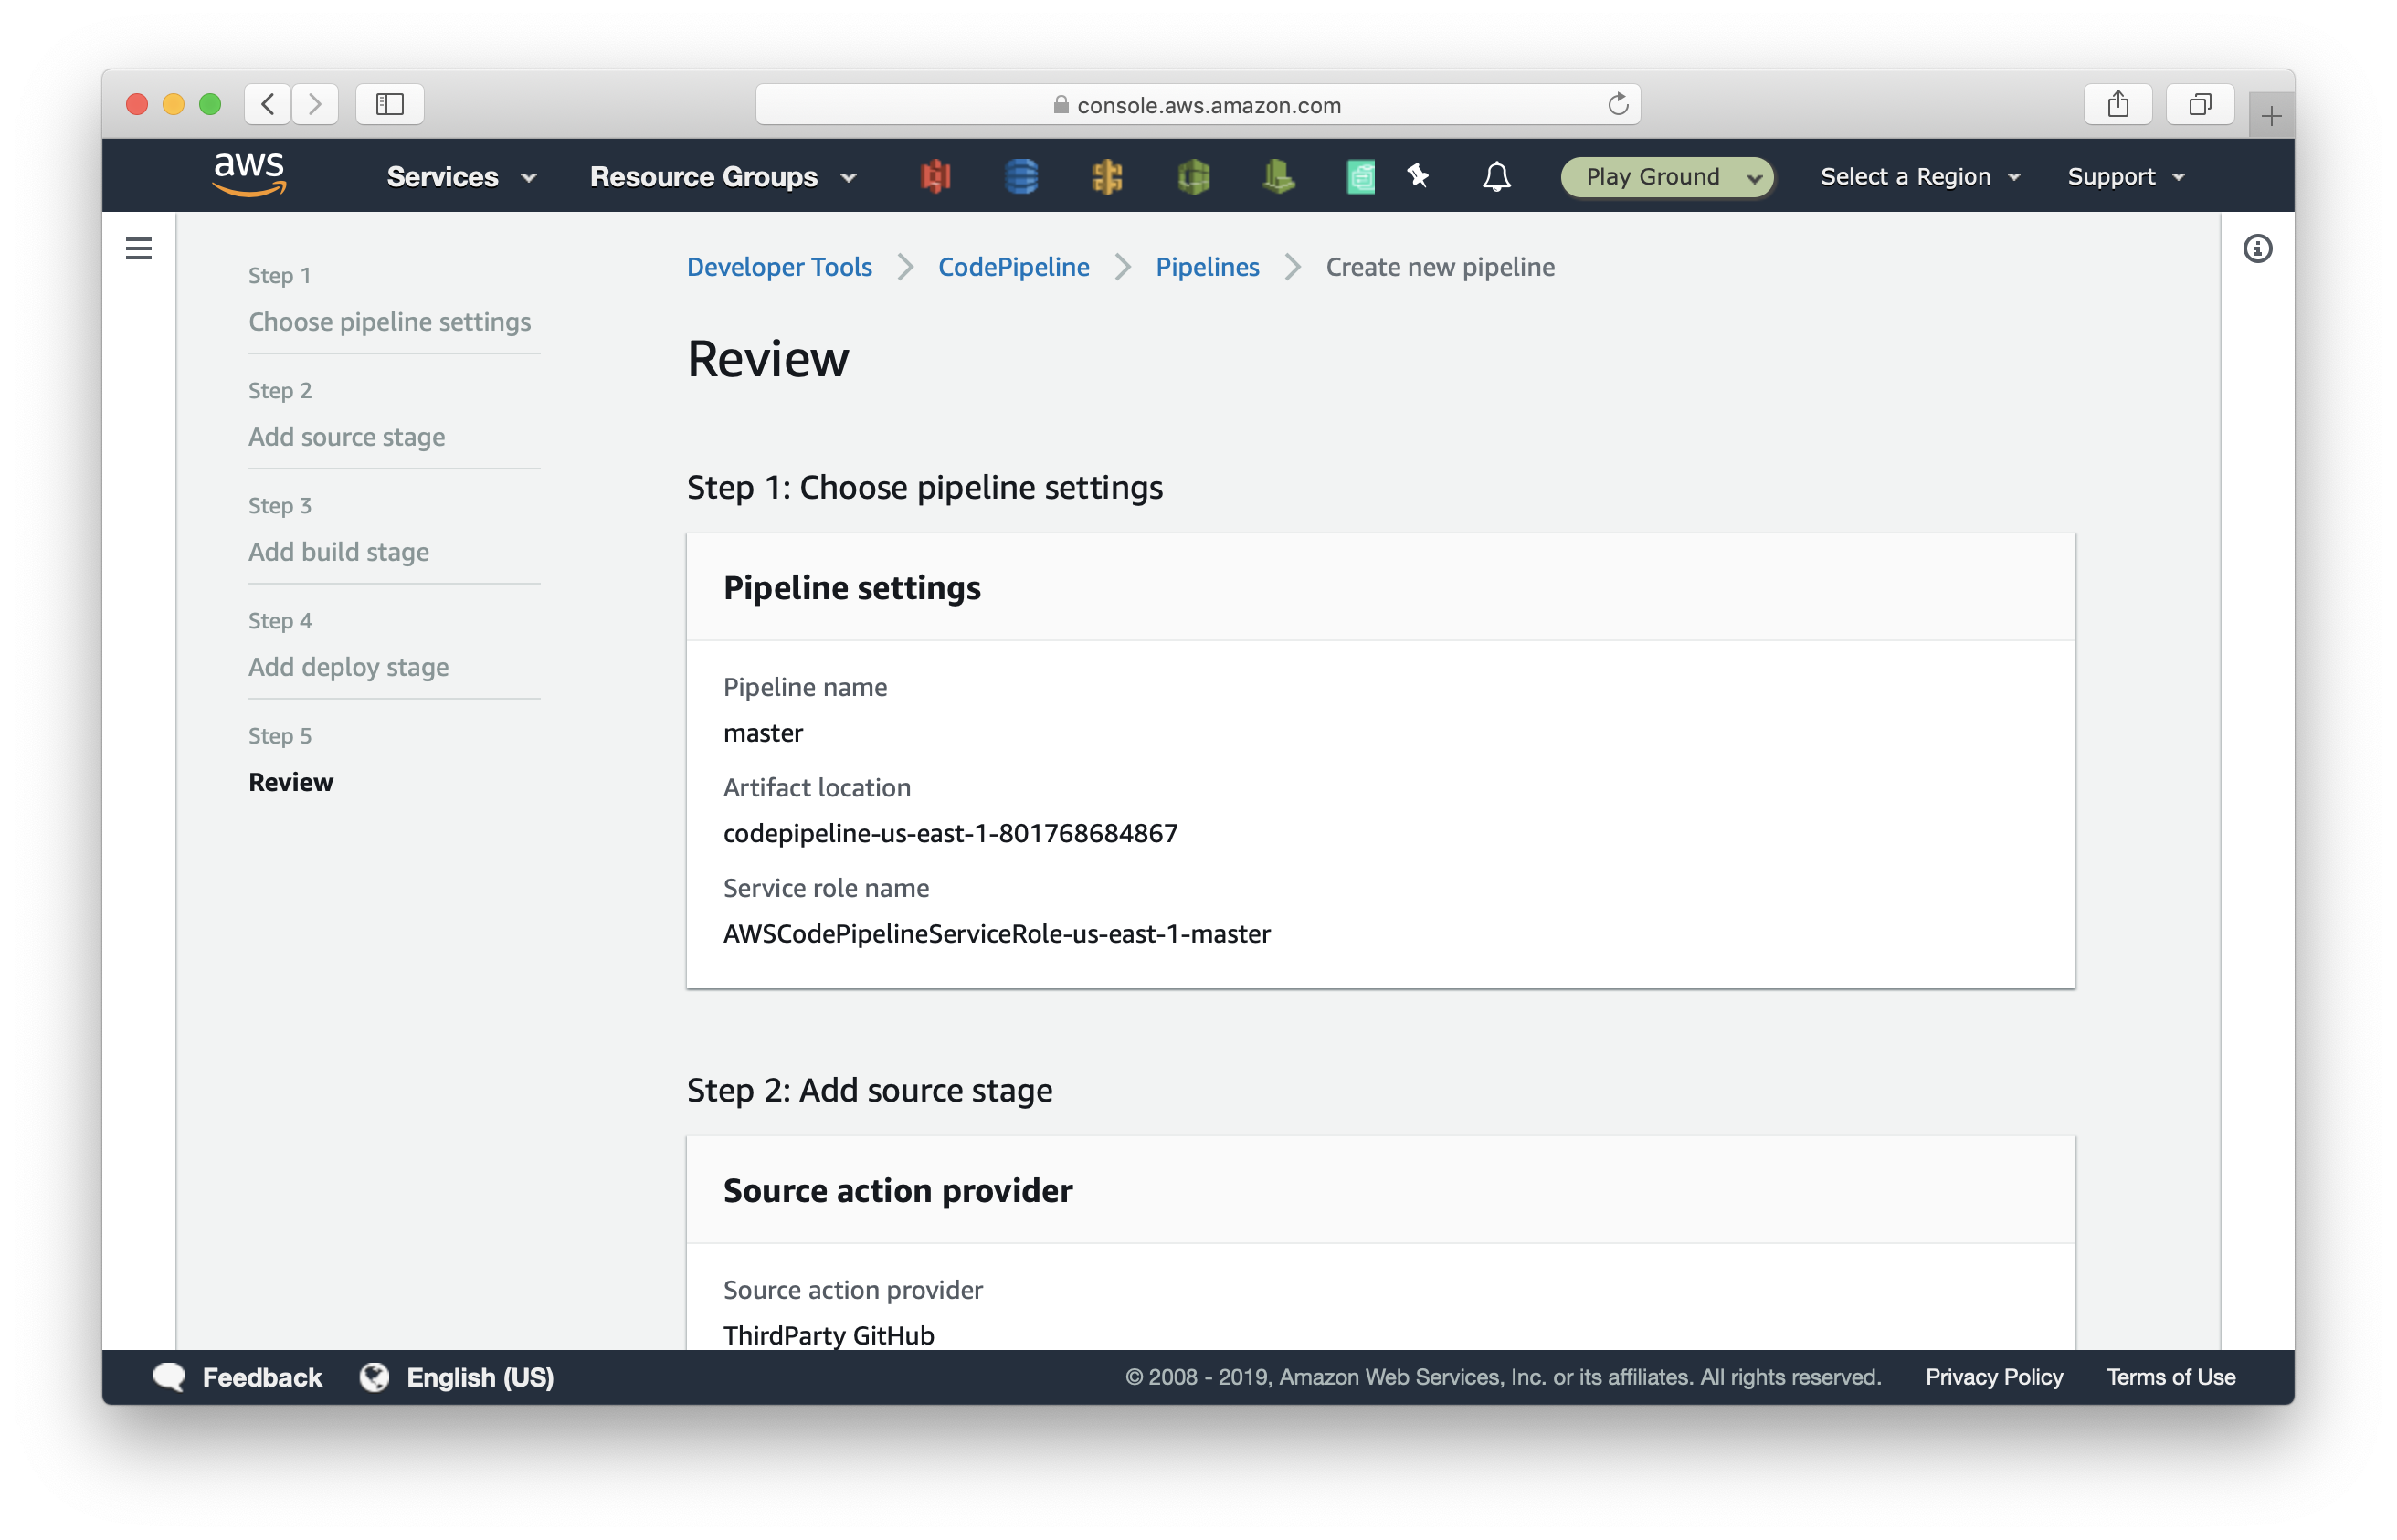
Scroll to the bottom and click Create pipeline.
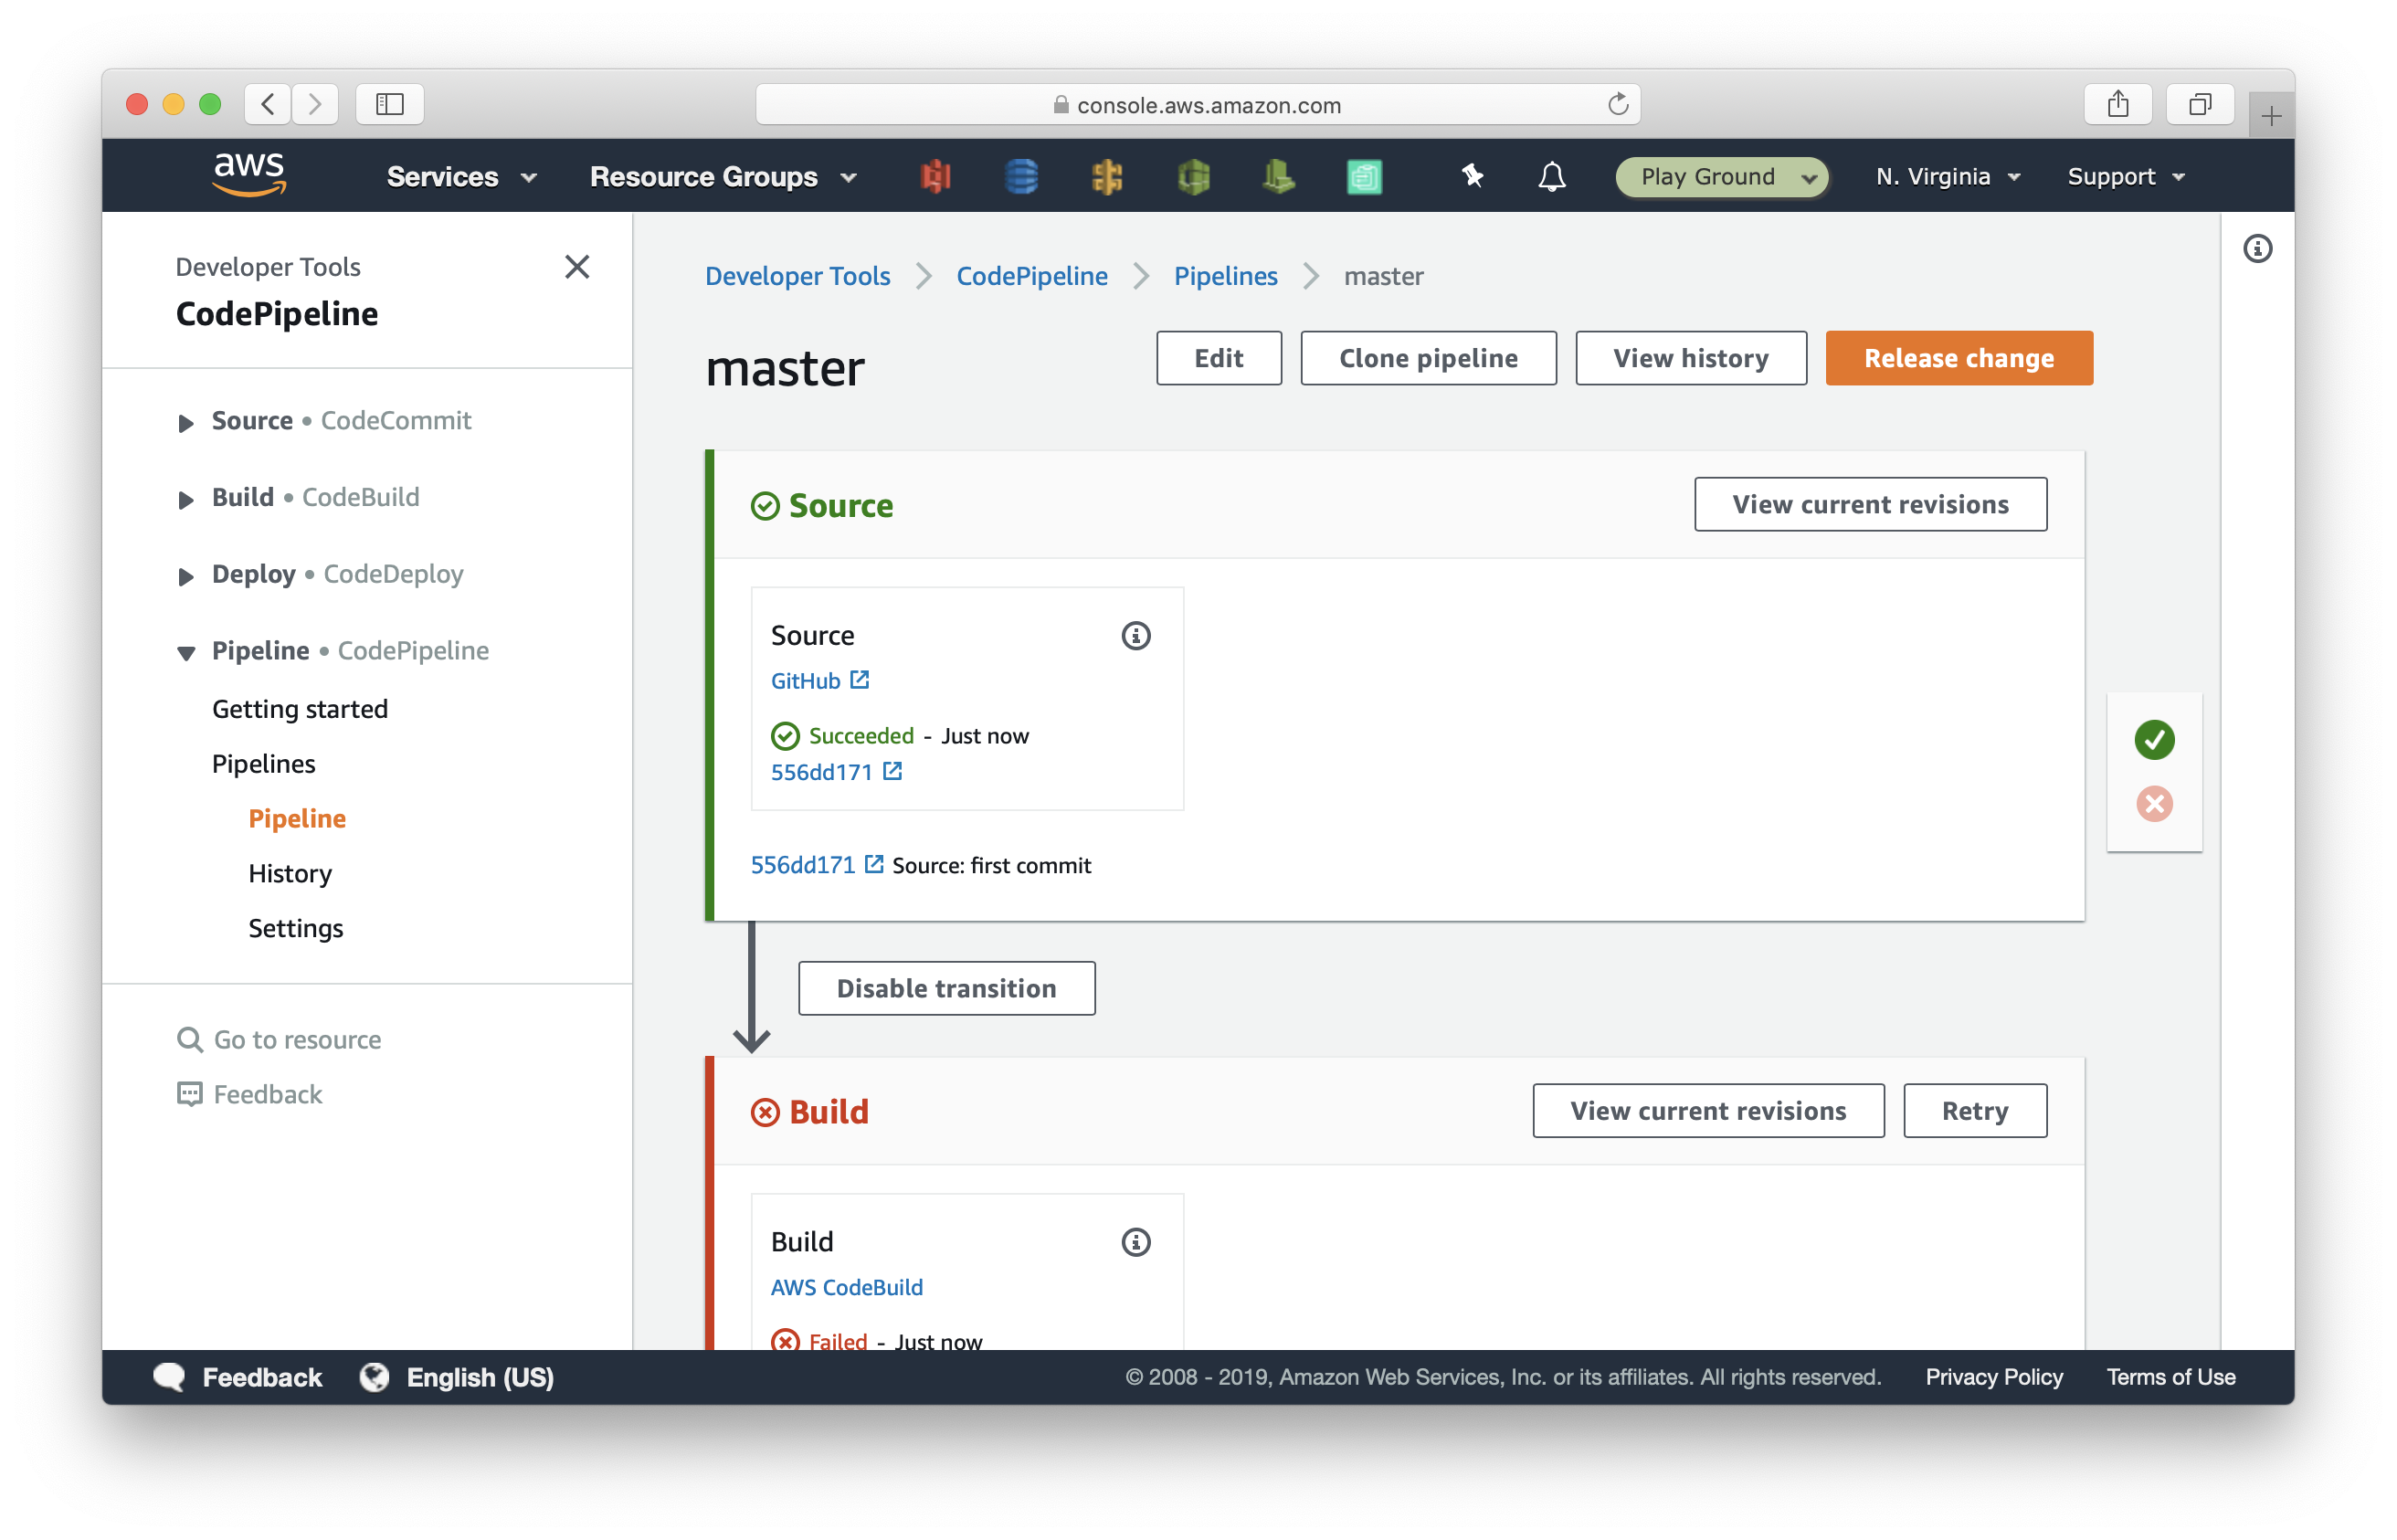
After the pipeline is created, it automatically deploys the latest commit. The Build stage will fail since we have not told CodeBuild how to build and deploy our Serverless service yet.
But before we do that, let’s create two more CodeBuild projects to deploy our posts-api and cron-job services.
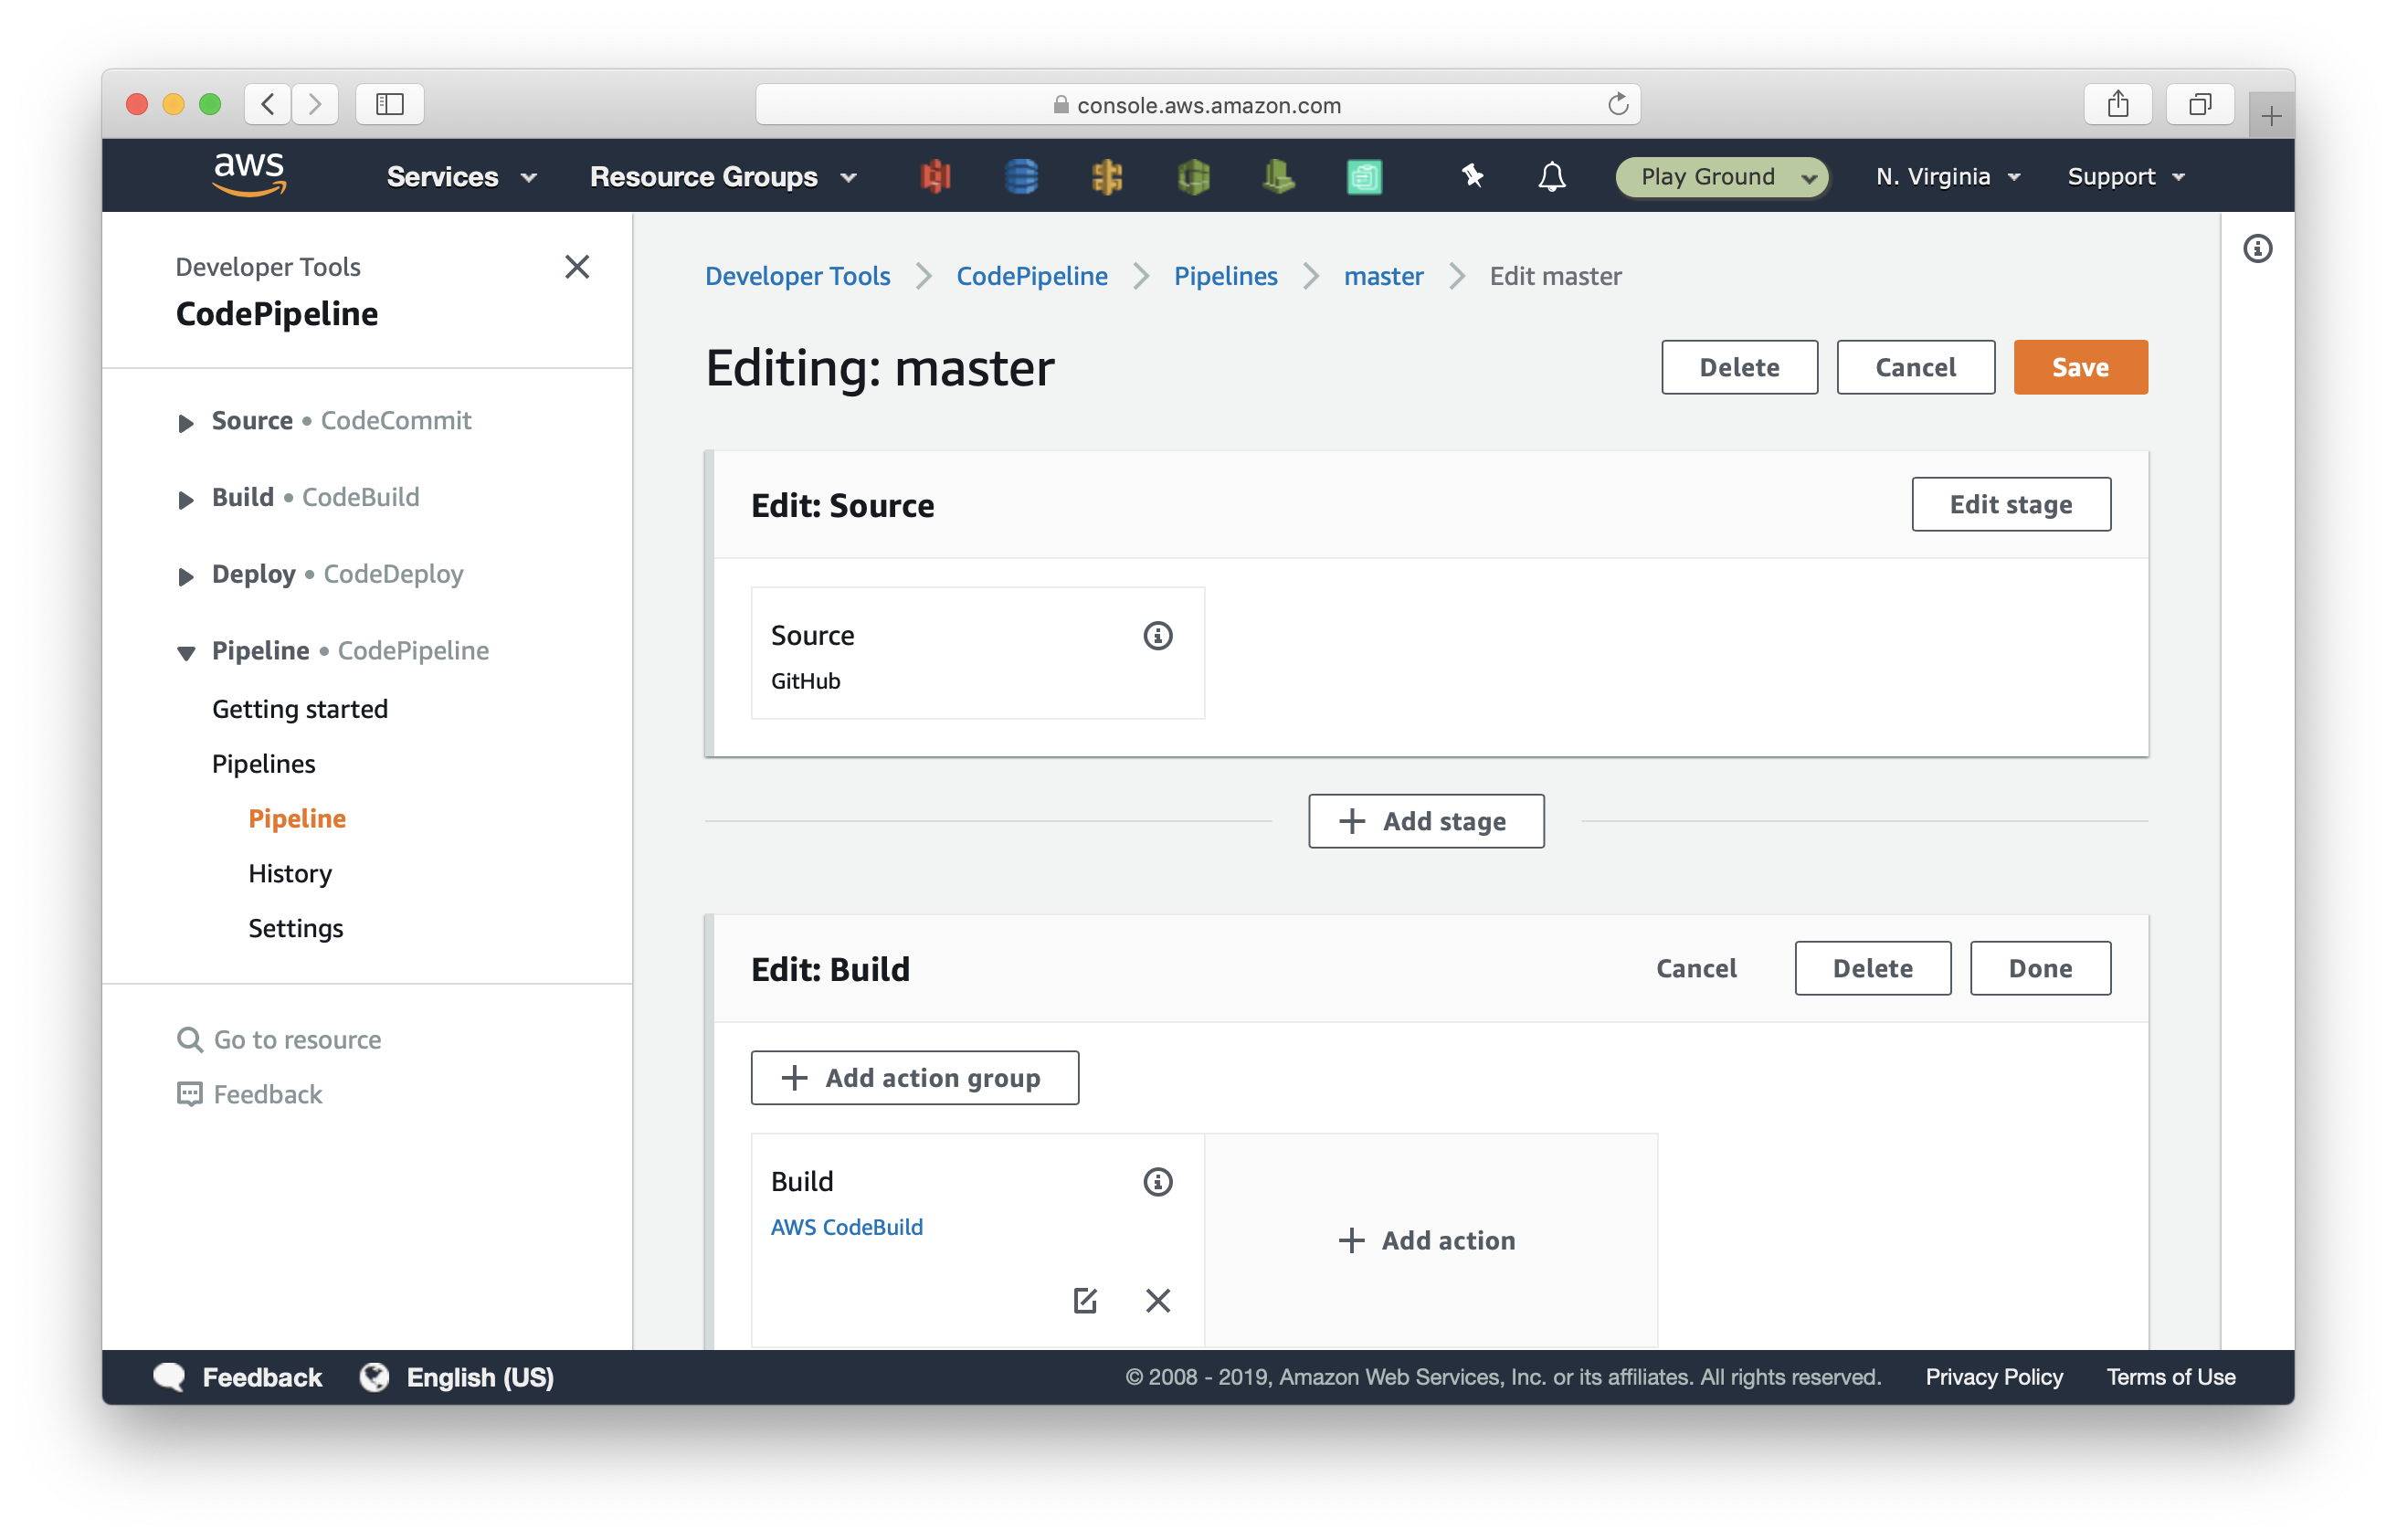
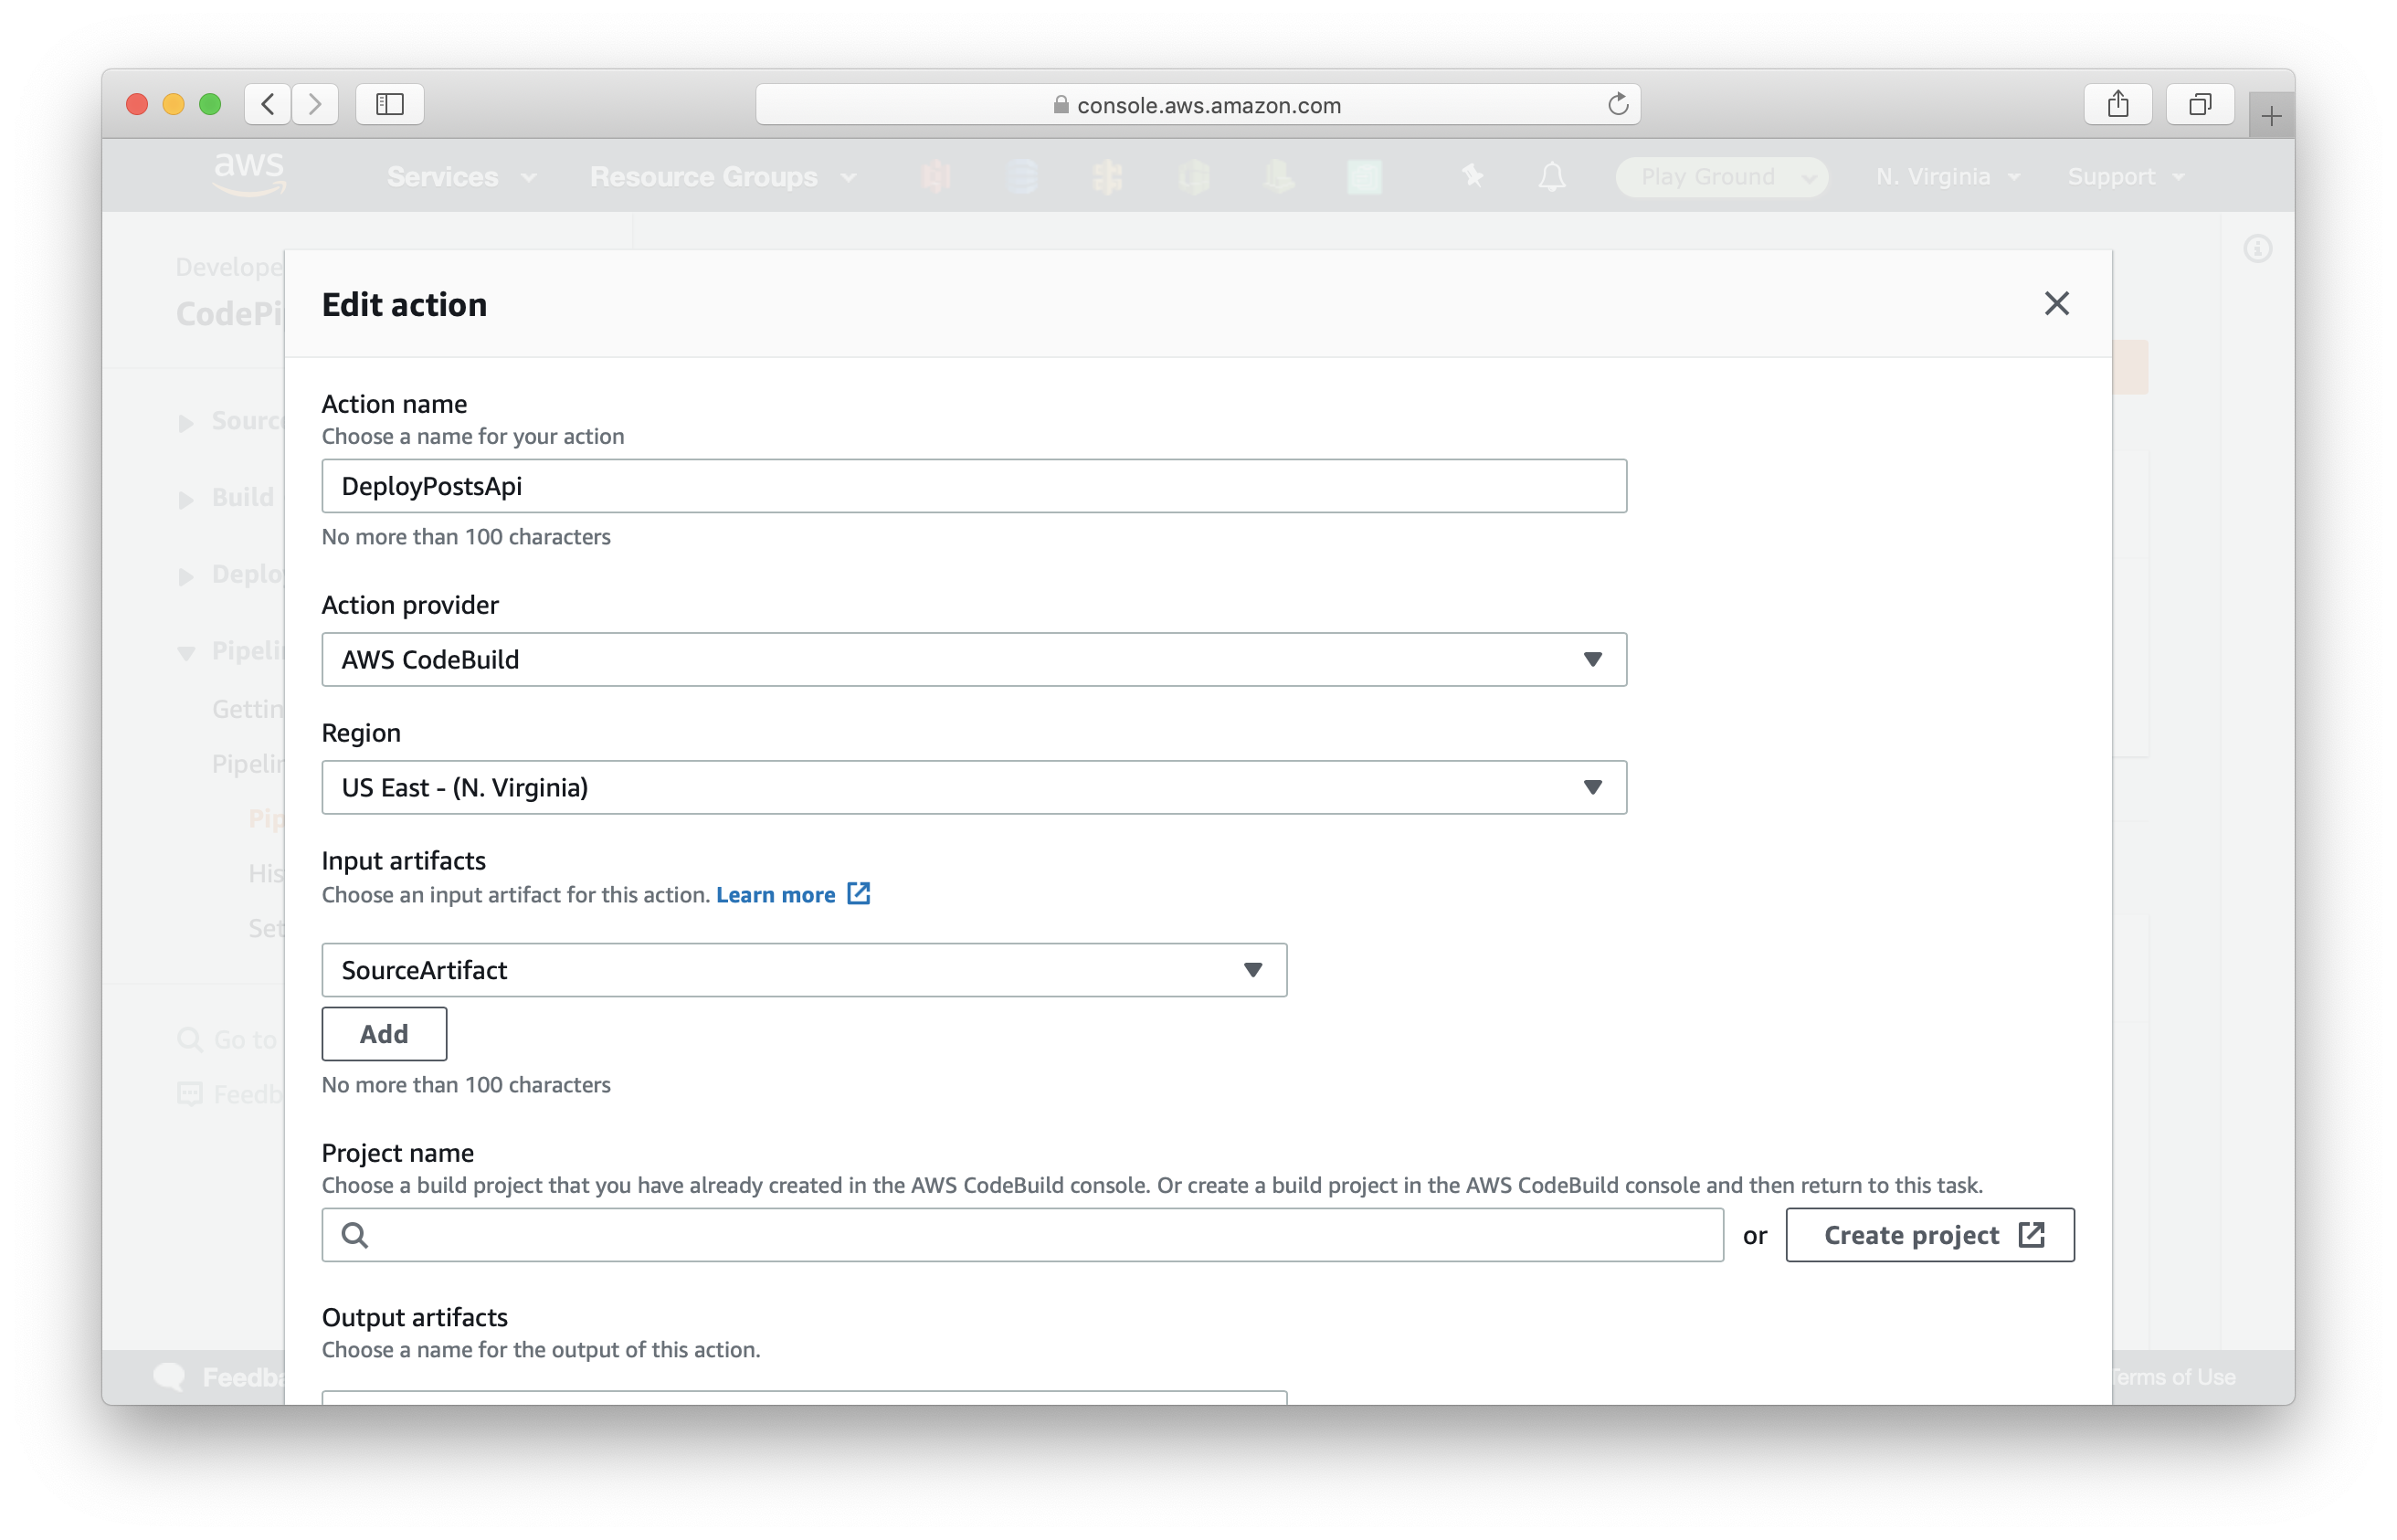
Select Edit at the top > then select Edit stage for the Build stage at the bottom. And click + Add action.
Fill out the form with the following:
- Action name: DeployPostsApi
- Action provider: AWS CodeBuild
- Input artifact: SourceArtifact
Then click Create project.
Repeat the same steps to create a CodeBuild project named deploy-posts-api with the same configuration. The only difference is that the environment variable is set it to:
- Name: SERVICE_PATH
- Value: services/posts-api
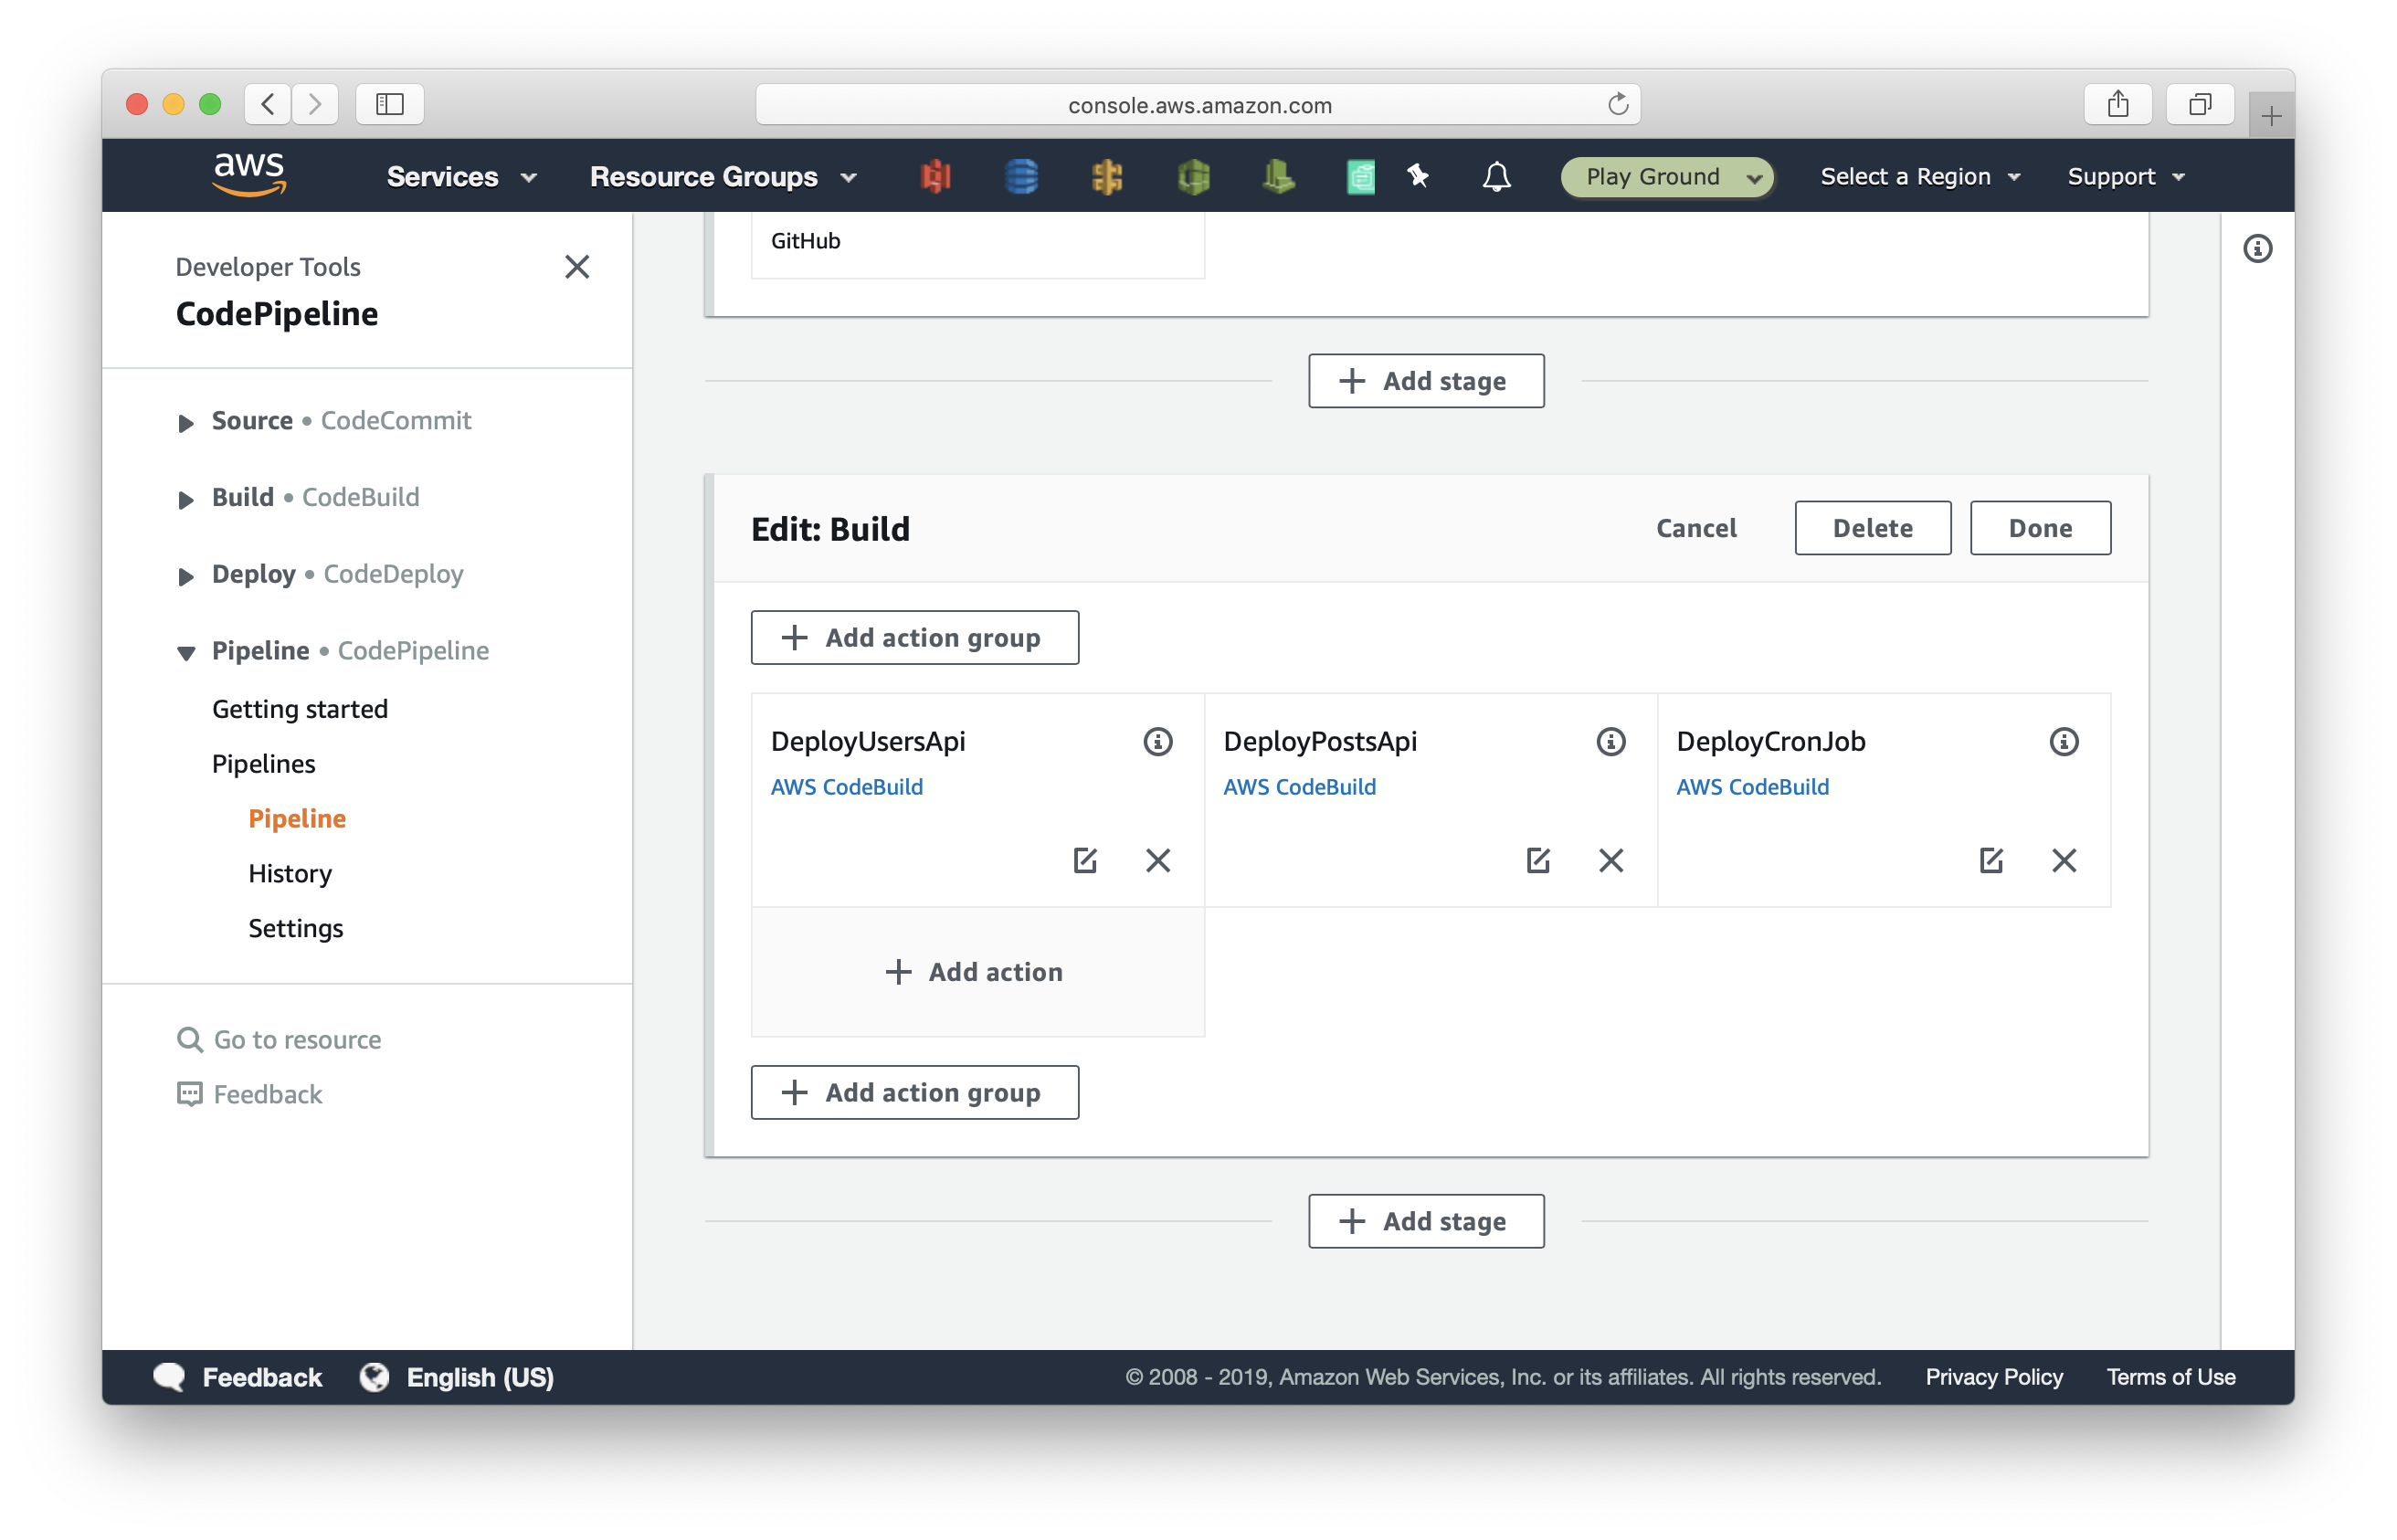
After the action is created, your pipeline should look like:

Select + Add action again and create a new action named DeployCronJob. Name the CodeBuild project deploy-cron-job with environment variable:
- Name: SERVICE_PATH
- Value: services/cron-job
To keep the naming consistent, rename the Build action to DeployUsersApi. Now your pipleline should look like:
Scroll up and click Save and confirm.
Go to the cloned repository and click on Create new file.

Name the new file buildspec.yml and paste the following:
version: 0.2

phases:
  install:
    runtime-versions:
      nodejs: 10
    commands:
      - npm install -g serverless
      - npm install
      - cd ${SERVICE_PATH} && npm install && cd -
  build:
    commands:
      - cd ${SERVICE_PATH} && serverless deploy -s ${CODEBUILD_INITIATOR##*/} && cd -

cache:
  paths:
    - node_modules
    - ${SERVICE_PATH}/node_modules
Let’s quickly go over what we are doing here:
- We created a build template that will read the path of a service from the environment variables we set earlier.
- The build job will run 3 times, once for each service.
- The build job does an
npm installin the repo’s root directory and in the service subdirectory. - The build job then goes into the service directory and runs
serverless deployusing the pipeline name (also the branch name) as the stage name. - As a side note, we also specified that we want to cache the
node_modules/directory in both the root and the service directory for faster deployment.
Next, scroll to the bottom and click Commit new file.
Back in CodePipeline, you’ll see the pipeline is currently running.
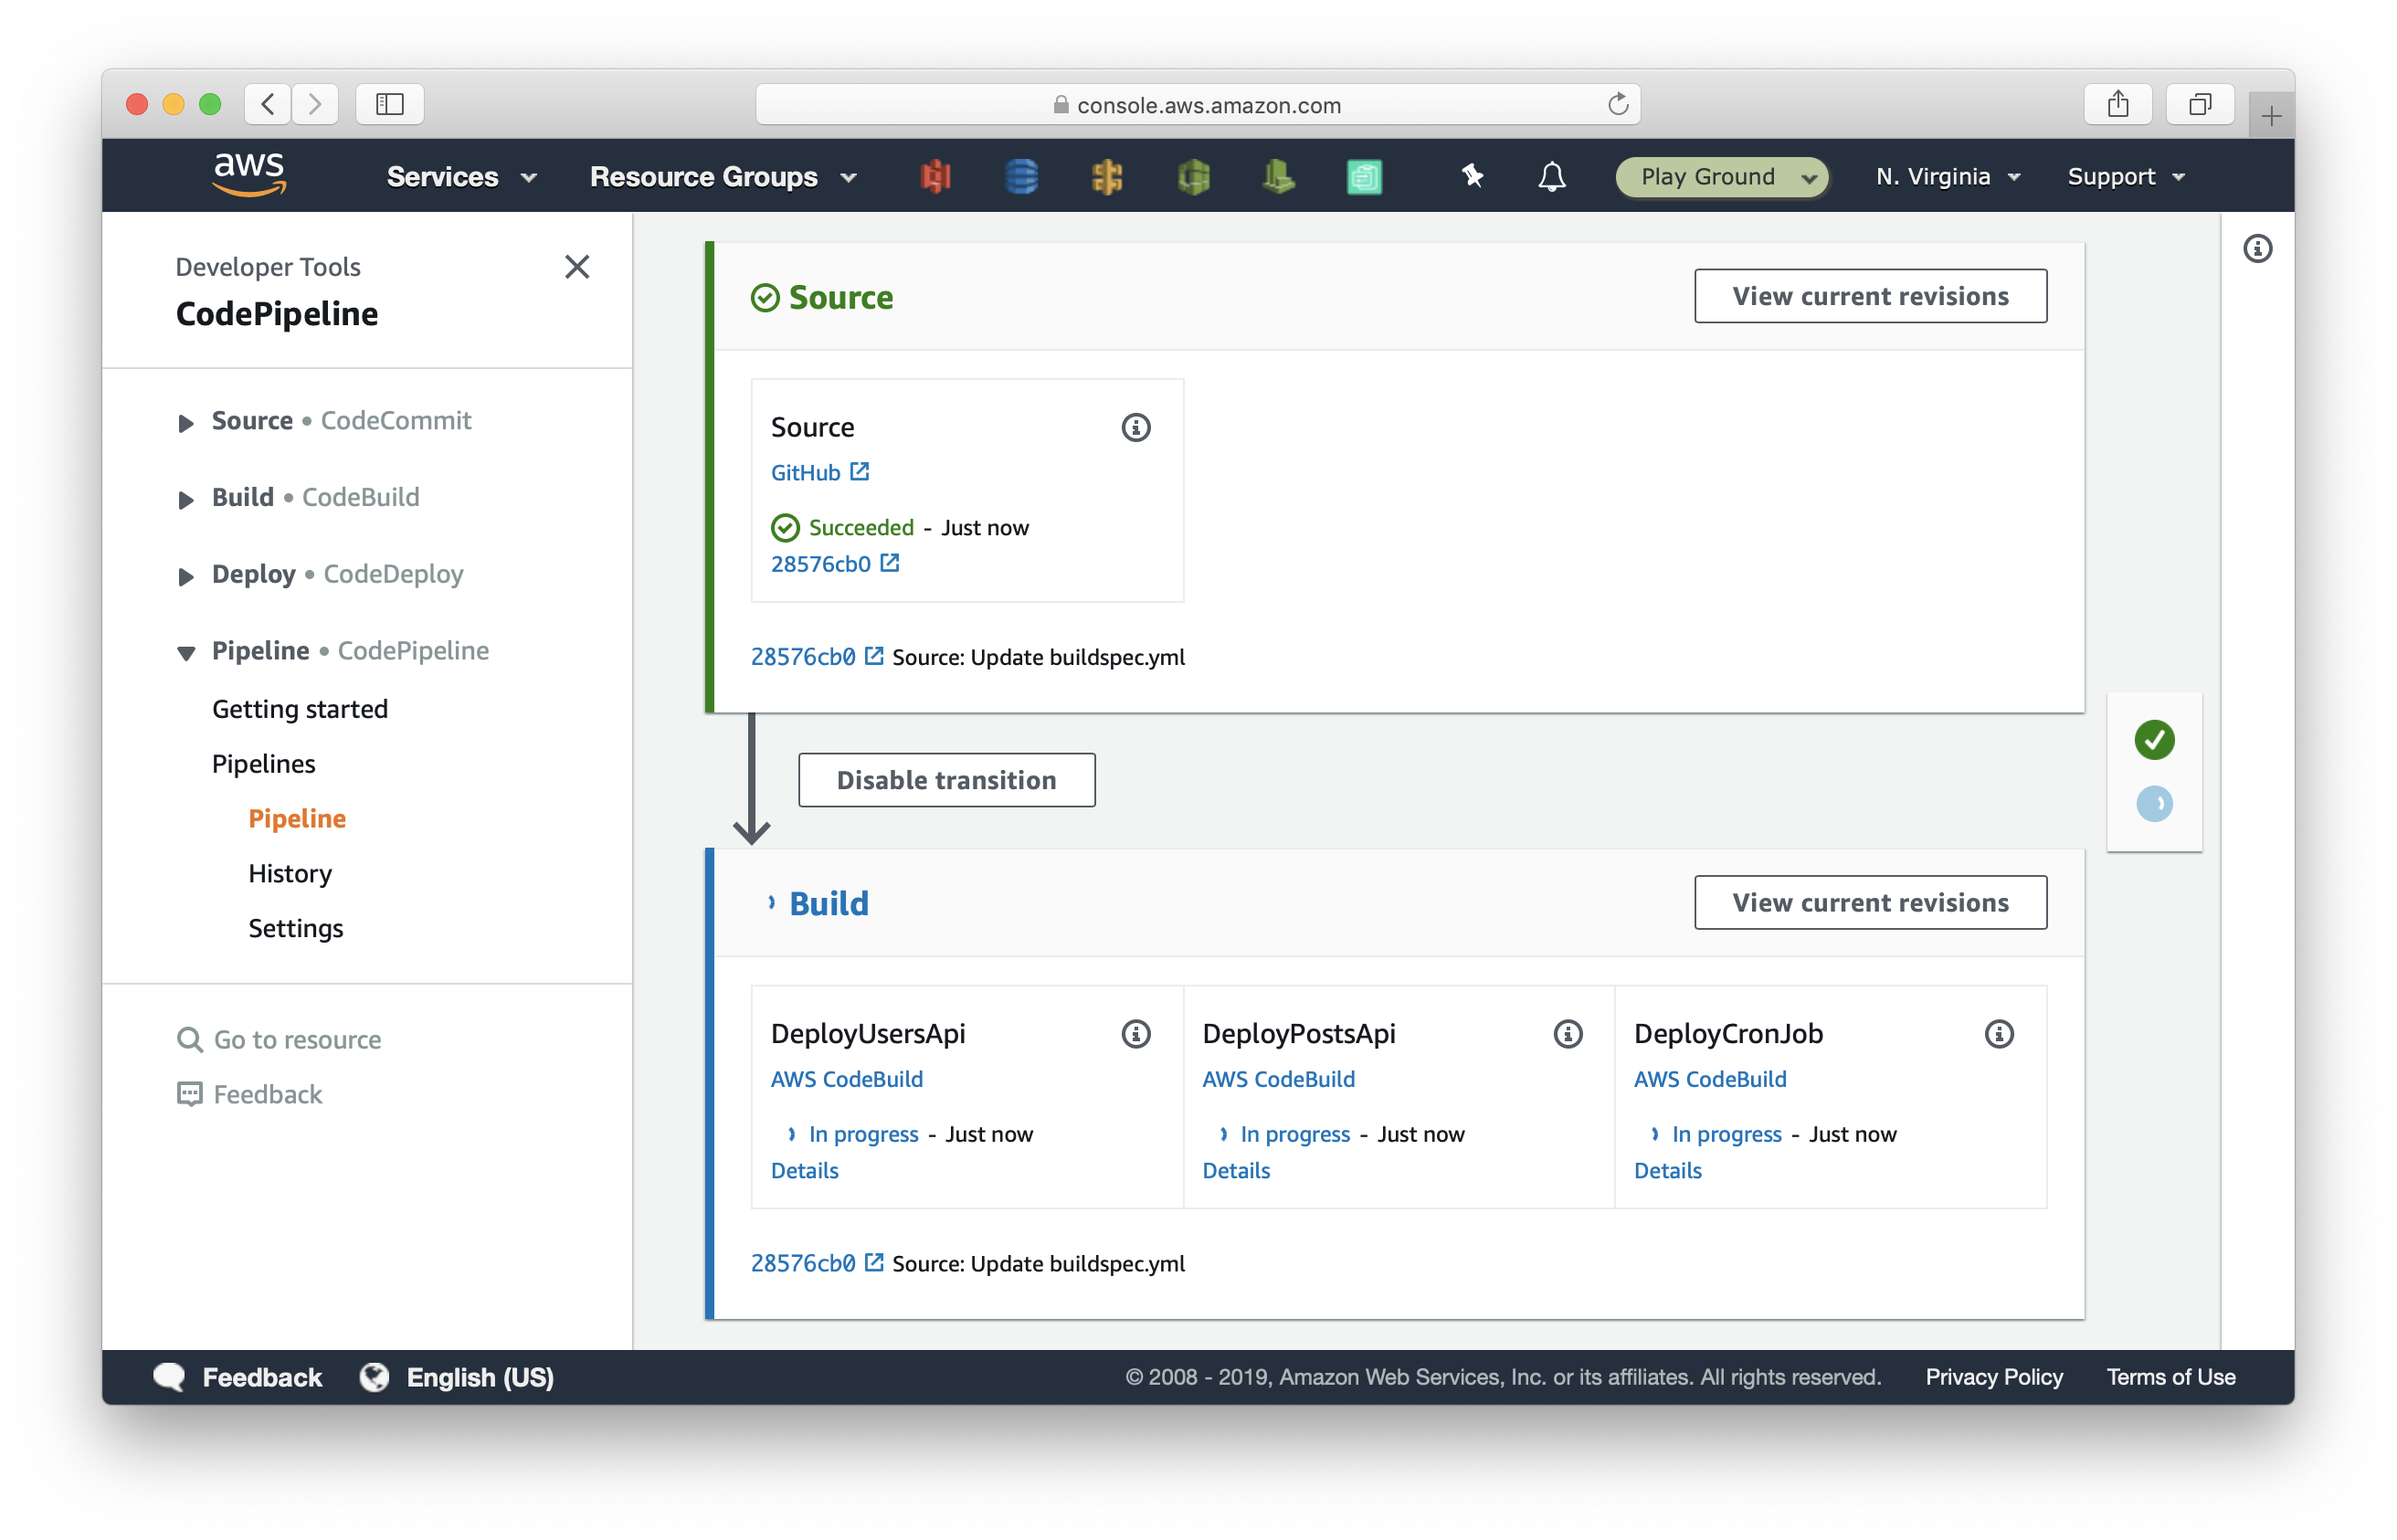
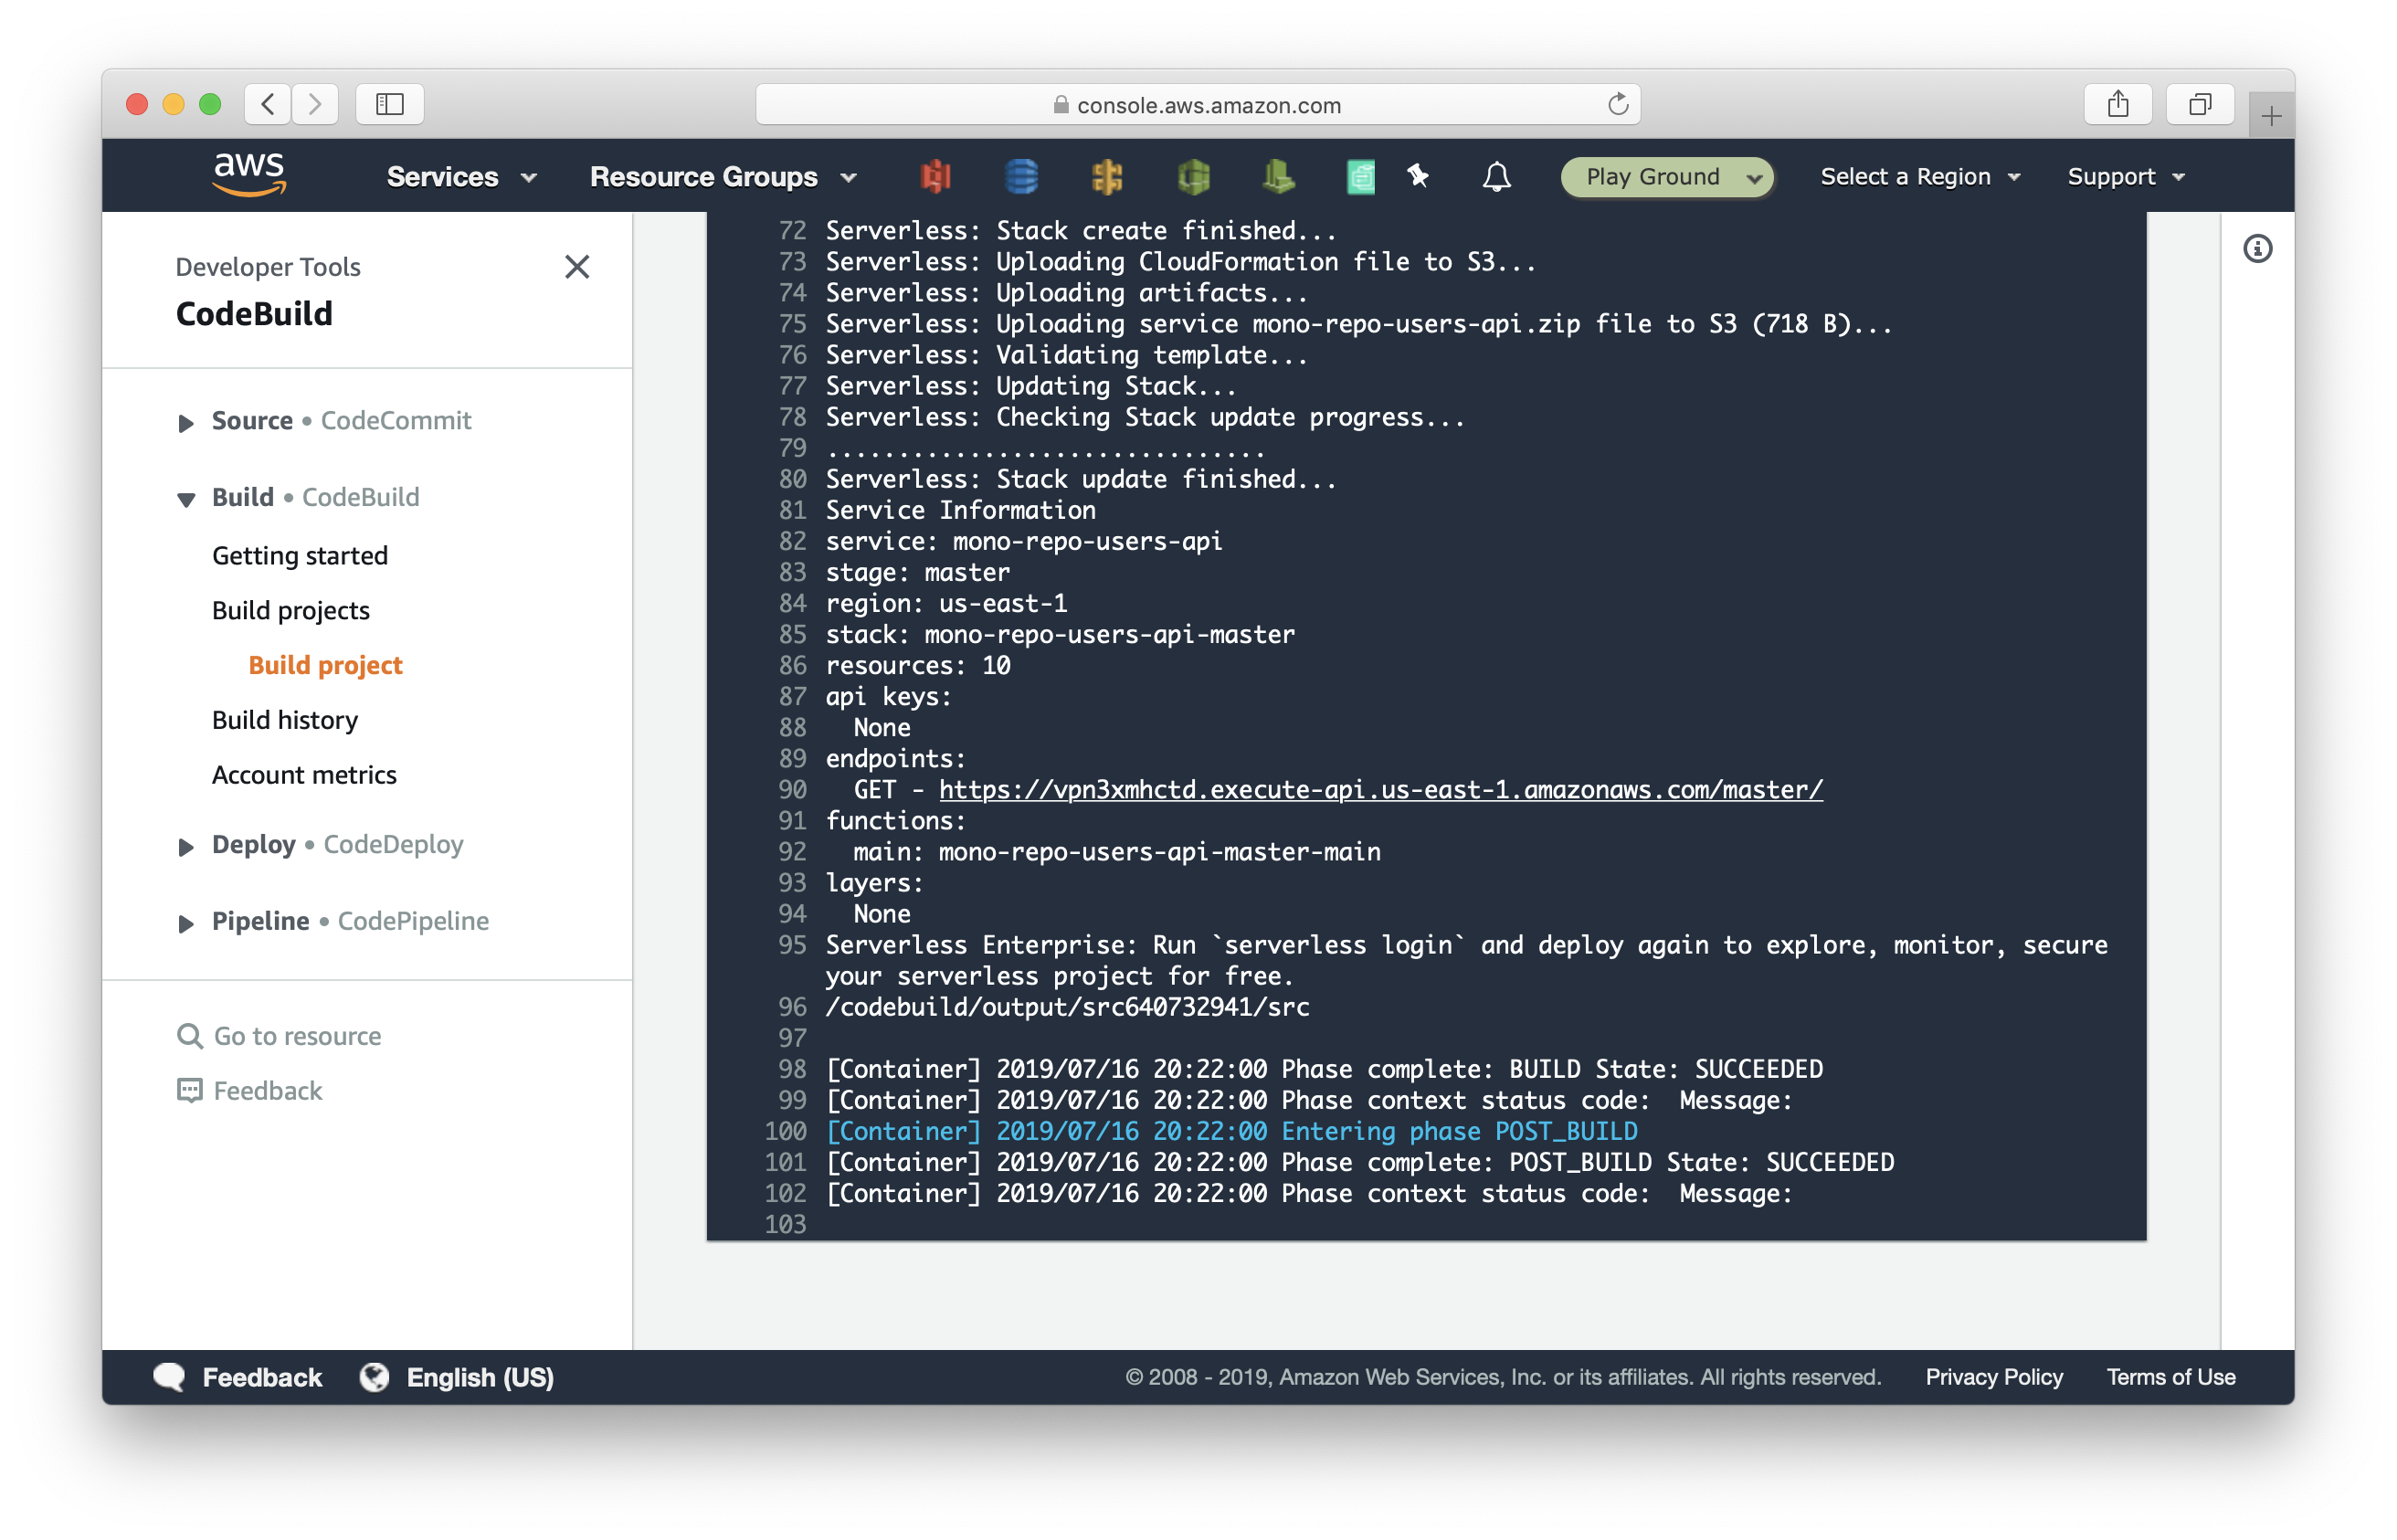
Click on Details for the DeployUsersApi action. You’ll see the output for each of the commands in our build spec. Scroll down, and you should see the output for the serverless deploy -s master command.
Now that we have the basics up and running, let’s look at how to deploy our app to multiple AWS accounts.
2. How to deploy to multiple AWS accounts
You might be curious as to why we would want to deploy to multiple AWS accounts. It’s a good practice to keep your development and production environments in separate accounts. By separating them completely, you can secure access to your production environment. This will reduce the likelihood of accidentally removing resources from it while developing. We have a detailed post on this here.
Assume that so far we’ve been operating in the Production account (say account id 111111111111); and you have another AWS account you use for Staging (account id 222222222222). We are going to configure our pipeline to auto-deploy to our Staging account when we git push to the staging branch.
First, let’s create an IAM role that grants the Production account permission to deploy to the Staging AWS account.
Go to the AWS IAM console in your Staging account, select Roles on the left menu and click Create role.
Select Another AWS Account at the top and enter the account id for the Production account. Then click Next: Permissions.
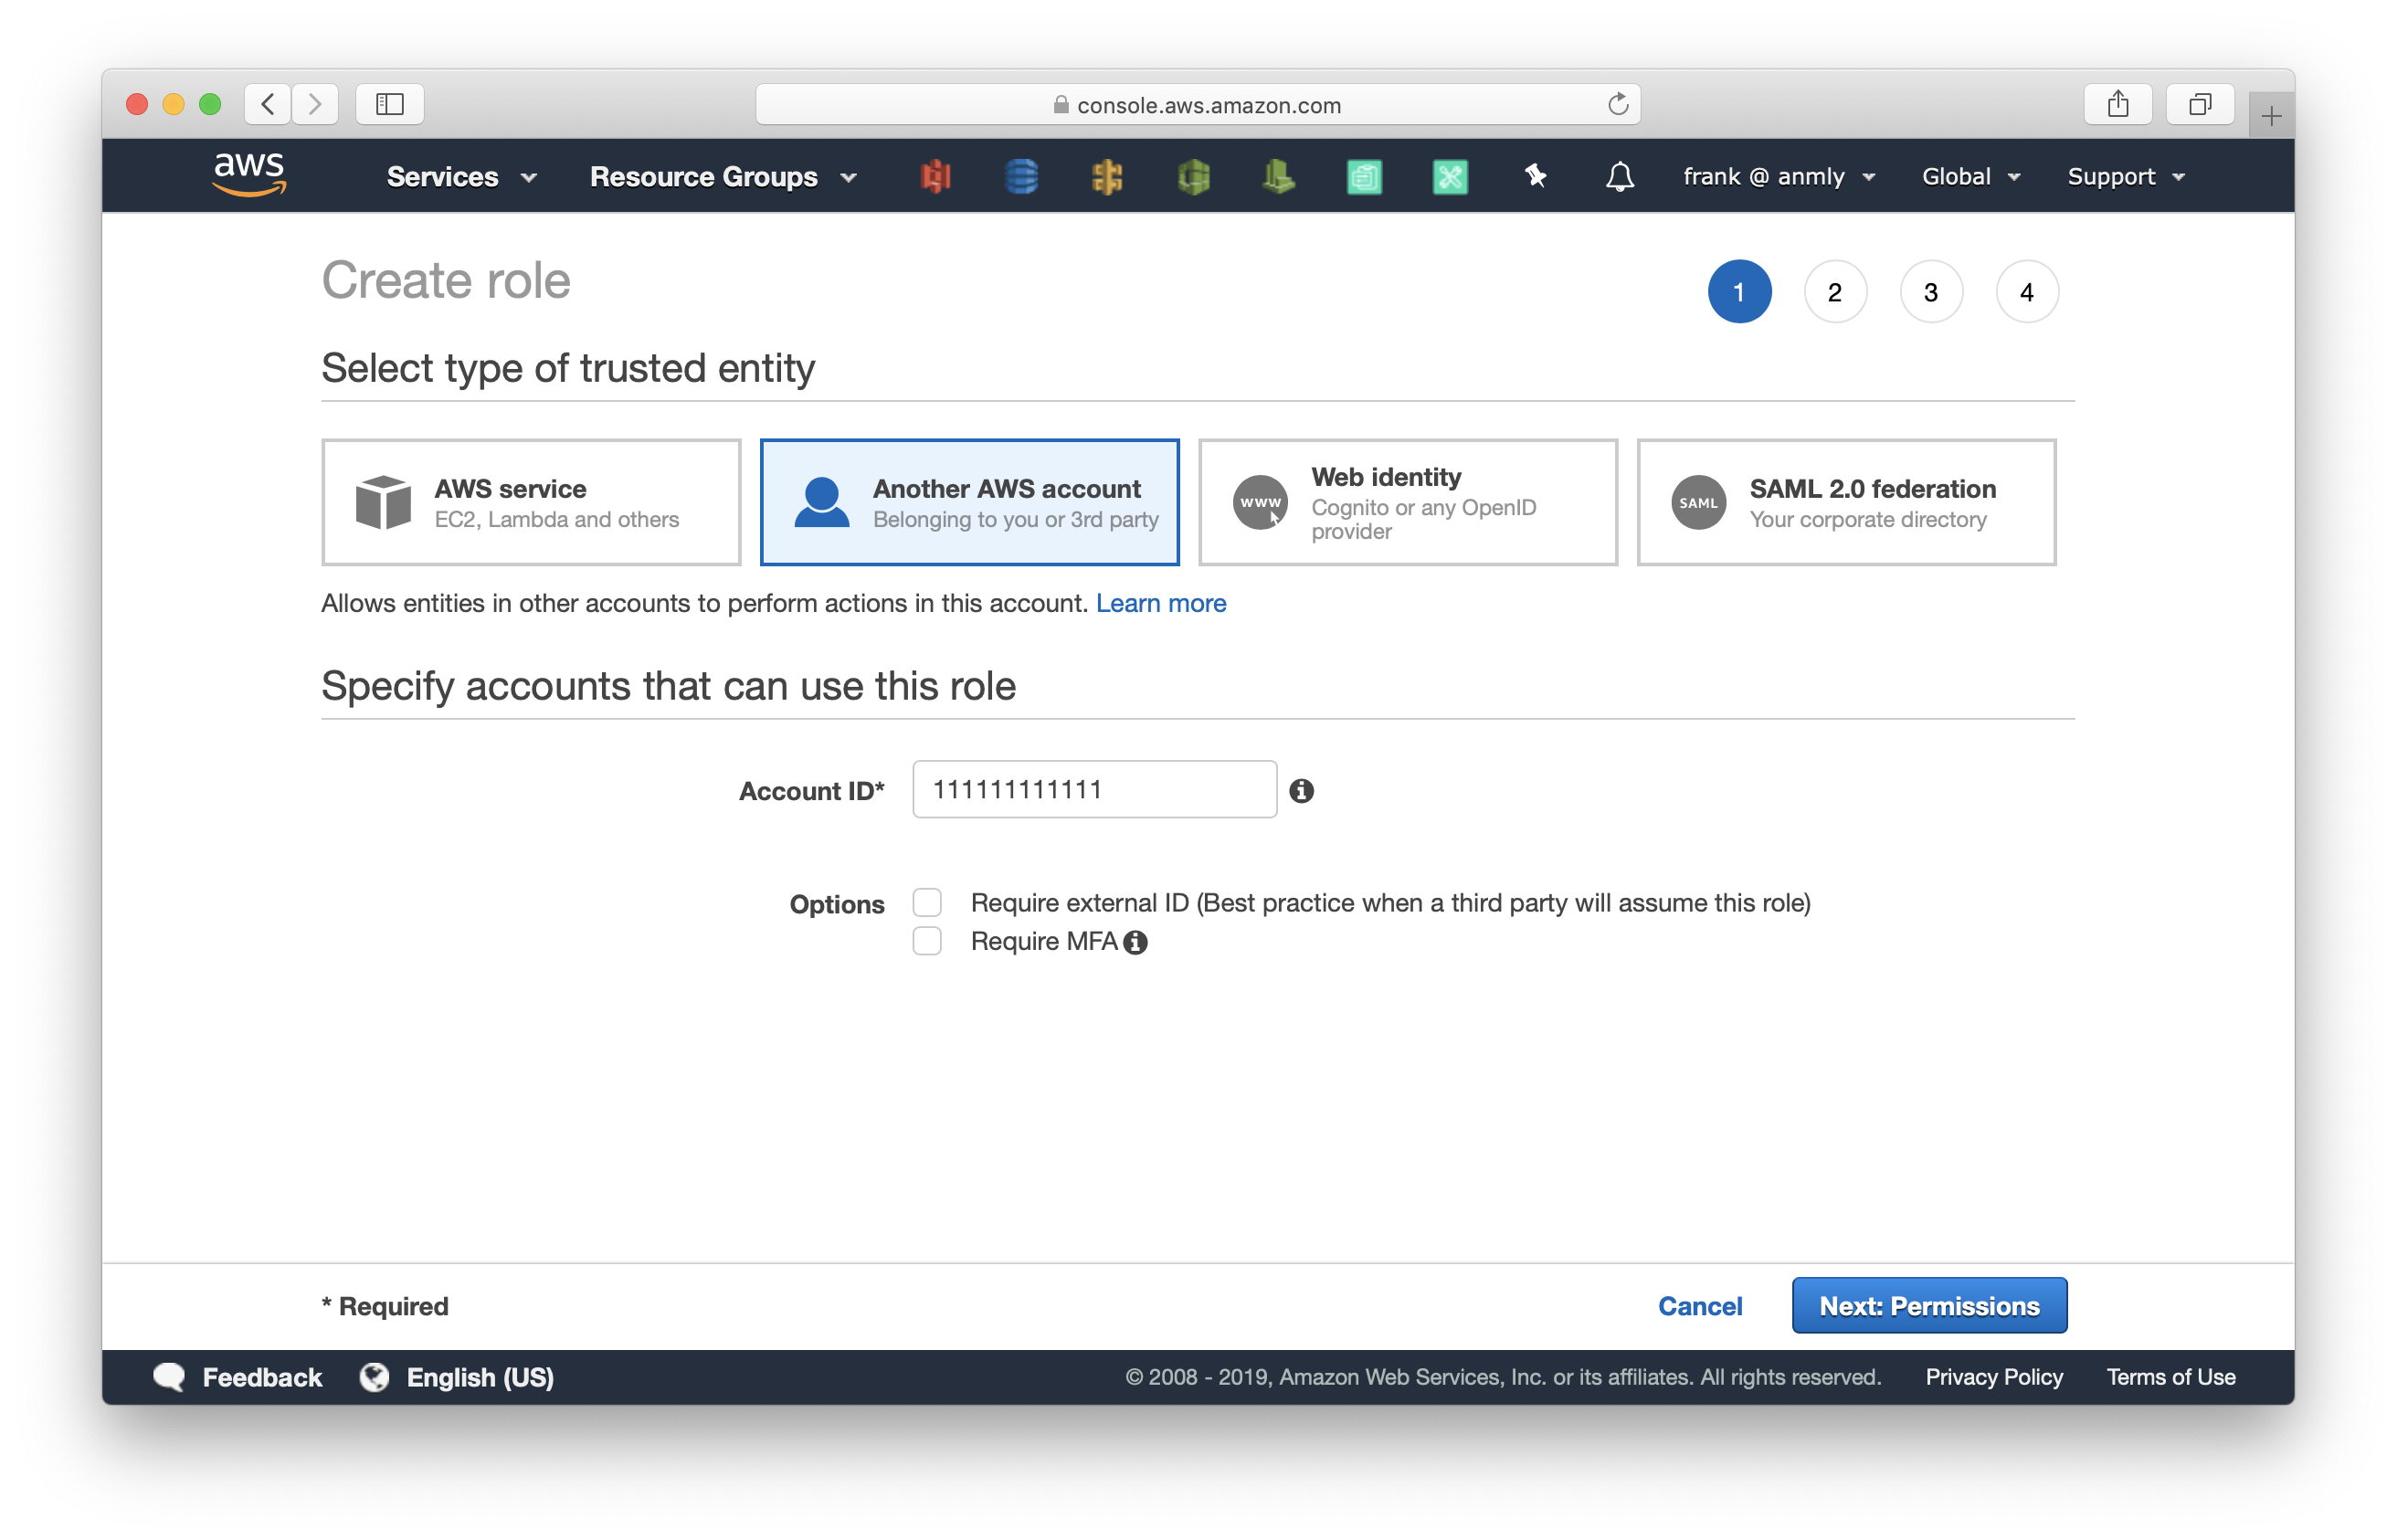
Select AdministratorAccess and click Next: Tags.
Click Next: Review > name the role CodeBuildRole > and click Create role.
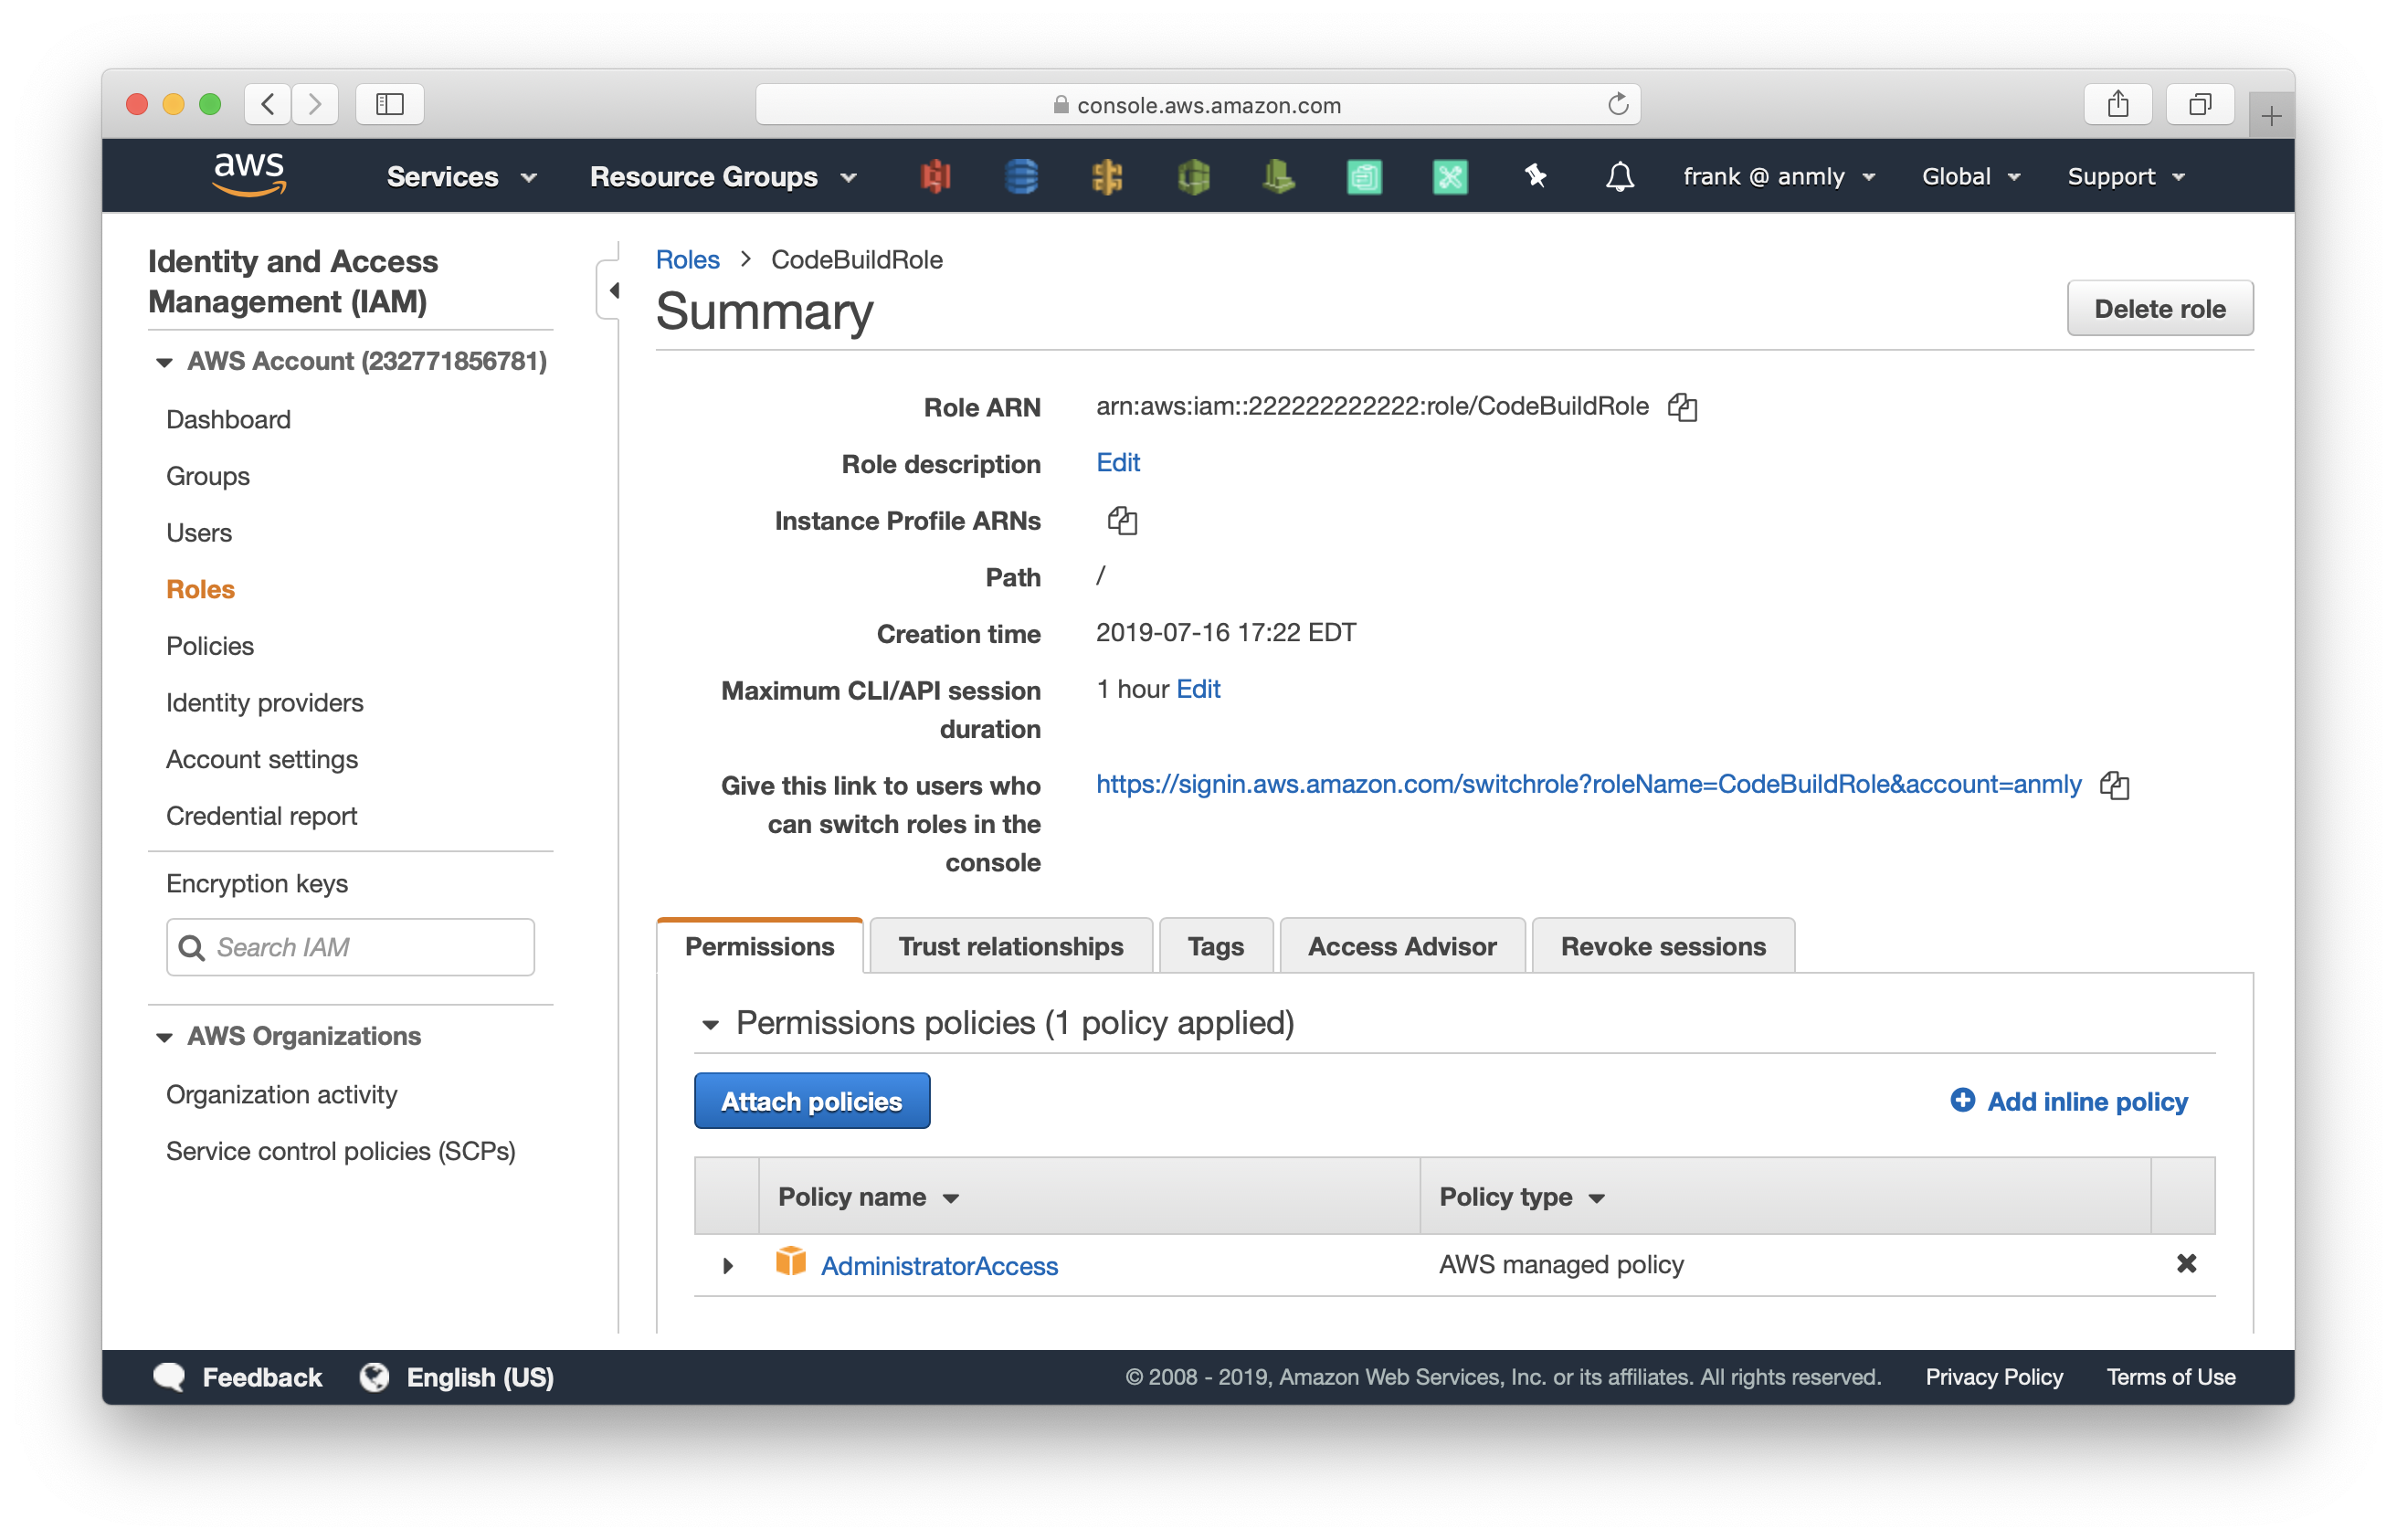
Select the role we just created, and take a note of the Role ARN arn:aws:iam::222222222222:role/CodeBuildRole. We’ll be using that next.
Go back to the Production AWS account. Go to the CodePipeline console and select Create pipeline. This time, we will create a staging pipeline. Click Next.
Select the same GitHub repository, but this time enter staging branch. Click Next. If you’ve not created a staging branch, quickly go to your Github repo and create one.
Select AWS CodeBuild and select the deploy-users-api CodeBuild project we created previously. Click Next.
Select Skip deploy stage and finally click Create pipeline.
Now, a pipeline is created and it will get triggered on git push to the staging branch. Again, the pipeline auto-deploys the latest commit in the staging branch upon the pipeline creation. Note that, both our CodePipeline projects are in our Production AWS account. Even though the staging one is deploying to our Staging account.
Next, let’s finish configuring the pipeline. Click Edit, and:
- Add DeployPostsApi action;
- Add DeployCronJob action; and
- Rename Build to DeployUsersApi action
Hit Save to apply the edit.
Go to your GitHub repo and open buildspec.yml in the staging branch. Replace it with the following:
version: 0.2

phases:
  install:
    runtime-versions:
      nodejs: 10
    commands:
      - npm install -g serverless
      - npm install
      - cd ${SERVICE_PATH} && npm install && cd -
  build:
    commands:
      - STAGE_NAME=${CODEBUILD_INITIATOR##*/}
      - |
        if [ "${STAGE_NAME}" = "staging" ]; then
          CRED=`aws sts assume-role --role-arn arn:aws:iam::222222222222:role/CodeBuildRole --role-session-name prod-access`
          echo $CRED
          AWS_ACCESS_KEY_ID=`node -pe 'JSON.parse(process.argv[1]).Credentials.AccessKeyId' "$CRED"`
          AWS_SECRET_ACCESS_KEY=`node -pe 'JSON.parse(process.argv[1]).Credentials.SecretAccessKey' "$CRED"`
          AWS_SESSION_TOKEN=`node -pe 'JSON.parse(process.argv[1]).Credentials.SessionToken' "$CRED"`
          AWS_EXPIRATION=`node -pe 'JSON.parse(process.argv[1]).Credentials.Expiration' "$CRED"`
        fi
        cd ${SERVICE_PATH} && serverless deploy -s ${STAGE_NAME} && cd -

cache:
  paths:
    - node_modules
    - ${SERVICE_PATH}/node_modules
This new build spec does a couple of things:
- A git push to the staging branch will trigger the staging pipeline. And CodeBuild will assume into the Staging AWS account and get a set of temporary AWS credentials. CodeBuild will then use these temporary credentials to deploy.
- A git push to the master branch will still be deployed to the Production account.
Commit and push this change. This will trigger CodePipeline and CodeBuild to build the staging branch. This time deploying to your Staging account.
And that’s it! Your pipeline now manages multiple environments. Let’s wrap things up next.
Next steps
It took us a few steps but we now have a fully-functional CI/CD pipeline for our monorepo Serverless app using CodePipeline and CodeBuild. The repo used in this guide is available here with the complete CodeBuild configs. You might note that we did not go over the PR workflow in this pipeline. This is because (as of writing this post) CodePipeline does not natively support PRs. You’ll need to create a Lambda function as a GitHub webhook to do this, something that is beyond the scope of this post.
Some helpful next steps would be to auto-create custom domains for your API endpoints, send out Slack or email notifications, generate CloudFormation change sets and add a manual confirmation step when pushing to production, etc. You also might want to design your workflow to accommodate for any dependencies your services might have. These are cases where the output from one service is used in another.
Finally, if you are not familiar with Seed, it’s worth noting that it’ll do all of the above for you out of the box (including the PR workflow)! And you don’t need to write up a build spec or do any scripting.
Do your Serverless deployments take too long? Incremental deploys in Seed can speed it up 100x!
Learn More