How to share an API domain between services in a monorepo Serverless app
In this post we’ll be looking at how to configure a custom domain so it can be shared across multiple services in a monorepo Serverless app.
As a refresher, a monorepo Serverless app is one where multiple Serverless services are in subdirectories with their own serverless.yml file. The directory structure of a sample monorepo app might look something like this:
/
  package.json
  services/
    users-api/
      serverless.yml
    billing-api/
      serverless.yml
    search-api/
      serverless.yml
What we are trying to do
- users-api service handles requests under the path
https://api.domain.com/users/... - billing-api service handles requests under the path
https://api.domain.com/billing/... - search-api service handles requests under the path
https://api.domain.com/search/...
There are two ways to do this:
- Each service creates its own API Gateway project and endpoint, and then we map the three endpoints to the /users, /billing, and /search base path respectively.
- We create a new root-api service that creates an API Gateway project and endpoint. And the other services reuse the same API Gateway project.
We will look at each approach in detail.
If you need a refresher on custom domains in Serverless; we have a couple of posts to help you out:
- How to buy a domain name on Amazon Route 53 for my Serverless API
- How to set up a custom domain name for API Gateway in your Serverless app
Method 1: Multiple API Gateway Projects
In this setup, each service creates its own API Gateway project. A service might be defined like the one below:
service: mono-repo-users-api

plugins:
  - serverless-domain-manager

custom:
  customDomain:
    domainName: api.seed-frank-playground.download
    basePath: users

provider:
  name: aws
  runtime: nodejs10.x
  region: us-east-1

functions:
  main:
    handler: handler.main
    events:
      - http:
          path: /
          method: get
          cors: true
For reference, here is the repo of a monorepo app with multiple API Gateway projects.
Configure domains
To configure a service, start by:
- Creating an SSL certificate for the domain.
- Validating the domain in Route53.
- And run
serverless create_domainin one of the service to configure the custom domain.
For reference, we have a post on how to do this.
Deploy all the services individually by running serverless deploy. Once they are done deploying, API Gateway will give you endpoints that might look like these:
- users-api:
https://r3f6c4wjl0.execute-api.us-east-1.amazonaws.com/dev/ - billing-api:
https://uufd2irj1e.execute-api.us-east-1.amazonaws.com/dev/ - search-api:
https://poaw3vyekj.execute-api.us-east-1.amazonaws.com/dev/
And each endpoint will be mapped to the custom domain with their basePath:
- users-api:
https://api.seed-frank-playground.download/users/ - billing-api:
https://api.seed-frank-playground.download/billing/ - search-api:
https://api.seed-frank-playground.download/search/
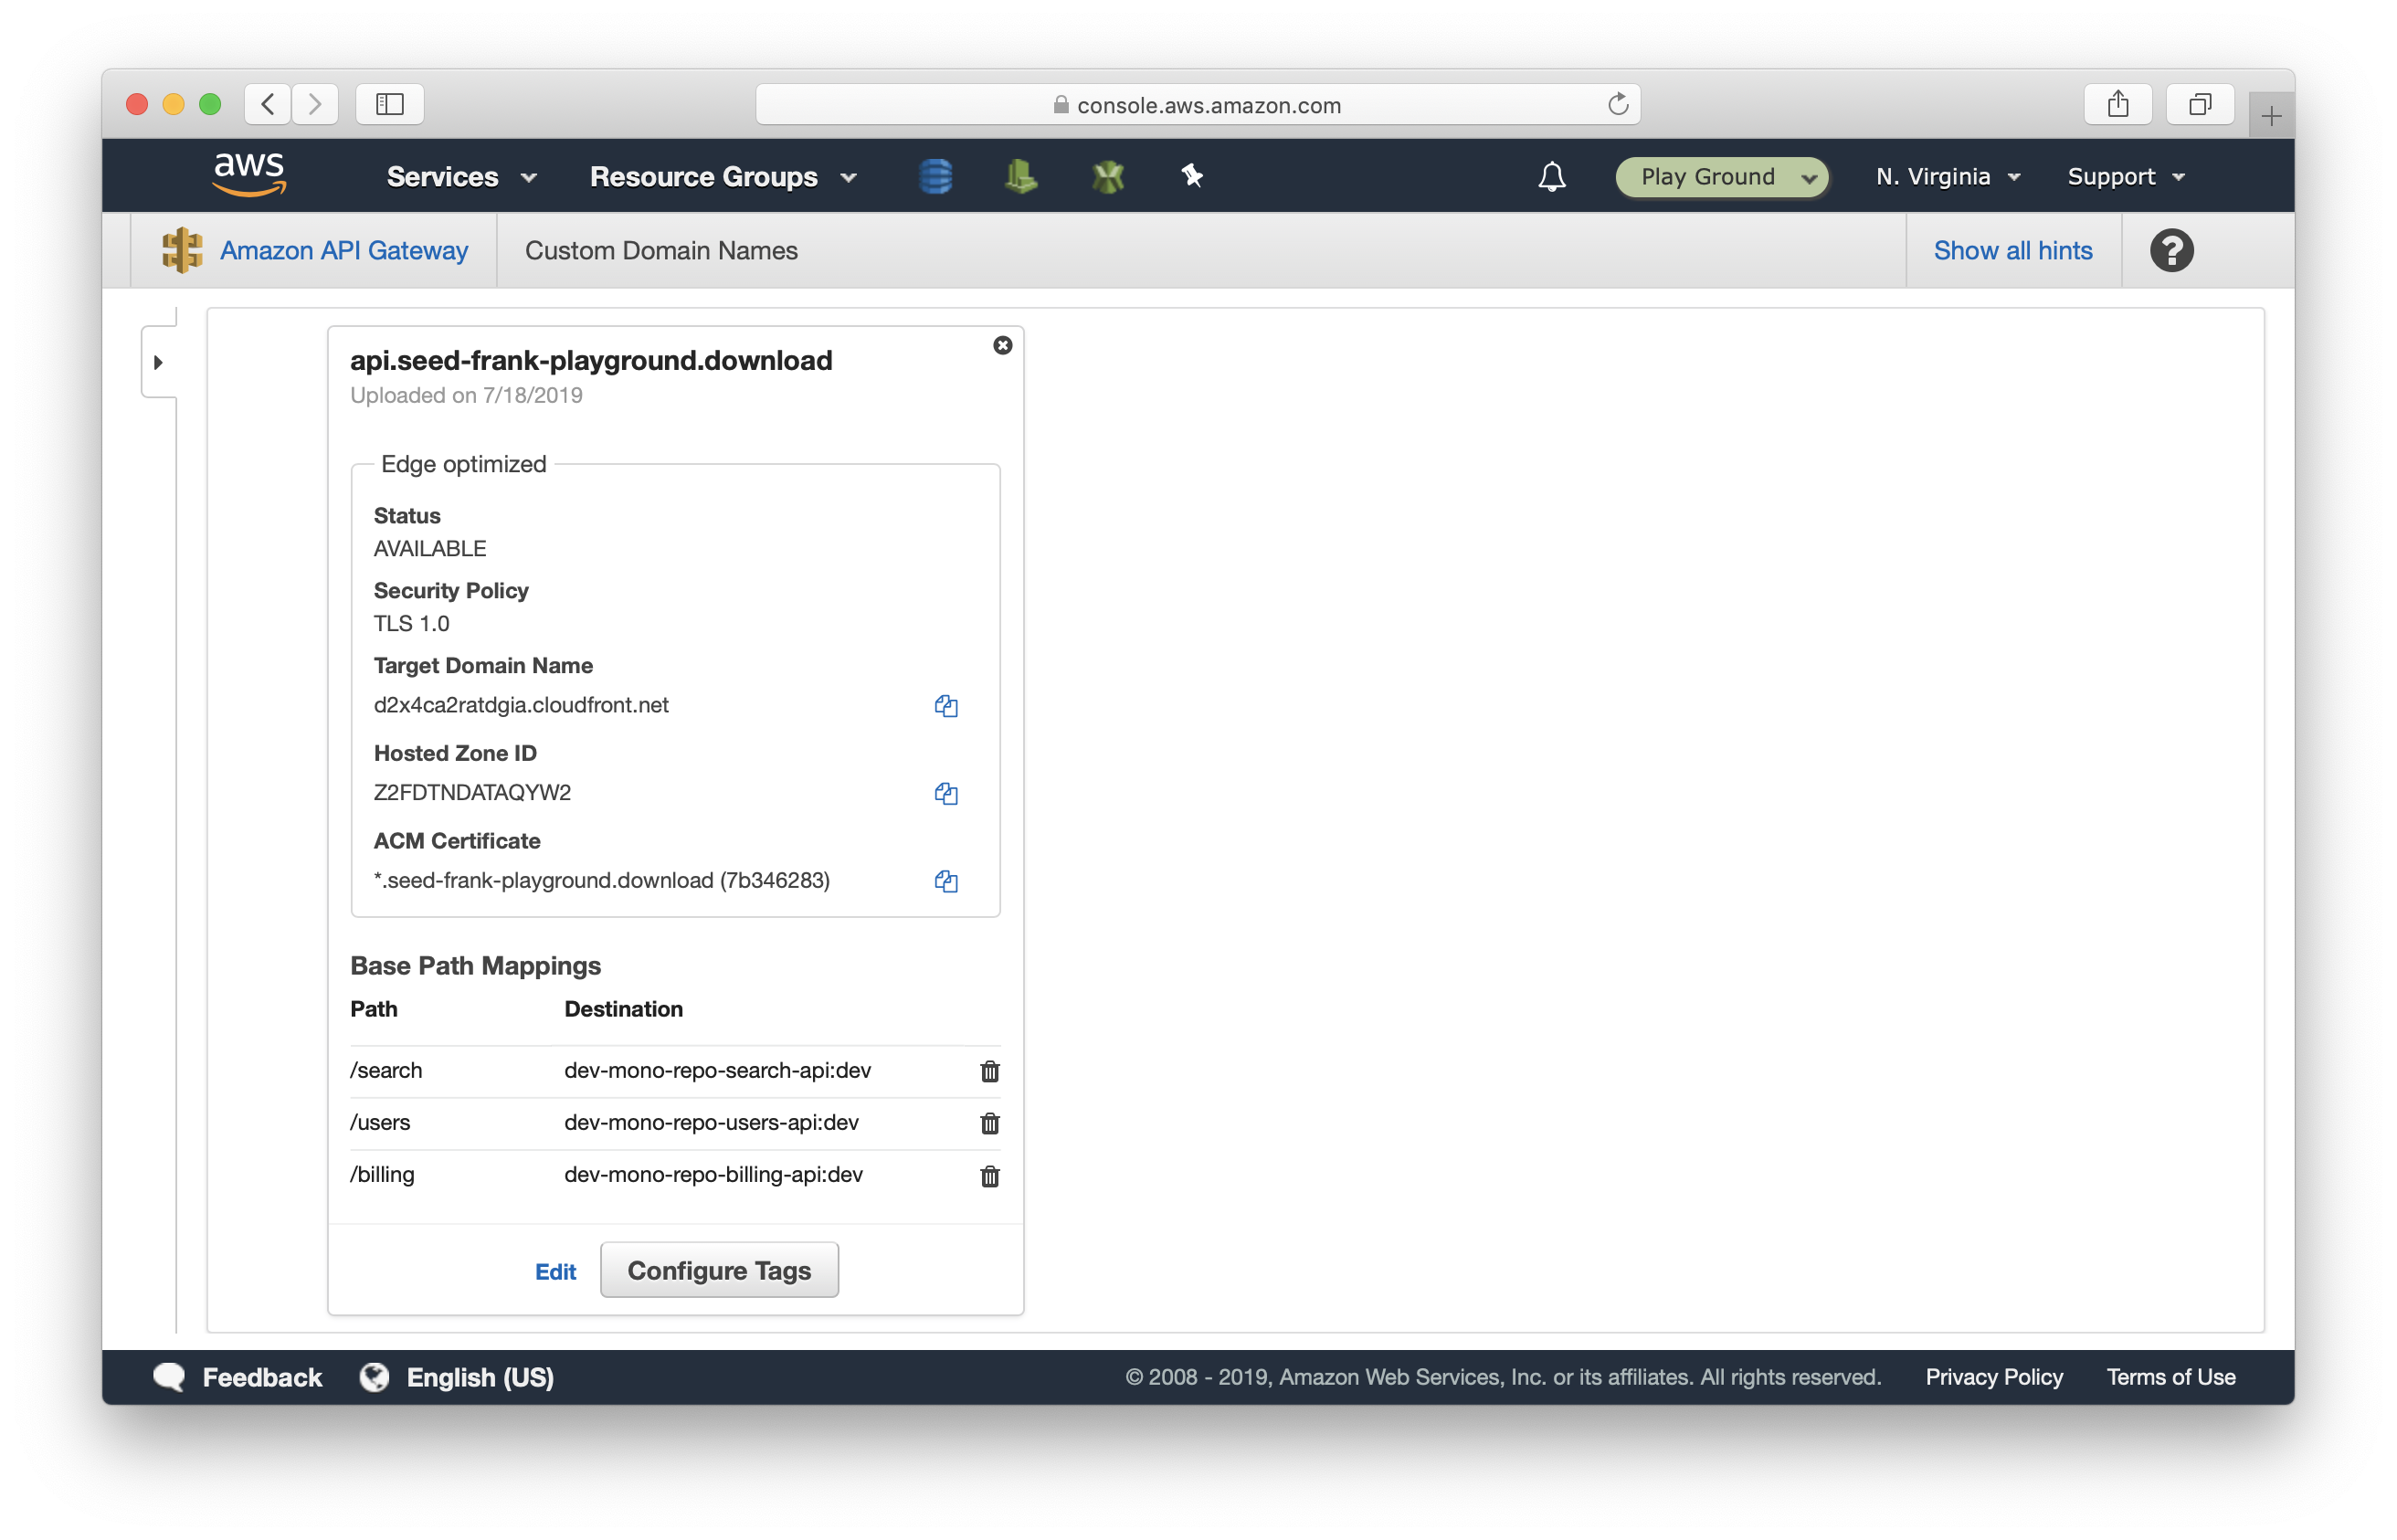
Here is what the custom domain setup looks like in your API Gateway console.
And just as expected, making a request to both of the URLs would return the same response.
$ curl https://r3f6c4wjl0.execute-api.us-east-1.amazonaws.com/dev/
Hello users!

$ curl https://api.seed-frank-playground.download/users/
Hello users!
Method 2: Single API Gateway Project
In this setup, we create a root-api service that has an API Gateway endpoint mapped to the custom domain’s root path. We also export the API Gateway resource. The other three services in turn will reference this resource.
For reference, here is a sample repo with this setup.
Our root API project might look something like this:
service: mono-repo-root-api

plugins:
  - serverless-domain-manager

custom:
  stage: ${opt:stage, self:provider.stage}
  customDomain:
    domainName: api.seed-frank-playground.download

provider:
  name: aws
  runtime: nodejs10.x
  region: us-east-1

functions:
  main:
    handler: handler.main
    events:
      - http:
          path: /
          method: get
          cors: true

resources:
  - Outputs:
      ApiGatewayRestApiId:
        Value:
          Ref: ApiGatewayRestApi
        Export:
          Name: ${self:custom.stage}-ApiGatewayRestApiId

      ApiGatewayRestApiRootResourceId:
        Value:
           Fn::GetAtt:
            - ApiGatewayRestApi
            - RootResourceId
        Export:
          Name: ${self:custom.stage}-ApiGatewayRestApiRootResourceId
Now, let’s look at how to configure the individual services.
Each service references the root-api service’s API Gateway project. Note that, we only need to set up the custom domain once in the root-api. So we won’t need to use the serverless-domain-manager plugin in these services.
Also note that, the path: option is now set to /users (and not the root /, as the previous approach).
service: mono-repo-users-api

custom:
  stage: ${opt:stage, self:provider.stage}

provider:
  name: aws
  runtime: nodejs10.x
  region: us-east-1
  apiGateway:
    restApiId:
      'Fn::ImportValue': ${self:custom.stage}-ApiGatewayRestApiId
    restApiRootResourceId:
      'Fn::ImportValue': ${self:custom.stage}-ApiGatewayRestApiRootResourceId

functions:
  main:
    handler: handler.main
    events:
      - http:
          path: /users
          method: get
          cors: true
Configure domains
Just as before we need to:
- Create an SSL certificate for the domain.
- Validate the domain in Route53.
For reference, we have a post on how to do this.
Next, go into the root-api folder and:
- Run
serverless create_domain, to configured the custom domain. - Run
serverless deploy.
For the three services, deploy them as well using the serverless deploy command.
After they are done deploying, you’ll notice that only the root-api has a set of endpoints:
- root-api:
https://rpxd6e2wc91.execute-api.us-east-1.amazonaws.com/dev/ - users-api:
https://rpxd6e2wc91.execute-api.us-east-1.amazonaws.com/dev/users/ - billing-api:
https://rpxd6e2wc91.execute-api.us-east-1.amazonaws.com/dev/billing/ - search-api:
https://rpxd6e2wc91.execute-api.us-east-1.amazonaws.com/dev/search/
Note how the root-api is of the / path, while the other three services have their respective base paths. This is different from our earlier approach.
Also, the root-api service is now mapped to the custom domain.
- root-api:
https://api.seed-frank-playground.download/ - users-api:
https://api.seed-frank-playground.download/users/ - billing-api:
https://api.seed-frank-playground.download/billing/ - search-api:
https://api.seed-frank-playground.download/search/
And making a request to the two different URLs will give you the same result.
$ curl https://rpxd6e2wc91.execute-api.us-east-1.amazonaws.com/dev/users/
Hello users!

$ curl https://api.seed-frank-playground.download/users/
Hello users!
Comparison
Both the above approaches don’t have any major advantages over the other. It does however matter from an architectural design perspective. The first approach dictates that all your services be completely standalone. Meaning that, you could move them out of your app. While in the second approach, all the services are tied to the root service.
Here is one way to decide between the setups. If you are splitting up your services because you’ve hit the 200 resource limit, it makes more sense to go with the second approach. While if you are deciding to have a complete microservices approach, you might want to go with the first one.
Do your Serverless deployments take too long? Incremental deploys in Seed can speed it up 100x!
Learn More